Assist3 Software
Select Probe
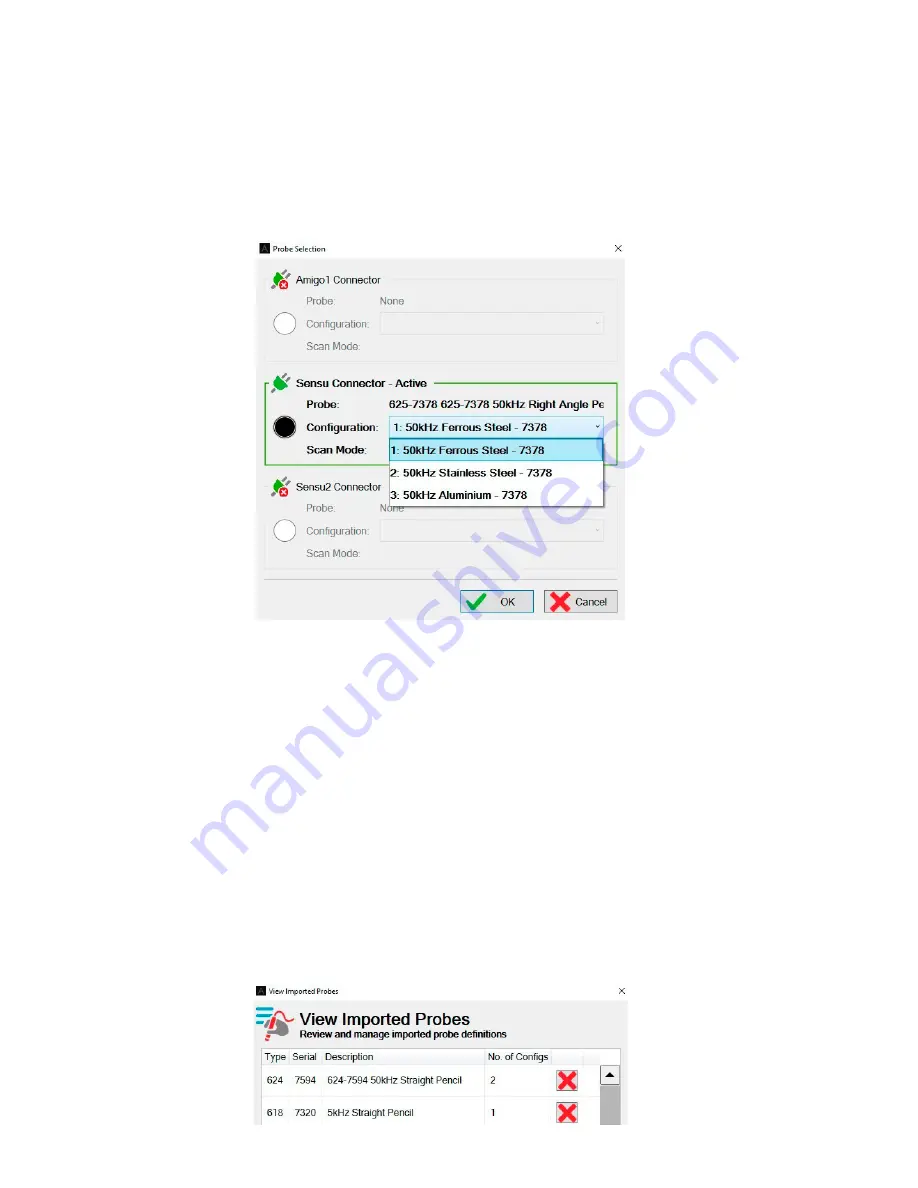
Up to three probes can be attached to the instrument at any one time. The selected Active
Probe and its selected active Configuration are shown here.
The
Select Probe
button allows you to choose which probe and configuration to use. This
function can also be accessed from the
Backstage/General
tab or the
Home Ribbon
, as
described on "Home ribbon", page 40.
Figure 4-3
Select probe
Probe selection
Some ACFM probes are calibrated for more than one material. If this is the case, the material
Configuration
can be selected from the list. The
Scan Mode
can be set to clock or encoder (if
you have an encoder fitted). In clock mode it takes several readings a second, regardless of
whether the probe is moving. In encoder mode it only gathers data when the probe is moving,
then displays the data against distance travelled. Before scanning can start, a connector and
probe must be selected as
Active.
Import Probe
is used to import probe configurations for legacy probes when used with a PC
U41 does not support legacy probes and this option is not used on the U41 system. When using
ASSIST Pro with an U41 instrument, which does support legacy probes, this will copy Amigo1
probe configuration files (.qpc) found on the root of a USB mass storage device to the ASSIST
probe library. This only needs to be done the first time an Amigo1 probe is used on the instrument,
or if a configuration file is changed. In this case the current configuration file will be overwritten.
View Imported
displays all the imported configuration files and allows you to delete any that
are no longer required. For example, if you were installing a new version of the file. Probe files
can be deleted by selecting the relevant item in the list and press the red cross.
Figure 4-4
View imported probes
Summary of Contents for TSC U41
Page 1: ...Getting Started with TSC U41 Modernizing Subsea ACFM User s Manual ...
Page 7: ...General Precautions and Conventions ...
Page 13: ...Chapter 1 System Overview ...
Page 27: ...Chapter 2 The Subsea Bottle ...
Page 33: ...Chapter 3 The Topside Unit ...
Page 40: ...Chapter 4 Assist3 Software ...
Page 67: ...Assist3 Software 55 Figure 4 37 Finishing the installation ...
Page 69: ...Chapter 5 Troubleshooting ...
Page 71: ...Troubleshooting 59 ...


