background image

2

Portable Lamp

S

HL 200-Ex

EN
EN
EN
EN
EN
EN
EN
EN
EN
EN
EN
EN
EN
EN
EN
EN
EN
EN
EN
EN
EN
EN
EN
EN
EN

Contents

1

General Information  ............................................................................................

25

1.

1

Conformity with standards and regulations .........................................................

25

2

Explanation of the symbols .................................................................................

25

2.1 Symbols in these operating instructions  .............................................................

25

2.2 Warning notes .....................................................................................................

26

2.3 Symbols on the device or in the circuit diagrams ................................................

26

3

Safety notes ........................................................................................................

27

3.1 Operating instructions storage ............................................................................

27

3.2 Safe use ..............................................................................................................

27

3.3 Intended Use .......................................................................................................

27

3.4 Modifications and alterations  ..............................................................................

27

4

Function and device design  ................................................................................

27

4.1 Function  ..............................................................................................................

28

4.2 Device design  .....................................................................................................

28

5

Technical data .....................................................................................................

29

6

Transport and storage .........................................................................................

30

6.1 General  ...............................................................................................................

30

6.2 Batteries ..............................................................................................................

30

7

Mounting and installation  ....................................................................................

31

7.1 Dimensions / fastening dimensions  ....................................................................

31

7.2 Mounting / dismounting, operating position  ................................................

..

......

32

8

Commissioning  ..........................................................................................

..

.......

34

9

Operation  ..................................................................................................

..

........

34

9.1 Normal Operation ......................................................................................

..

........

35

9.2 Emergency light operation  ........................................................................

..

........

36

9.3 Charging Operation .....................................................................................

..

......

37

9.4 Battery capacity test ..................................................................................

..

........

38

9.5 Indications .................................................................................................

..

........

39

9.6 Troubleshooting  ........................................................................................

..

........

40

10

Maintenance and repair  .............................................................................

..

.......

41

10.1 Maintenance  ...............................................................................................

..

......

41

10.2 Repair  ........................................................................................................

..

.......

43

10.3 Returning the device ...................................................................................

..

......

43

11

Disposal  .......................................................................................................

..

.....

43

12

Accessories and Spare parts  ......................................................................

..

.....

44

13

EC Declaration of Conformity  ......................................................................

..

.....

45

Summary of Contents for SHL 200-Ex

Page 1: ...Zone 1 21 BEDIENUNGSANLEITUNG OPERATING INSTRUCTIONS SHL 200 Ex ...

Page 2: ...ng 5 3 4 Umbauten und Änderungen 5 4 Funktion und Geräteaufbau 6 4 1 Funktion 6 4 2 Geräteaufbau 6 5 Technische Daten 7 6 Transport und Lagerung 9 6 1 Allgemeines 9 6 2 Batterien 9 7 Montage und Installation 9 7 1 Maßangaben Befestigungsmaße 9 7 2 Montage Demontage Gebrauchslage 10 8 Inbetriebnahme 13 9 Betrieb 13 9 1 Normalbetrieb 13 9 2 Notlichtbetrieb 14 9 3 Ladebetrieb 15 9 4 Test der Batterie...

Page 3: ...e Angaben 1 1 Konformität zu Normen und Bestimmungen Siehe Zertifikate und EG Konformitätserklärung www ecom ex com 2 Erläuterung der Symbole 2 1 Symbole in der Betriebsanleitung Symbol Bedeutung Tipps und Empfehlungen zum Gebrauch des Geräts Gefahr allgemein Gefahr durch explosionsfähige Atmosphäre Gefahr durch spannungsführende Teile ...

Page 4: ...länen rot grün grün grün grün Beschreibung rote LED blinkt 2 grüne LED blinkt rote LED an 2 grüne LED an GEFAHR Gefahren für Personen Nichtbeachtung der Anweisung führt zu schweren oder tödlichen Verletzungen bei Personen WARNUNG Gefahren für Personen Nichtbeachtung der Anweisung kann zu schweren oder tödlichen Verletzungen bei Personen führen VORSICHT Gefahren für Personen Nichtbeachtung der Anwe...

Page 5: ... achtung dieser Betriebsanleitung entstehen besteht keine Haftung Vor Installation und Inbetriebnahme sicherstellen dass das Gerät unbeschädigt ist Arbeiten am Gerät Installation Instandhaltung Wartung Störungsbeseitigung nur von dazu befugtem und entsprechend geschultem Personal durchführen lassen 3 3 Bestimmungsgemäße Verwendung Der Handscheinwerfer SHL 200 Ex ist ein Betriebsmittel für ortsverä...

Page 6: ...ie Notlichtfunktion ist de und aktivierbar Laden der Batterie mit Hilfe des Ladesessels Test der Batteriekapazität 4 2 Geräteaufbau WARNUNG Gefahr durch zweckentfremdete Verwendung Explosionsschutz gefährdet Gerät ausschließlich entsprechend den in dieser Betriebsanleitung festgelegten Betriebsbedingungen verwenden Gerät in explosionsgefährdeten Bereichen nur gemäß dieser Betriebsanleitung betreib...

Page 7: ... Lichttechnische Daten Lampenbestückung Hauptlicht LED 3 W Nebenlicht LED 0 5 W Lichtstärke 24 000 cd Lichtfarbe 6500 K Lichtverteilung gem DIN 14642 Funktion Dauerlicht oder Blinklicht des Hauptlichts Dauerlicht des Nebenlichts Funktion des Hauptlichts stufenlos dimmbar Brenndauer Tiefentladung Bei Restkapazität der Batterie 10 erfolgt automatisches Umschalten von Haupt auf Nebenlicht Testfunktio...

Page 8: ...adestrom Ladezeit ca 11 h Funktion Ladebeginn beim Einsetzen des Handscheinwerfers in den Ladesessel mit Spannungsanzeige über grüne LED Abschaltfunktion Bei Kfz Betrieb wird die Spannung der Autobatterie überwacht Sinkt die Spannung der Autobatterie unter 11 7 V bzw 23 5 V bei 12 V bzw 24 V Batterie wird der Ladevorgang des Handscheinwerfers automatisch unterbrochen Die Abschaltfunktion kann deak...

Page 9: ...lüssigkeiten lagern Kühl und trocken lagern 7 Montage und Installation 7 1 Maßangaben Befestigungsmaße GEFAHR Gefahr durch falsche Installation des Geräts Explosionsschutz gefährdet Installation strikt nach Anleitung und unter Berücksichtigung der nationalen Sicherheits und Unfallverhütungsvorschriften durchführen damit der Explosionsschutz erhalten bleibt Das Gerät nur durch geschultes Fachperson...

Page 10: ...en Bereich Explosionsschutz gefährdet Ladesessel nur im sicheren Bereich verwenden Der Montageort muss eben und tragfähig sein Die Schrauben für die Montage des Wandhalters sind nicht im Lieferumfang enthalten 14770E00 Maßzeichnungen alle Maße in mm Änderungen vorbehalten 135 39 55 4 7 6 2 1 1 3 1 64 0 9 ø 4 50 1 2 3 4 1 Schrauben Ladesessel Torx 20 im Lieferumfang Wandhalter enthalten 2 Ladesesse...

Page 11: ...adesessel schieben Den Adapter mit den Schrauben befestigen Anzugsdrehmoment 0 5 Nm 14771E00 Den Wandhalter waagerecht ausrichten Mit 4 Schrauben am Montageort befestigen Den Ladesessel von oben auf den Wandhalter schieben Den Ladesessel mit den mitgelieferten Schrauben befestigen Anzugsdrehmoment 1 5 Nm 14772E00 14943E00 39 55 Ø4 50 1 Schrauben zur Befestigung des Ladesessels nicht im Lieferumfan...

Page 12: ...dapter mit den Schrauben befestigen Anzugsdrehmoment 0 5 Nm 7 2 3 Montage Gürtelhaken Den Gürtelhaken von oben in die Führung schieben Mit der Schraube befestigen Anzugsdrehmoment 0 5 Nm 14944E00 14773E00 1 2 3 1 Adapter 2 Schrauben Adapter Torx 10 im Lieferumfang enthalten 3 Fremdgeräteladesessel KFZ90 1 Schraube Gürtelhaken Torx 10 im Lieferumfang enthalten 2 Gürtelhaken 1 2 ...

Page 13: ...ei Verwendung im explosionsgefährdeten Bereich Explosionsschutz gefährdet Ladesessel nur im sicheren Bereich verwenden Den Handscheinwerfer vor dem ersten Benutzen in den angeschlossenen Ladesessel setzen WARNUNG Gerät vor der Inbetriebnahme überprüfen Explosionsschutz gefährdet Vor der Inbetriebnahme Prüfungsvorschriften in den national gültigen Bestimmungen beachten damit der Explosionsschutz er...

Page 14: ...stufe an 9 2 Notlichtbetrieb Ladesessel An die Versorgungsspannung anschließen Die LED Power leuchtet Den Handscheinwerfer einsetzen Handscheinwerfer Eventuell eingeschaltete LED wird abgeschaltet Ein Funktionstest wird durchgeführt Die LED Anzeige informiert 5 Sekunden über die Batteriekapazität WARNUNG Gefahr durch stroboskopischen Effekt Schwere Verletzungen möglich Den Dimm Modus nicht verwend...

Page 15: ...e Fehler Bei Entnahme aus dem Ladesessel und eingeschalteter Notlichtfunktion Die LED Hauptlicht wird eingeschaltet Bei Entnahme aus dem Ladesessel und ausgeschalteter Notlichtfunktion Die Funktion vor dem Einsetzen wird aktiviert Bei Auslieferung ist die Funktion Notlichtbetrieb eingeschaltet Bei ausgeschalteter Funktion und Netzausfall werden folgende Zustände am Handscheinwerfer aktiviert rot g...

Page 16: ...heinander ein und wieder aus Testablauf Die Batterie wird 12 Stunden geladen Danach wird die LED Hauptlicht eingeschaltet Die Batterie wird bis auf 10 der Kapazität entladen Die Entladezeit wird gemessen und bewertet Bei Auslieferung ist die Funktion Abschalten Ladebetrieb bei Unterspannung aktiviert Der Ladebetrieb im KFZ wird bei Unterspannung unterbrochen Die Funktion kann deaktiviert und aktiv...

Page 17: ...pazität nach Ladung kleiner als 100 LED Hauptlicht defekt Taste wurde während des Tests gedrückt Ergebnis Batterietest Batteriekapazität 40 Batteriekapazität 60 Batteriekapazität 80 Batteriekapazität 80 rot grün grün grün grün Beschreibung rote LED blinkt 2 grüne LED blinkt rote LED an 2 grüne LED an rot grün grün grün grün Beschreibung Batteriekapazität 10 Batteriekapazität 20 Batteriekapazität 4...

Page 18: ...gs Ausgangsbeschaltung rot grün grün grün grün Beschreibung Batteriekapazität 20 Batteriekapazität 42 Batteriekapazität 65 Batteriekapazität 88 Batteriekapazität 98 Batteriekapazität 98 rot grün grün grün grün Beschreibung Notlichtfunktion aus Notlichtfunktion ein rot grün grün grün grün Beschreibung Ladeabschaltung aus Ladeabschaltung ein rot grün grün grün grün Beschreibung Abruch Batterietest U...

Page 19: ...dhaltung und Wartung Art und Umfang der Prüfungen den entsprechenden nationalen Vorschriften entnehmen Prüfungsintervalle an Betriebsbedingungen anpassen rot grün grün grün grün Beschreibung Spannung Eingang LED zu hoch Spannung Eingang LED zu klein WARNUNG Gefahr bei Verwendung im explosionsgefährdeten Bereich Explosionsschutz gefährdet Handscheinwerfer nur im sicheren Bereich öffnen WARNUNG Unbe...

Page 20: ...schrauben Anzugsdrehmoment 0 5 Nm Prüfen Maßnahmen der zulässigen Umgebungstemperatur Bei Über oder Unterschreiten der zulässigen Umgebungstemperatur ist das Gerät außer Betrieb zu nehmen der Gehäusekomponenten auf Rissbildung oder Beschädigungen Austauschbare Gehäusekomponenten tauschen Bei nicht austauschbaren Gehäusekomponenten ist das Gerät außer Betrieb zu nehmen der bestimmungsgemäße Verwend...

Page 21: ...rnden kratzenden sowie aggressive Reinigungsmittel oder Lösungsmittel verwenden 10 2 Reparatur 10 3 Rücksendung Für die Rücksendung im Reparatur Servicefall das Formular Serviceschein verwen den Auf der Internetseite www ecom ex com im Menü Service Reparatur Serviceschein herunterladen und ausfüllen Gerät zusammen mit dem Serviceschein wieder in der Originalverpackung an die ecom instruments GmbH ...

Page 22: ...fährdet Batterien getrennt sammeln kontrolliert der Entsorgung zuführen nicht im Hausmüll entsorgen an öffentliche Sammelstellen oder an den Lieferanten zurückgeben HINWEIS Nur Original Zubehör und Original Ersatzteile des Herstellers verwenden Zubehör und Ersatzteile Benennung Abbildung Beschreibung Art Nr Gewicht kg Batteriepack 14808E00 Blei Vlies Akku 6 V 4 5 Ah A0002144 0 720 weitere siehe Da...

Page 23: ...23 Handscheinwerfer SHL 200 Ex ...

Page 24: ...ns and alterations 27 4 Function and device design 27 4 1 Function 28 4 2 Device design 28 5 Technical data 29 6 Transport and storage 30 6 1 General 30 6 2 Batteries 30 7 Mounting and installation 31 7 1 Dimensions fastening dimensions 31 7 2 Mounting dismounting operating position 32 8 Commissioning 34 9 Operation 34 9 1 Normal Operation 35 9 2 Emergency light operation 36 9 3 Charging Operation...

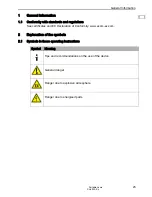
Page 25: ... with standards and regulations See certificates and EC Declaration of Conformity www ecom ex com 2 Explanation of the symbols 2 1 Symbols in these operating instructions Symbol Meaning Tips and recommendations on the use of the device General danger Danger due to explosive atmosphere Danger due to energised parts ...

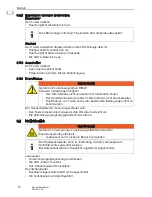
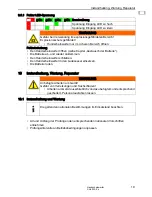
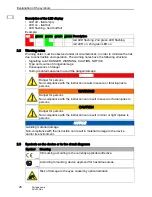
Page 26: ...n the circuit diagrams red green green green green Description red LED flashing 2nd green LED flashing red LED on 2nd green LED on DANGER Danger for persons Non compliance with the instruction results in severe or fatal injuries to persons WARNING Danger for persons Non compliance with the instruction can result in severe or fatal injuries to persons CAUTION Danger for persons Non compliance with ...

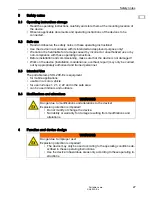
Page 27: ...the device is not damaged Work on the device installation maintenance overhaul repair may only be carried out by appropriately authorized and trained personnel 3 3 Intended Use The portable lamp SHL 200 Ex is equipment for mobile applications usable in a motor vehicle for use in Zones 1 21 2 22 and in the safe area can be used indoors and outdoors 3 4 Modifications and alterations 4 Function and d...

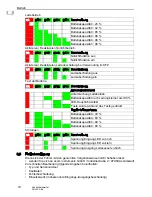
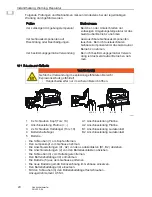
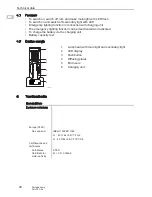
Page 28: ...y lighting function can be deactivated and activated To charge the battery via the charging unit Battery capacity test 4 2 Device design 5 Technical data 14769E00 Technical Data Explosion protection Europe ATEX Gas and dust IBExU 12ATEX 1066 II 2 G Ex ib IIC T4 Gb II 2 D Ex tb IIIC T75 C Db Certifications and certificates Certificates ATEX Certificate for motor vehicles E1 10 R 036569 1 2 3 4 5 6 ...

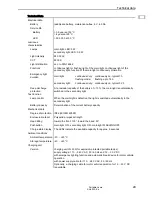
Page 29: ...ched automatically to the secondary light Battery capacity Determination of the current battery capacity Mechanical data Degree of protection IP66 IEC EN 60529 Enclosure material Polyamide impact strength Head tilting toward the front 100 toward the back 90 Pushbutton main light ON secondary light ON main light FLASHING OFF Charge state display The LEDs indicate the available capacity for approx 5...

Page 30: ...In motor vehicle operation the car battery voltage is monitored If the voltage of the car battery drops below 11 7 V and 23 5 V with a 12 V and 24 V battery respectively the charging process of the portable lamp will be interrupted automatically The automatic break device can be deactivated Protection class II with protective insulation Enclosure material polyamide impact resistant black Mounting ...

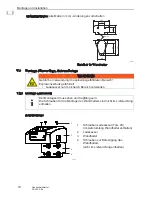
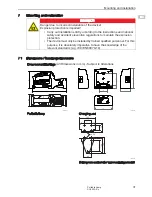
Page 31: ...g to the instructions and national safety and accident prevention regulations to maintain the explosion protection The device must only be installed by trained qualified personnel For this purpose it is absolutely imperative to have the knowledge of the relevant standards e g IEC EN 60079 14 Dimensional Drawings All Dimensions in mm Subject to Alterations 14754E00 14753E00 Portable lamp Charging u...

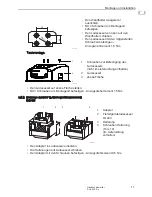
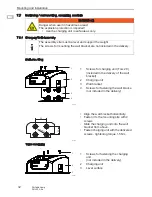
Page 32: ...screws for mounting the wall bracket are not included in the delivery 14770E00 14771E00 Align the wall bracket horizontally Fasten it to the mounting site with 4 screws Slide the charging unit onto the wall bracket from above Fasten charging unit with the delivered screws tightening torque 1 5 Nm 14772E00 1 2 3 4 1 Screws for charging unit Torx 20 included in the delivery of the wall bracket 2 Cha...

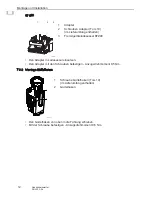
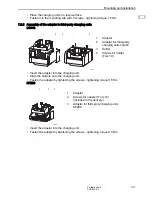
Page 33: ...3 Insert the adapter into the charging unit Slide the holders onto the charging unit Fasten the adapter by tightening the screws tightening torque 0 5 Nm KFZ90 Insert the adapter into the charging unit Fasten the adapter by tightening the screws tightening torque 0 5 Nm 14943E00 14944E00 2 1 3 4 1 Adapter 2 Adapter for third party charging units LG443 3 Holder 4 Screws for holder Torx 10 1 2 3 1 A...

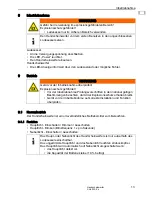
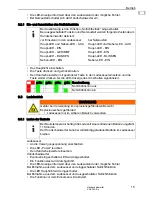
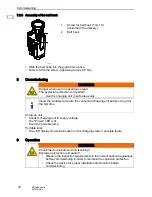
Page 34: ... state or possible faults 9 Operation 14773E00 WARNING Danger when used in hazardous areas The explosion protection is impaired Use the charging unit in safe areas only Insert the portable lamp into the connected charging unit before using it for the first time WARNING Check the device before commissioning Explosion protection is impaired Observe the inspection requirements in the current national...

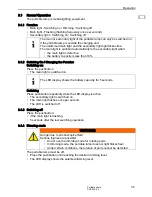
Page 35: ...the main light is flashing 5 seconds after the last switching operation 9 1 4 Dimming mode The portable lamp must be off Press the pushbutton until reaching the desired dimming level The LED display shows the selected dimming level The main or secondary light of the portable lamp can only be switched on if the portable lamp is outside the charging unit The undimmed main light and the secondary lig...

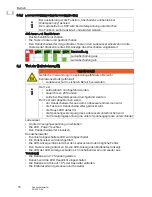
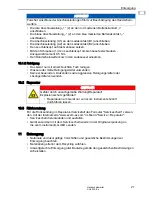
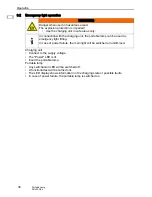
Page 36: ... be switched off A functional test will be carried out The LED display shows information on the charging state or possible faults In case of power failure the portable lamp is switched on WARNING Danger when used in hazardous areas The explosion protection is impaired Use the charging unit in safe areas only In connection with the charging unit the portable lamp can be used as emergency light fitt...

Page 37: ...ht will be switched on Upon removal from the charging unit and with the emergency lighting function switched off The function before insertion will be activated Upon delivery the Emergency light mode function is on With the function switched off and in case of power failure the following states will be activated at the portable lamp red green green green green Description Emergency lighting functi...

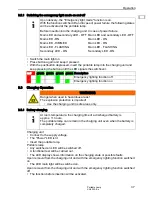
Page 38: ...ntil the LED display shows the battery test The LEDs of the LED display are switched on and off one after the other Upon delivery the function Switch off charging operation in the event of undervoltage is active In case of undervoltage the charging operation in the motor vehicle will be interrupted The function can be deactivated and activated red green green green green Description Charging switc...

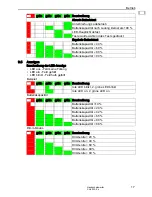
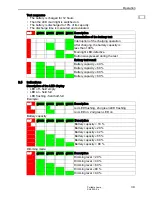
Page 39: ...ption Cancellation of the battery test Interruption of the charging operation After charging the battery capacity is less than 100 Main light LED defective Button was pressed during the test Battery test result Battery capacity 40 Battery capacity 60 Battery capacity 80 Battery capacity 80 red green green green green Description red LED flashing 2nd green LED flashing red LED on 2nd green LED on r...

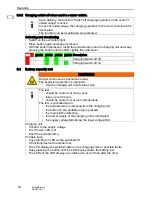
Page 40: ...ry capacity 65 Battery capacity 88 Battery capacity 98 Battery capacity 98 red green green green green Description Emergency lighting function off Emergency lighting function on red green green green green Description Charging switch off off Charging switch off on red green green green green Description Cancellation of the battery test Interruption of the charging operation After charging the batt...

Page 41: ... unit Charge battery 10 Maintenance and repair 10 1 Maintenance Consult the relevant national regulations to determine the type and extent of inspections Adapt inspection intervals to the operating conditions red green green green green Description LED input voltage too high LED input voltage too low WARNING Danger when used in hazardous areas The explosion protection is impaired Open the portable...

Page 42: ...he screws 3 tightening torque 0 5 Nm Check Measures the permissible ambient temperature If exceeding the permissible ambient temperature or falling below the device must be taken out of operation the enclosure components for formation of cracks and damage Replace the exchangeable enclosure components If the enclosure components are non exchangeable the device must be taken out of operation its int...

Page 43: ... when repair service is required On the internet site www ecom ex com under Downloads Customer service Download the service form and fill it out Send the device along with the service form in the original packaging to ecom instruments GmbH 11 Disposal Observe national and local regulations and statutory regulation regarding disposal Separate materials when sending it for recycling Ensure environme...

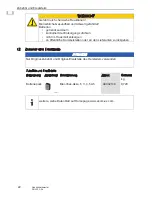
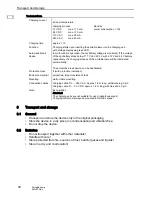
Page 44: ... EN EN EN 12 Accessories and Spare parts NOTICE Use only original accessories and spare parts by the manufacturer Accessories and Spare Parts Designation Figure Description Art no Weight kg Battery 14808E00 lead fleece battery maintenance free 6 V 4 5 Ah A0002144 0 720 For others see data sheet on homepage www ecom ex com ...

Page 45: ...es Name Anschrift des Herstellers Name address of the manufacturer Nom et adresse du fabricant ecom instruments GmbH Industriestraße 2 97959 Assamstadt Germany Beschreibung der Geräte Description of the devices Description des appareils Handscheinwerfer Portable lamp Lamp torche Typ Type SHL 200 Ex Ex Kennzeichnung Ex designation Marquage Ex II 2 G Ex ib IIC T4 Gb II 2 D Ex tb IIIC T75 C Db EG Bau...

Page 46: ...014 34 UE ATEX Physikalisch Technische Bundesanstalt Bundesallee 100 38116 Braunschweig Germany Kenn Nummer Identification number Numéro d identification 0102 Angewandte harmonisierte Standards Applied harmonized standards Standards harmonisés appliqués EN 60079 0 2012 A11 2013 EN 60079 11 2012 EN 60079 31 2014 EN 50581 2012 EN 55015 2013 EN 60598 1 2008 A11 2009 EN 61000 3 2 2014 EN 61000 3 3 201...

Page 47: ......

Page 48: ...iesem Dokument vorzunehmen oder das Dokument zu rückzuziehen Copyright 2015 ecom instruments GmbH The contents of this document either in part or in their entirety may not be reproduced forwarded distributed or saved in any way without ecom instruments GmbH prior written consent The contents of this document are presented as they currently exist ecom instruments GmbH does not provide any express o...

Reviews: