41
Z-Wave network and general functionality
Routing table
:
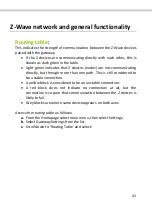
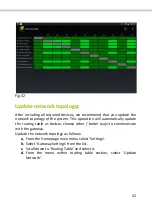
This indicates the strength of communication between the Z-Wave devices
paired with the gateway.
If the 2 devices are communicating directly with each other, this is
shown as dark green in the table.
Light green indicates that 2 devices (nodes) are not communicating
directly, but through more than one path. This is still considered to
be a stable connection.
A yellow block is considered to be an unstable connection.
A red block does not indicate no connection at all, but the
connection is so poor that communication between the 2 devices is
likely to fail.
Grey blocks are where same device appears
on both axes.
Access the routing table as follows:
a.
From the Homepage select main menu, then select Settings.
b.
Select Gateway Settings from the list.
c.
Scroll down to ‘Routing Table’ and select:
Summary of Contents for MyVirtuoso Home
Page 1: ...User manual...
Page 21: ...21 Fig 9 c Select Set Eco Comfort level Fig 10 d Un check Use default...
Page 24: ...24 Fig 13 c Select Manual mode and confirm with OK Fig 14...
Page 36: ...36 Fig 25 f Select the Household Consumption Fig 26...
Page 40: ...40 Fig 30 NOTE Other time periods can selected see figure Fig 31...
Page 45: ...45 Fig 35 b Press on and then select the desired category of devices Fig 36...
Page 47: ...47 Fig 38 Fig 39 NOTE When the consumption in the home is greater than the...
Page 59: ...59 Fig 56 j Select and Then from the rule drop down menu Fig 57...
Page 65: ...65 Fig 63 b Select and then When from rule drop down menu Fig 64...
Page 67: ...67 Fig 66 e Check the digital heads then OK Fig 67...
Page 69: ...69 Fig 69 d Select and then If from rule drop down menu Fig 70...
Page 71: ...71 Fig 72 g Select and Then from rule drop down menu Fig 73...
Page 72: ...72 h Check Heating Boiler Actuator then OK Fig 74 i Put Heating button into on position Fig 75...
Page 75: ...75 Fig 79 f Select Head state and status for each head Fig 80...
Page 81: ...81 Fig 87 d Select and then When from rule drop down menu Fig 88...
Page 92: ...92 Fig 102 g Check boxes for device s to activate in this case the hall light then OK Fig 103...
Page 99: ...99 Fig 107 c Press and select When Fig 108...
Page 101: ...101 Fig 110 g Set the status of the motion sensor Fig 111...
Page 103: ...103 Fig 113 k Press and select Rule Options l Uncheck Activate opposite condition...
Page 106: ...106 Fig 116 d Set the required time e Press and select IF...
Page 107: ...107 Fig 117 f Select the sensor and confirm with OK Fig 118...
Page 108: ...108 g Press on temperature Fig 119 h Set the desired temperature and confirm with OK...
Page 109: ...109 Fig 120 i Press and select Then j Select Notify and confirm with OK...
Page 111: ...111 Fig 122 l Press and select Rule Options m Uncheck Activate opposite condition...
Page 123: ...123 Fig 133 f Press on to display another webcam Fig 134...
Page 125: ...125 www ecodhome co uk info ecodhome co uk Re Rev 08 2015 P P N 01335 0351 00...

