background image

866.463.2611 • www.ecosystemsdisplays.com

General Info

1

2

4  

5

SEG

 Graphic

 Install

1

2

3

4

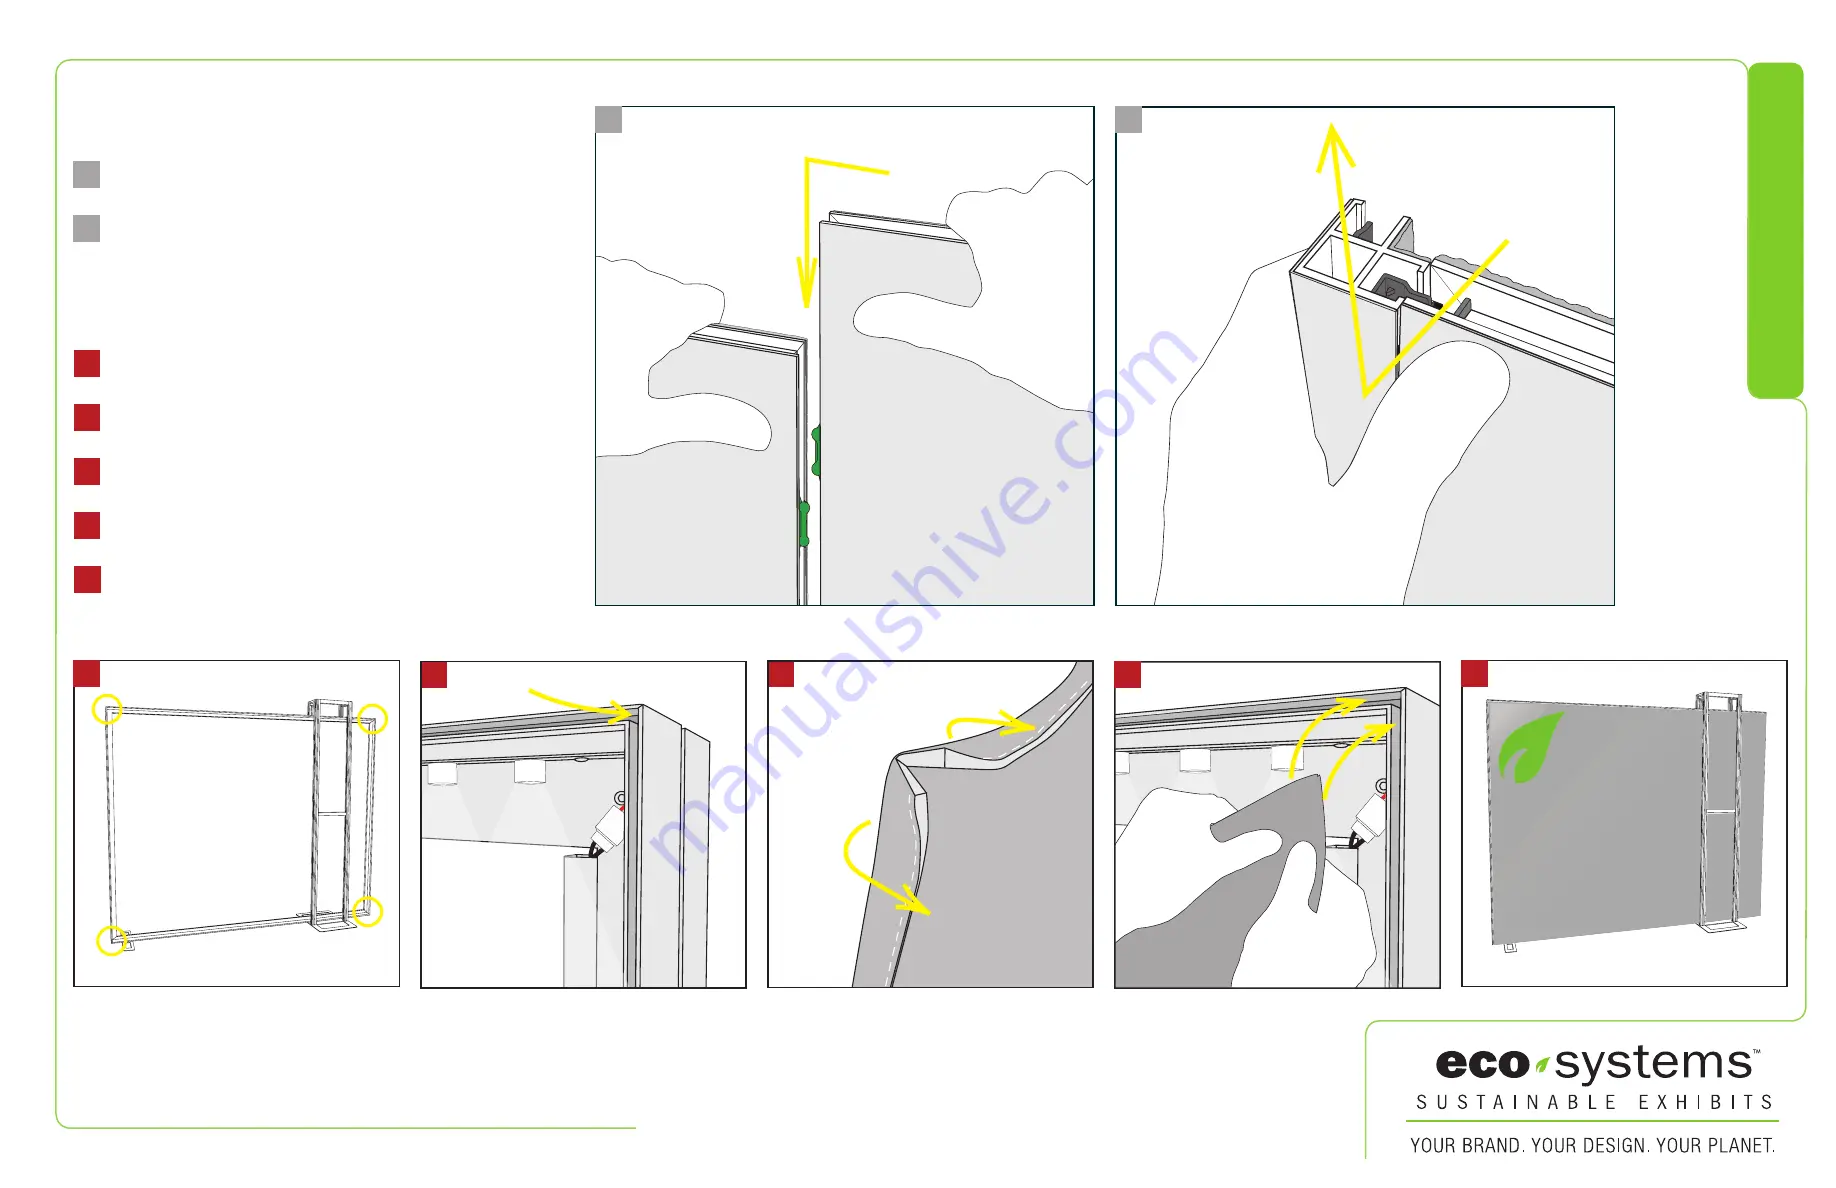
Graphic is installed corners first. This allows a proportional fit around the 

perimeter of the extrusion.
Locate channels along the edge of the extrusions.

Fold over graphic (hiding threads) and tuck silicon edge and fabric 

into corners. 
After corners are complete, slide in the rest of the graphic into channel. 

(From edges to center)

3

5

Graphic is installed. Stand back and be amazed!

Place ECO panel together with a vertical offset, slide down to lock 

connector in place.          

Panel Corner Connectors are installed just like ECO panels. Remove by 

off-setting top lock clips horizontally followed by separating vertically.

2

1

ECO Panel Install

1

2

Summary of Contents for ECO-2054

Page 1: ...866 463 2611 www ecosystemsdisplays com Setups Order XXXXX ECO 2054 10 x20 Inline Display Plan View 10 20 ...

Page 2: ...g Instructions for Setups Packing Inline Connection between Extrusions Baseplate Connection for Vertical Extrusions Cleaning and Packing Use non abrasive cleaners when cleaning extrusions or ECO Glass inserts Use mild cleaners and soft materials such as cotton to clean all laminates Keep exhibit components away form extreme heat and long exposure to sun light This will prevent warping and fading R...

Page 3: ... hiding threads and tuck silicon edge and fabric into corners After corners are complete slide in the rest of the graphic into channel From edges to center 3 5 Graphic is installed Stand back and be amazed Place ECO panel together with a vertical offset slide down to lock connector in place Panel Corner Connectors are installed just like ECO panels Remove by off setting top lock clips horizontally...

Page 4: ...owed by corner D to complete the installation of the corners Graphic Removal To remove the graphic from the frame locate the fabric pull tab Gently pull up on the tab to remove the fabric Step 3 Once all corners are inserted press one silicon edge into channel from corners and work toward the center Make sure welt is fully inserted into channel Continue until all sides are done Smooth out edges of...

Page 5: ...nsert narrow side of welt with fabric to outside into the channel Repeat for other side of this corner Step 2 Repeat Step 1 for opposite corner C then insert corner B followed by corner D to complete the installation of the corners Step 3 Once all corners are inserted press one silicon edge into channel from corners and work toward the center Make sure welt is fully inserted into channel Continue ...

Page 6: ...with push button connectors and pre connected horizontal sections Cleaning and Packing Your Display 1 Use care when cleaning aluminum extrusion or acrylic inserts Use only non abrasive cleaners 2 Retain all packing material It will make re packing much easier and will reduce the likelihood of shipping damage 3 8A Top View Q918 Aero Frame Aero Frame Attachment Steps 1 Assemble Aero header parts in ...

Reviews: