


Zero 88 FLX Lighting Console
–
User Manual
Page
61
of
64
Technical Information
Mains inlet
FLX is fitted with a Neutrik powerCON TRUE1 (NAC3MPX)
mains inlet on the back panel, and power on/off switch.
100 - 240V AC; MAX 1A
50 - 60Hz, 60W
INTERNALLY FUSED.
A GOOD EARTH CONNECTION IS ESSENTIAL.
The internal fuse is not user replaceable, contact an
authorized service agent if the desk does not power up and
you suspect that the fuse has failed. When using a UK
style plug (BS 1363), a 5A fuse should be fitted.
USB ports
Five external USB ports are fitted on the FLX. Two located
on the rear of the console, one on the front panel, and one
on either side. These support the USB 2.0
standard, and
are “overload protected” in pairs. If a USB device tries
drawing too much power, FLX will disable that pair or ports
until the device is unplugged. USB ports can be used for:
-
Wings
-
Keyboard & Mouse
-
External Touchscreen (
DVI-D also required)
-
External Storage Devices
(such as Memory Sticks)
Ethernet
The FLX Lighting Console is fitted with a Neutrik etherCON
RJ45 Ethernet port and is capable of supporting various
Ethernet protocols.
Kensington Lock
A Kensington-style lock slot is provided on
FLX for securing the console to an operating
location, using a standard laptop lock cable.
Sound to Light
A stereo ¼” jack socket provides basic Sound to Light
functionality. Left and right channels are mixed internally.
Audio Connector
Area
Desc.
Tip
Left
Channel
Ring
Right
Channel
Sleeve
0V Signal
Ground
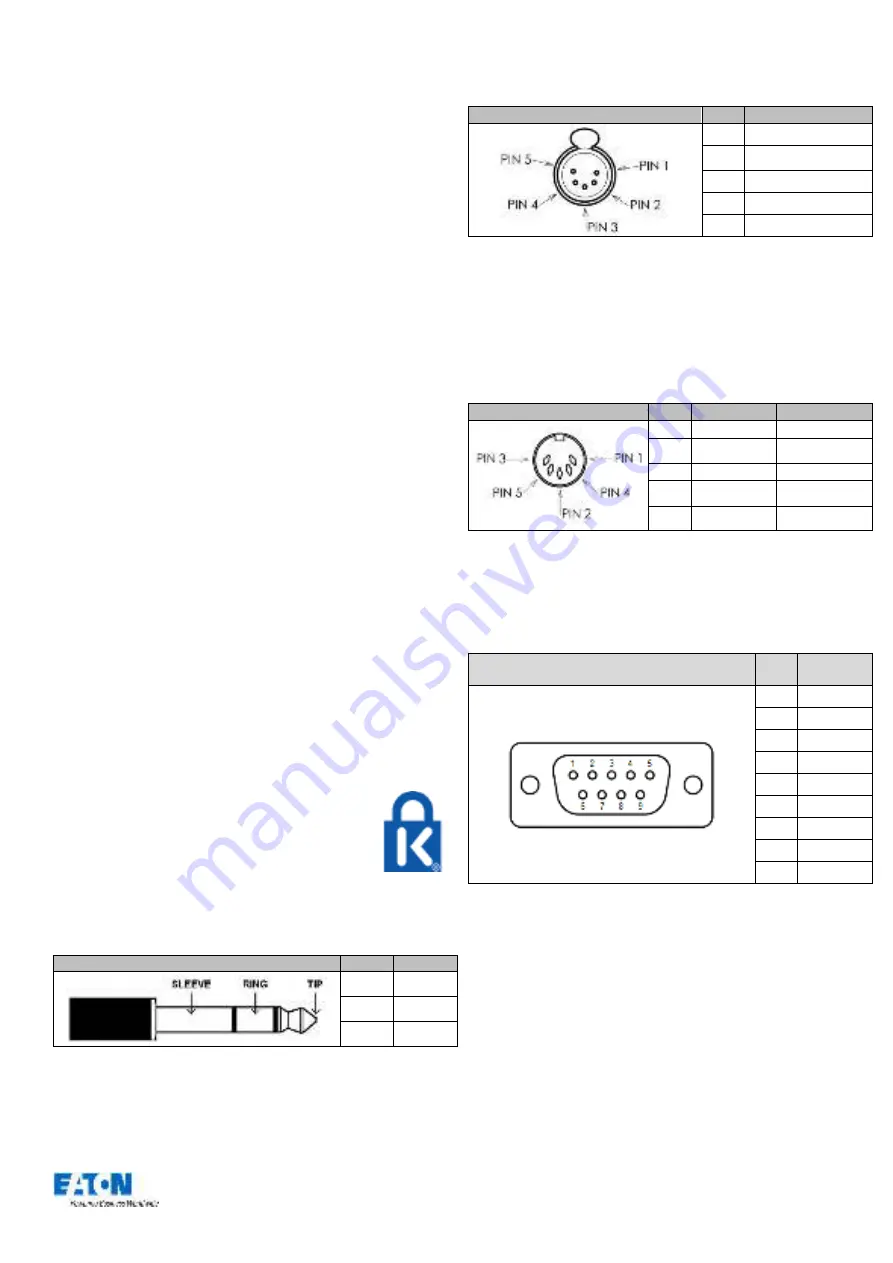
DMX output
Two female Neutrik 5 pin XLR, isolated, with voltage
protection and data output indicator. Data on channels 1
–
512 only. RDM Ready.
DMX Input Connector
Pin
Desc.
1
Signal Ground (0V)
2
DMX Drive
Complement (1-)
3
DMX Drive True (1+)
4
Not Connected
5
Not Connected
Video output
1 x DVI-I connector, but DVI-D output only.
MIDI
2 x 5 pin DIN connectors providing MIDI input and MIDI
thru
.
MIDI Connector
Pin
In
Output/Thru
1
Not Used
Not Used
2
Not Used
Signal
Ground
3
Not Used
Not Used
4
Opto Isolated
Input
Output
5
Opto Isolated
Input
Output
Remote input
A 9 pin D-sub connector providing 8 remote switches
(common ground). Short pin 1-8 to pin 9 (common) to
simulate a button push.
Remote Input Connector
Pin
Remote
Switch
1
Switch 1
2
Switch 2
3
Switch 3
4
Switch 4
5
Switch 5
6
Switch 6
7
Switch 7
8
Switch 8
9
Common