For more information visit: www.EatonElectrical.com
IB01301018E
I.B. 94A1994R01
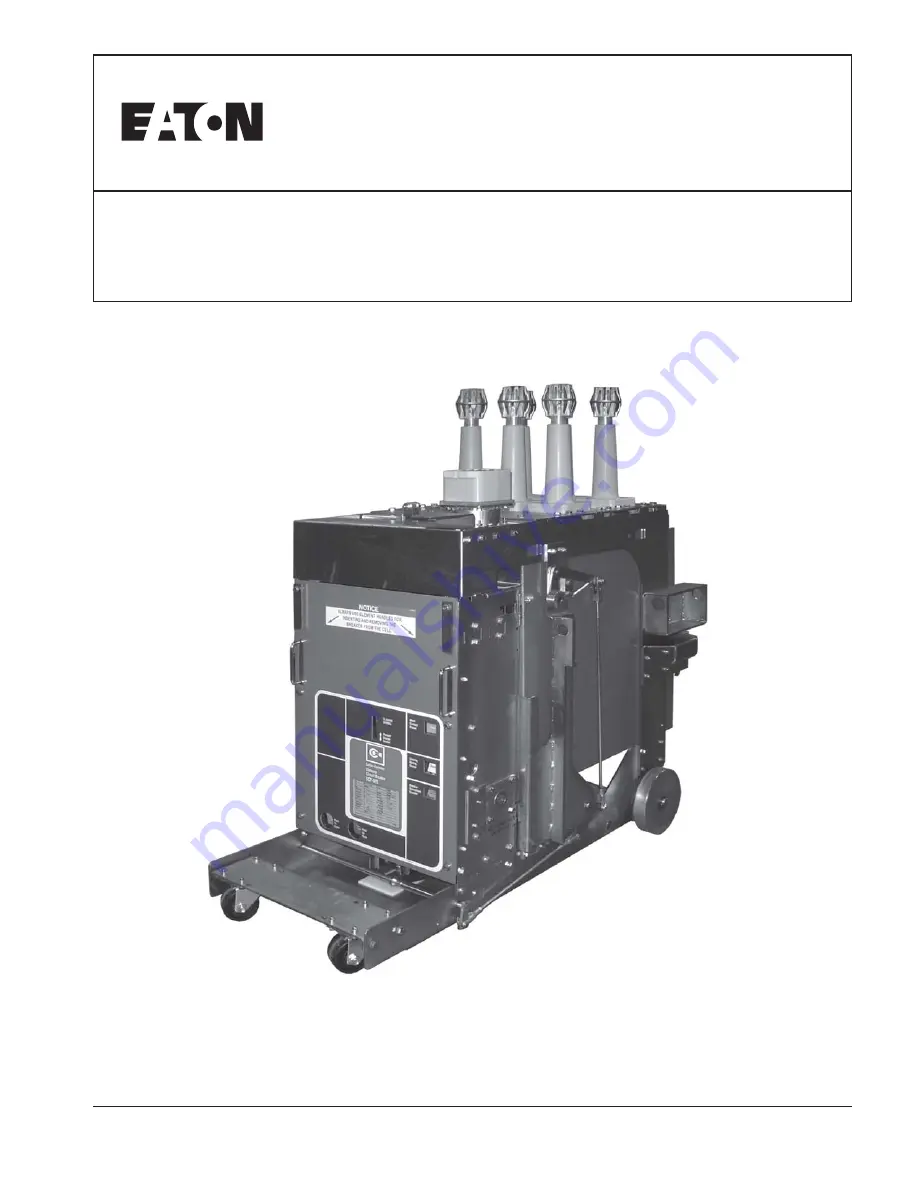
Instructions for VR-Series Replacement Breakers for Westinghouse Type B20B / B22B
(B22B-VR-500-1200A)
Page 1: ...For more information visit www EatonElectrical com IB01301018E I B 94A1994R01 Instructions for VR Series Replacement Breakers for Westinghouse Type B20B B22B B22B VR 500 1200A ...
Page 2: ......
Page 3: ...E THE EQUIPMENT TO FAIL RESULTING IN DEATH BODILY INJURY AND PROPERTY DAMAGE ALL SAFETY CODES SAFETY STANDARDS AND OR REGULA TIONS AS THEY MAY BE APPLIED TO THIS TYPE OF EQUIP MENT MUST BE STRICTLY ADHERED TO THESE CIRCUIT BREAKER ELEMENTSARE DESIGNED TO BE INSTALLED PURSUANT TO THE AMERICAN NATIONAL STAN DARDS INSTITUTE ANSI SERIOUS INJURY INCLUDING DEATH CAN RESULT FROM FAILURE TO FOLLOW THE PRO...
Page 4: ...ON 16 5 1 VACUUM INTERRUPTER 16 5 1 1 THE INTERRUPTER ASSEMBLY 16 5 1 2 CONTACT EROSION INDICATOR 16 5 1 3 CONTACT WIPE AND STROKE 17 5 2 PHASE BARRIERS 17 5 3 BUSHINGS AND DISCONNECTING CONTACT ASSEMBLIES 17 5 4 STORED ENERGY MECHANISM 17 5 4 1 CLOSING SPRING CHARGING 18 5 4 2 CLOSING OPERATION 18 5 4 3 TRIPPING OPERATION 18 5 4 4 TRIP FREE OPERATION 18 5 5 CONTROL SCHEMES 18 5 6 SECONDARY CONNEC...
Page 5: ...E Tables Table 1 1 B20B B22B VR Vacuum Circuit Breaker Availability and Interchangeability 5 Table 1 2 B20B B22B VR Dimensions in Inches 6 Table 3 1 Weight by Breaker Type 9 Table 5 1 Time Per Event 18 Table 6 1 Voltages 27 Table 6 3 Proper Lubrication Times Per Rating 34 Table 6 2 CloSureTM Tool Mounting Testing Locations by Circuit Breaker Type 33 Table 6 4 Troubleshooting Chart 34 ...
Page 6: ...am and Trip Linkage 21 Figure 5 6 Charging Schematic 22 Figure 5 7 Typical AC DC Schematic 23 Figure 5 8 TOC Operator 24 Figure 5 9 Static Grounding Contact 24 Figure 6 1 Lubrication Areas 25 Figure 6 2 Vacuum Interrupter Showing Contact Erosion Indicator With Breaker Open 28 Figure 6 3 Vacuum Interrupter Showing Contact Erosion Indicator With Breaker Closed 28 Figure 6 4 The Arrow Shows The T Con...
Page 7: ...ORDER TO OBTAIN OPTIMUM PERFORMANCE FOR LONG USEFUL LIFE OF THE CIRCUIT BREAKERS VR SERIES BREAKERSARE PROTECTIVE DEVICES AS SUCH THEY ARE MAXIMUM RATED DEVICES THEREFORE THEY SHOULD NOT UNDER ANY CIRCUMSTANCE BE APPLIED OUTSIDE THEIR NAMEPLATE RATINGS Table 1 1 B20B B22B VR Vacuum Circuit Breaker Availability and Interchangeability WARNING l a n i m o N e g a t l o V V k s s a l C g n i t s i x E...
Page 8: ...B01301018E I B 94A1994R01 Page 6 Effective April 2005 Table 1 2 B20B B22B VR Dimensions in Inches B22B VR Shown Figure 1 1 Outline and Dimensions in inches of Type B20B B22B VR Breakers B22B VR Shown A B C C H G D F E I g n i t a R A B C D E F G H I A 0 0 2 1 0 0 5 2 0 7 4 0 5 4 2 5 2 5 3 8 4 2 6 0 3 2 3 2 4 1 5 2 4 2 0 0 8 4 4 6 4 ...
Page 9: ...ere personnel injury or property damage y y y y y Do not work on a breaker with the secondary test coupler engaged Failure to disconnect the test coupler could result in an electrical shock leading to death personnel injury or property damage y y y y y Do not work on a closed breaker or a breaker with closing springs charged The closing spring should be discharged and the main contacts open before...
Page 10: ...nal Westinghouse breaker racking mechanism and is therefore not provided as part of the vacuum replacement breaker Secondary Connection Block Extension Cable The extension cable can be used to connect the circuit breaker to a test cabinet or to the switchgear cell s secondary receptacle block so that the breaker can be electrically operated while not installed in the switchgear cell This extension...
Page 11: ... manual charge socket opening Figure 3 2 Charge the closing springs by pumping the handle up and down about 36 times until a crisp metallic click is heard This indicates that the closing springs are charged and is shown by the closing spring charged yellow indicator Remove the mainte nance tool Push the manual close button The breaker will close as shown by the breaker contacts closed red indicato...
Page 12: ...fective April 2005 Figure 3 3 Front External View of Breaker B22B VR Shown 1 3 4 4 5 5 6 7 8 9 10 11 2 Primary Disconnects Secondary Disconnect MOC Operator Safety Locking Rod Retainer Safety Locking Rod Holes Manual Charging Socket 1 2 3 4 5 6 Breaker Contacts Indicator Spring Charged Discharged Operations Counter Push To Close Button Push To Open Button 7 8 9 10 11 ...
Page 13: ...reakers for Westinghouse Type B20B B22B I B 94A1994R01 Page 11 Effective April 2005 IB01301018E Figure 3 4 Back External View of Breaker B22B VR Shown 1 3 4 5 2 3 6 Ground Contact Assembly Interlock System Retractable Wheels 4 5 6 Phase Barrier Shutter Operator Assembly Safety Rod Holes 1 2 3 ...
Page 14: ...tion 5 7 Breaker operations may not be performed due to the interlock holding the trip linkage engaged and a charging motor series contact open Manual charging of the breaker is possible but an attempt to close in this position would result in a trip free operation WARNING 4 Connect position Once the breaker has been lifted to the trip free position it remains trip free only until it reaches the c...
Page 15: ...ion indicator marks as described in Section 6 5 and illustrated in Figure 6 2 and 6 3 to verify that contact erosion is not greater than the service limit of 1 8 Check contact wipe per Section 6 5 and Figure 6 5 4 7 PRIMARY CIRCUIT BREAKER RESISTANCE TESTS Check the primary circuit resistance of the three pole units as described in Section 6 8 The resistance should not exceed the values specified ...
Page 16: ... circuit breaker between the disconnect trip free and connect positions The cell lifting mechanism is a worm driven rack and dual pinion type arrange ment To prevent inadvertent lowering of the mechanism two locking rods are provided and inserted through components of the cell and breaker The racking drive shaft of the cell is exposed where the racking handle can be engaged The drive shaft accuate...
Page 17: ...en and close linkages are released the racking handle has been removed from the cell and the safety rod holes are aligned Care and experience is needed in order to determine whether a more than usual force is required to raise the breaker into a cell as this might be an indication of mechanical interference or misalignment of components If unusual force is noted the breaker should be withdrawn fro...
Page 18: ...l vapor causes the vacuum to be quickly restored and prevents the transient recovery voltage from causing a restrike across the gap of the open contacts 5 1 1 THE INTERRUPTER ASSEMBLY Each interrupter is assembled at the factory as a unit to assure correct dimensional relationships between working components The interrupter assembly consists of a vacuum interrupter a molded glass polyester stand o...
Page 19: ...e 5 3 ALL FOUR PHASE BARRIERS MUST BE IN PLACE BEFORE PLACING THE CIRCUIT BREAKER INTO SERVICE FAILURE TO HAVE THEM IN POSITION CAN CAUSE DEATH SERIOUS PERSONNEL INJURY AND OR PROPERTY DAMAGE 5 3 BUSHINGS AND DISCONNECTING CONTACT ASSEMBLIES The line and load bushing assemblies which are the primary circuit terminals of the circuit breaker consist of six silver plated conduc tors Multiple finger t...
Page 20: ...into the face of the spring release coil electrically or manually the upper portion of the clapper pushes the spring release latch 4 upward When the spring release latch moves the cam shaft assembly is free to rotate The force of the closing cam 8 moving the main link 2 rotating the pole shaft 1 which charges the opening spring This moves the three operating rods 9 closes the main contacts and cha...
Page 21: ... anti close interlock INTERLOCKS ARE PROTECTIVE DEVICES FOR PERSONNEL AND EQUIPMENT DO NOT BYPASS MODIFY OR MAKE INOPERA TIVE ANY INTERLOCKS DOING SO COULD CAUSE DEATH SERIOUS PERSONAL INJURY AND OR PROPERTY DAMAGE 5 7 1 ANTI CLOSE INTERLOCK The anti close interlock prevents discharging of the closing springs if the breaker is already closed Figure 5 5 Item 2 When the breaker is closed the interlo...
Page 22: ...ive April 2005 Figure 5 4 B22B VR Vacuum Element Front Faceplate Removed 1 9 8 13 4 5 2 3 11 10 6 12 Motor Cutoff Switch Closing Cam Ratchet Wheel Manual Charge Socket Position Switch Latch Check Switch Rear 8 9 10 11 12 13 LH Closing Spring RH Closing Spring Reset Opening Spring Spring Release Assembly Shunt Trip Assembly Charging Motor Operations Counter 1 2 3 4 5 6 7 7 ...
Page 23: ...and Trip Linkage Breaker Open Springs Discharged Breaker Open Springs Charged 2 9 13 7 1 3 Pole Shaft Anti Close Interlock Sping Release Close Latch Spring Crank Closing Spring Closing Spring Fixed End Spring Release Close Coil 1 2 3 4 5 6 7 Cam Shaft Motor Ratchet Lever Drive Pawl Ratchet Wheel Holding Pawl Spring Release Close Clapper Spring Release Latch Close Roller 8 9 10 11 12 13 14 6 5 12 4...
Page 24: ...ker Open and Closing Spring Not Charged Figure 5 5b Breaker Breaker Open and Closing Spring Charged Figure 5 5c Breaker Closed and Closing Spring Not Charged Figure 5 5d Breaker Closed and Closing Spring Charged Pole Shaft Main Link Banana Link Trip Latch Shunt Trip Lever Shunt Trip Coil 1 2 3 4 5 6 Cam Shaft Closing Cam Operating Rod Main Link Roller Trip Bar D Shaft Trip Latch Rest Spring 7 8 9 ...
Page 25: ... 10UV 10A 10UV 9UV 2ND AUXILIARY SWITCH OPTIONAL VCP WR SERIES 18 OR 29 3RD AUXILIARY SWITCH OPTIONAL VCP WR SERIES 29 SPRING CHARGED INDICATING LIGHT 1 2 AC SOURCE RL GL WL Y SR Y AC AC CAP TRIP DEV PS1 PS2 M 24 LS1 bb 1 3 3A 4 2 4 CS C CS T PR 7 13 55 9 10 52 51 54 53 58 57 56 14 5 9 Y LS2 bb LS2 aa LC b b a 21 20 16 19 18 ST 1 17 15 23 13 10 8 7 3 22 6 b b b a a a a UV 14 11 FOR AC UV TRIP ONLY...
Page 26: ... operates the paddle of the TOC switch The TOC switch contains contacts which are used to interlock the circuit breaker with other external devices and provide remote indication of breaker position 5 10 STATIC GROUNDING CONTACT The grounding contact is an assembly of spring loaded fingers located at the right rear of the breaker frame The contact engages the switchgear cell grounding bus when the ...
Page 27: ... THE CLOSING SPRINGS STAND AT LEAST ONE METER AWAY FROM THE BREAKER WHEN TESTING FOR VACUUM INTEGRITY FAILURE TO FOLLOW ANY OF THESE INSTRUCTIONS MAY CAUSE DEATH SERIOUS BODILY INJURY OR PROPERTY DAMAGE SEE SECTION 2 SAFE PRACTICES FOR MORE INFORMATION 6 2 FREQUENCY OF INSPECTION Inspect the breaker once a year when operating in a clean non corrosive environment For a dusty and corrosive environme...
Page 28: ... e t n i e c a l p e R e t a u q e d a t o n s i m u u c a v f i y d o b c i m a r e c n o t r i D k c e h C l a u s i V h t o l c e e r f t n i l y r d h t i w n a e l C s t c e n n o c s i D y r a m i r P e g a m a d r o g n i n r u b o N k c e h C l a u s i V d e g a m a d d e n r u b f i e c a l p e R d e d o r e r o 3 l o r t n o C s e c i v e d g n i p p i r t d n a g n i s o l C t c e r r o...
Page 29: ...isplacement capacitive current the test unit should have sufficient volt ampere capacity It is recommended that the equipment be capable of delivering 25 milliamperes for one minute Although an AC high potential test is recommended a DC test may be performed if only a DC test unit is available In this case the equipment must be capable of delivering 5 milliamperes for one minute to avoid ambiguity...
Page 30: ... of the breaker Connect the remaining poles and breaker frame to ground Start the machine with output potential at zero and increase to the test voltage Maintain the test voltage for one minute Repeat for the remaining poles Successful withstand indicates satisfactory insulation strength of the primary circuit Open the breaker Connect the high potential lead of the test machine to one of the poles...
Page 31: ...d the test levels by more than 15 Factory test levels are recorded on the Circuit Breaker Test Form 6 9 MECHANISM CHECK Make a careful visual inspection of the mechanism for any loose parts such as bolts nuts pins rings etc Check for excessive wear or damage to the breaker components Operate the breaker several times manually and electrically Check the closing and opening times to verify that they...
Page 32: ...ersonnel and equipment The recommendations and information contained herein are based on Eaton Electrical experience and judgment but should not be considered to be all inclusive or covering every application or circumstance which may arise If further information is required you should consult Eaton s Electrical Services Systems Testing Procedures Assuming that the breaker is safely pulled out to ...
Page 33: ...move the transparent CloSureTM Tool Remove the tape from the cam and stick the tape on the front right side sheet of the circuit breaker Record the date of the test and the operations counter reading on the tape Figures 6 14 and 6 15 Step 13 Evaluate the CloSureTM performance by comparing the test tape with illustrations in Figure 6 16 If the marking is similar to 6 16A measure the over travel x I...
Page 34: ...terface Date of Breaker Operations CloSure Distance Date of Breaker Operations CloSure Distance Date of Breaker Operations CloSure Distance A B C X Inches CloSure Overtravel CloSure Distance CloSure Position TM TM TM TM Note Use the center of the marker diameter to determine X distance Figure not to scale 8 0 to 10 Inches 5 3 16 Approx 5 3 16 Approx TM TM 5 3 16 Approx Figure 6 16 Illustrative Tes...
Page 35: ...a h c e M h t d i W t e n i b a C h c n i r e p p U g n i t n u o M e l o H r e w o L g n i t n u o M e l o H r e k r a M t n e m e c a l P e l o H R V P H D 0 2 7 2 1 A 1 A 2 B 1 B 2 C 5 C R W P C V 8 1 0 2 7 2 1 A 1 A 1 A 2 B 2 B 2 B 1 C 2 C 5 C Table 6 2 CloSureTM Tool Mounting Testing Locations by Circuit Breaker Type Width Figure 6 18 Typical Circuit Breaker Front View with CloSureTM Tool Att...
Page 36: ... effective for many years They should not be disturbed unless there is definite evidence of sluggishness dirt or parts are dis mantled for some reason If it becomes necessary to disassemble the mechanism the bearings and related parts should be thoroughly cleaned remove old grease in a good grease solvent Do not use carbon tetrachloride They should then be washed in light machine oil until the cle...
Page 37: ...y picks up Close Coil Open or burned Latch Check Switch Contact open Bad switch or trip bar not reset Auxiliary Switch b contact open or burned Motor Cut Off Contacts open or burned Trip Coil Assy Clapper fails to reset Closing Sound Pole Shaft But no Close Not open fully Trip Latch Reset Spring Damaged or missing Trip Bar D Shaft Fail to remain reset Trip Latch Hatchet Fails to remain reset Trip ...
Page 38: ...iary Switch a contact not making poor or burned Trip Coil Burned or open Terminals and Connections poor or burned or open Trip Mechanism Trip Clapper Jammed Trip Sound Trip Mechanism Trip Bar Trip Latch But no Trip Jammed Pole Shaft Jammed Operating Rod Assembly Broken or pins out Vacuum Interrupter One or more Welded UNDESIRABLY TRIPS Control Circuit Control Power CS T Switch remains made Mechani...
Page 39: ...ice severity and continuity requirements Each customer should develop his own level based on operating experience A replace ment parts data sheet RPD is included with each breaker 7 1 1 ORDERING INSTRUCTIONS a Always specify the breaker rating information and general order number from the nameplate b Describe the item give the style number and specify the quantity required c Specify the voltage fo...
Page 40: ......
Page 41: ......
Page 42: ...OR WARRANTIES ARISING FROM COURSE OF DEALING OR USAGE OF TRADE ARE MADE REGARDING THE INFORMATION RECOMMENDATIONS AND DESCRIPTIONS CON TAINED HEREIN In no event will Eaton Corporation be responsible to the purchaser or user in contract in tort including negligence strict liability or otherwise for any special indirect incidental or consequential damage or loss whatsoever including but not limited ...