

30
4–20kVA Users Guide P-164000669 4–20kVA Users Guide P-164000669—Rev 09
33..66
B
Byyppaassss O
Ovveerrvviieew
w
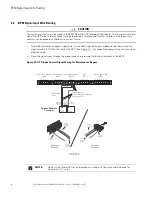
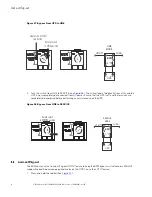
The BPM has three operating positions (see
). Consider both the operating state of the UPS and the
BPM when protecting your critical loads.
CAUTION
Failure to understand the correct bypass sequence and position may cause the critical load to be dropped. Do
not operate the bypsass switch if the UPS is in battery mode. Damage to the power modules or the bypass
switch can occur.
NOTE 1
If the UPS remains in Manual Bypass mode and incoming AC power is lost, the load is
automatically dropped. The UPS must be in Normal mode to provide battery backup
power.
NOTE 2
In the UPS or LINE position, AC input power is still connected to the input terminals
inside the UPS.
NOTE 3
If you have any questions or problems with the bypass operation, call the Help Desk
(see , “
” ).
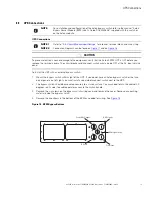
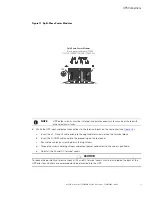
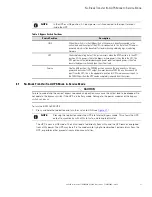
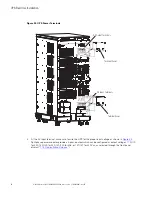
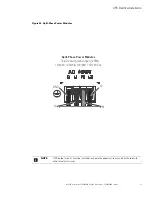
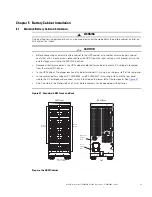
The BPM consists of a load position handle and a red button (see
).
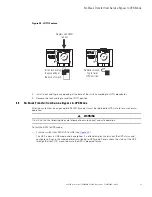
Figure 26. Bypass Switch Positions
LOTO Bar (red)
Interlock Button (red)
Bypass switch
handle
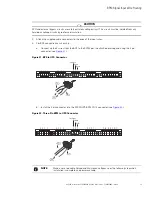
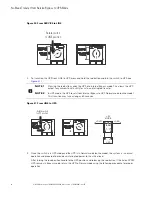
The red button:
•
Sends an electrical signal to the UPS to switch to the internal Bypass mode (if it is not already operating in
that mode).
•
Operates a mechanical interlock, to prevent the switch from being turned without first signaling the UPS.
You must press the red button before you can turn the load position handle.
When the red button is pressed, the UPS front panel displays “Manual Bypass.” To move the MBP switch
handle from one position to another, the red button must be pressed WHILE the handle is being rotated.
Otherwise, the switch will be damaged.
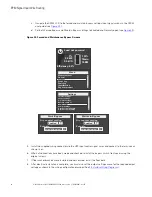
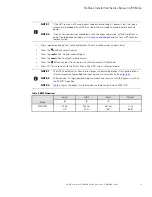
The bypass switch has three positions as described in
.
Summary of Contents for 9PXM
Page 1: ...p n P 164000669 Revision 09 Eaton 9PXM UPS 4 20kVA Users Guide Eaton 9PXM UPS ...
Page 4: ......
Page 8: ...viii 4 20kVA Users Guide P 164000669 4 20kVA Users Guide P 164000669 Rev 09 Table of Contents ...
Page 12: ...xii 4 20kVA Users Guide P 164000669 4 20kVA Users Guide P 164000669 Rev 09 List of Figures ...
Page 14: ...xiv 4 20kVA Users Guide P 164000669 4 20kVA Users Guide P 164000669 Rev 09 List of Tables ...
Page 22: ...8 4 20kVA Users Guide P 164000669 4 20kVA Users Guide P 164000669 Rev 09 Physical Features ...
Page 110: ...96 4 20kVA Users Guide P 164000669 4 20kVA Users Guide P 164000669 Rev 09 Communication Slots ...
Page 130: ...P 16400066909 P 164000669 09 ...