background image


16 

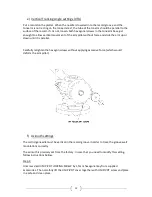
Step 5: 

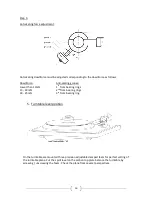
Anti-skating force adjustment: 


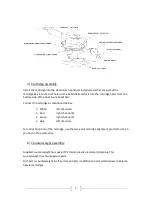
Anti-skating downforce must be adjusted corresponding to the downforce as follows: 

Downforce: 


Anti-skating groove:   


Lower than 13mN 


1

st  

from bearing rings 

13 - 18 mN 


2

nd

 from bearing rings 

18 - 25mN 


3

rd

 from bearing ring 


5.


Turntable level position


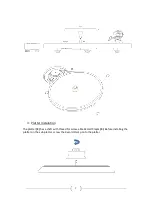
On the turntable are mounted three precision adjustable damped feets for perfect setting of 
the turntable plane. Put the spirit level on the carbon top plate balance the turntable by 
screwing / unscrewing the feets . Check the plane from several perspectives. 


Summary of Contents for C-Sharp

Page 1: ...European Audio Team INSTRUCTIONS FOR USE EAT C Sharp ...

Page 2: ...contribution to enviromental protection Disposal od packaging material Packaging protects the device from damage during the transportation The packaging materials were chosen with the regards to the enviromental protection and they are therefore recyclable Disposal of old equipment For the disposal of old equipment use a junk place appointed for that purpose The device is shipped partially disasse...

Page 3: ...mbly 8 a Cartridge assembly 9 b Counterweight assembly 9 10 c Vertica tracking Force setting VTF 10 11 d Tonearm output connection 11 e Vertical Tracking Angle setting VTA 12 f Azimuth setting 12 13 g Anti skatin assembly and adjustment 14 16 5 Turntable plane position 16 6 Starting the motor changing the speed 17 Technical specifications 18 Waranty service troubleshooting 19 ...

Page 4: ...4 ...
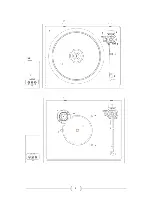
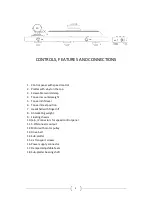
Page 5: ...eight 5 Tonearm lift lever 6 Tonearm rest position 7 Headshell with finger lift 8 Anti skating weight 9 Floating chassis 10 a b Connectors for speed control panel 11 5 PIN tonearm output 12 Motor with motor pulley 13 Drive belt 14 Sub platter 15 3x Transport screws 16 Power supply connector 17 Damped adjustable feets 18 Sub platter bearing shaft ...

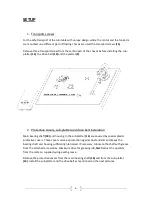
Page 6: ... belt instalation Main bearing shaft 18 and housing in the sub platter 14 are covered by special plastic protective covers These covers serve as protection against dust and dirt and keeps the bearing shaft and housing sufficiently lubricated If necessary lubricate the shaft with grease from tha attached accessories Maximum dose for greasing is 0 5ml Deduct the quantity from the scale on supplied s...

Page 7: ...7 3 Platter instalation Tha platter 2 has a shaft with thread for screw able Record Clapm 3 Before installing the platter on the sub platter screw the Record Clamp onto the platter ...

Page 8: ... the Record Clamp when carefully centering the platter onto the sub platter NO GREASE BETWEEN SUB PLATTER AND MAIN PLATTER 4 Tonearm assembly The tonearm is a combination of cardan bearings and as a special support is there also a uni pivot tip which is submerged in special vaseline Setting of the tonearm will be described in next steps ...

Page 9: ...mentioned below White left channel L Red right channel R Green right channel R Blue left channel L For correct position of the cartridge use the two point cartridge alignment protractor which you find in the accessories b Counterweight assembly Supplied counterweight has special TPE termo plastic elastomer damping This counterweight has two separate parts First part is counterweight itself and sec...

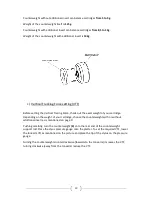
Page 10: ...eight of your cartridge Depending on the weight of your cartridge choose the counterweight with or without additional insert as is mentioned on page 9 Pushing carefully turn the counterweight 4 onto the rear end of the counterweight support rod Place the styus pressure gauge onto the platter To set the required VTF lower the tonearm lift as mentioned on the picture and place the tip of the stylus ...

Page 11: ...11 d Tonearm output connection Connect the cable from the accessories to the connector which is located on the rear side of the turntable behind the tonearm Keep the right position of the connector ...

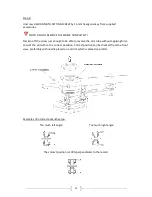
Page 12: ...rm up or down until i tis parallel Carefully retighten the hexagon screws without applying excessive force which would deform the arm pillar f Azimuth settings The cartridge needle must be vertical in the record groove in order to trace the groove wall modulations correctly The azimut his precisely set from the factory In case that you need to modify this setting follow instructions bellow Step 1 ...

Page 13: ...enough to be able to revolve the arm tube without applying force and set the azimuth to the correct possition Correct position can be checked from the front view preferably with needle placed on a mirror which is placed on platter Examples of incorrect azimuth setup Too much left angle Too much right angle The correct position is 100 perpendicular to the record ...

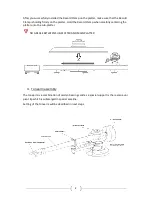
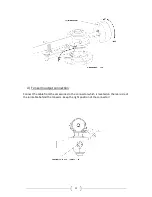
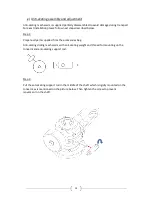
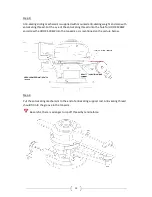
Page 14: ...d below Step 1 Prepare all parts supplied from the accessories bag Anti skating sliding mechanism with anti skating weight and thread for mounting on the tonearm and anti skating support rod Step 2 Put the anti skating support rod in the middle of the shaft which is rigidly mounted on the tonearm as is mentioned on the picture below Then tighten the screw to prevent movement on the shaft ...

Page 15: ... the anti skating thread onto the hole for HOOK SCREW and screw the HOOK SCREW into the tonearm as is mentioned on the picture below Step 4 Put the anti skating mechanism to the end of anti skating support rod Anti skating thread should fit into the groove in the tonearm Be careful there is a danger to rip off thread by tensile force ...

Page 16: ...N 1st from bearing rings 13 18 mN 2nd from bearing rings 18 25mN 3rd from bearing ring 5 Turntable level position On the turntable are mounted three precision adjustable damped feets for perfect setting of the turntable plane Put the spirit level on the carbon top plate balance the turntable by screwing unscrewing the feets Check the plane from several perspectives ...

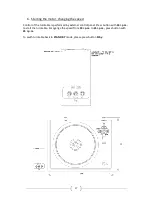
Page 17: ...rol of the turntable is performed by external control panel Press button with 33 r p m to start the turntable For cgange the speed from 33 r p m to 45 r p m press button with 45 r p m To swith turntable back to STAND BY mode please press button Stby ...

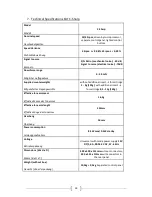
Page 18: ...ional insert for cartridge 5 9g 125g with additional insert for cartridge 8 5 13g 142g Mitgeliefertes Gegengewichts Effective tonearm mass 16 5g Effektive Masse des Tonarmes Effective tonearm lenght 254mm Effektive Länge des tonarmes Overhang 16mm Überhang Power consumption 8 5 W max 0 5W stanby Leistunggsaufnahme Voltage Universal swith mode power supply 15V DC 1 6 A 90 264 V AC 47 63Hz Betriebss...

Page 19: ...without oil dirty or damaged Service Should you encounter a problem which you are not able to alleviate or identify despite the above informations please contact your dealer for further advice Only when the problem cannot be resolved there should the unit be sent to the responsible distributor in your country Guarantee repairs will only be effected if the unit is returned correctly packaged For th...

Reviews: