background image

EN


  DYON SMART 43 X-EOS


24 

8.6.2 

Cable 

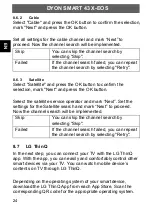
Select "Cable" and press the OK button to confirm the selection, 
mark "Next" and press the OK button.   
 
Set all settings for the cable channel a

nd mark “Next” to 

proceed. Now the channel search will be implemented.   

Skip   

You can skip the channel search by 
selecting "Skip". 

Failed   

If the channel search failed, you can repeat 
the channel search by selecting "Retry". 


8.6.3 

Satellite 

Select "Satellite" and press the OK button to confirm the 
selection, mark "Next" and press the OK button. 
 
Select the satellite service operator and mark “Next”. Set the 
settings for the Satellite search a

nd mark “Next” to proceed. 

Now the channel search will be implemented. 

Skip   

You can skip the channel search by 
selecting "Skip". 

Failed   

If the channel search failed, you can repeat 
the channel search by selecting "Retry". 


8.7 

LG ThinQ 

In the next step, you can connect your TV with the LG ThinQ 
app. With the app, you can easily and comfortably control other 
smart devices via your TV. You can 

watch mobile device’s 

contents on TV through LG ThinQ.   
 

Depending on the operating system of your smart device, 
download the LG ThinQ App from each App Store. Scan the 
corresponding QR code for the appropriate operating system.   

Summary of Contents for SMART 43 X-EOS

Page 1: ...etup 21 8 1 Language and Location 21 8 2 Device Connection 22 8 3 Internet Setup 22 8 4 Terms Conditions 23 8 5 Pair devices 23 8 6 Channel Search 23 8 6 1 Antenna 23 8 6 2 Cable 24 8 6 3 Satellite 24...

Page 2: ...ibility 38 11 7 Menu Support 38 12 Smart Functions 39 13 Voice Assistant 40 14 Recording Functions 41 15 TV Scheduler 43 16 Live Playback 44 17 CI Information 45 18 USB Devices 47 18 1 Connecting USB...

Page 3: ...ns heat registers stoves or other apparatus including amplifiers that produce heat 9 Do not defeat the safety purpose of the polarized plug If the provided plug does not fit into your outlet consult a...

Page 4: ...nect device the disconnect device shall remain readily operable 15 The ventilation should not be impeded by covering the ventilation openings with items such as newspapers table cloth curtains etc 16...

Page 5: ...the operation of this television receiver Do not remove the cabinet back from your set Refer servicing to qualified service personnel To prevent fire or electrical shock hazard do not expose the telev...

Page 6: ...ision on an unstable cart stand shelf or table Serious injury to an individual and damage to the television may result if it should fall When the television is not used for an extended period of time...

Page 7: ...omponents or through other procedures of re using outdated equipment you are making an important contribution to protection our environment Please ask you local municipal administration for the locati...

Page 8: ...support axdia de 3 Appropriate use The device is designed for receiving and watching encrypted and unencrypted DVB T2 DVB S2 and DVB C TV channels free to air for private use It is exclusively meant...

Page 9: ...fter a predefined time the device switches to networked standby mode when the connection is active Important The device switches to standby mode independently after 4 hours without operations Please n...

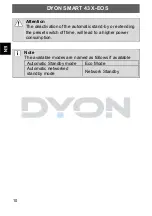
Page 10: ...ion of the automatic stand by or extending the preset switch off time will lead to a higher power consumption Note The available modes are named as follows if available Automatic Standby mode Eco Mode...

Page 11: ...duct may be found on the following link www axdiaservice de konform For regulations regarding the use of 5GHz WLAN within the EU please note This device is appropriate for use in the following Europea...

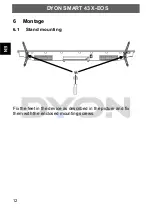
Page 12: ...EN DYON SMART 43 X EOS 12 6 Montage 6 1 Stand mounting Fix the feet in the device as described in the picture and fix them with the enclosed mounting screws...

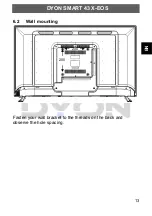
Page 13: ...EN DYON SMART 43 X EOS 13 6 2 Wall mounting Fasten your wall bracket to the threads on the back and observe the hole spacing 200 200...

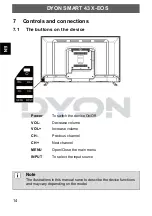
Page 14: ...ower To switch the device On Off VOL Decrease volume VOL Increase volume CH Previous channel CH Next channel MENU Open Close the main menu INPUT To select the input source Note The illustrations in th...

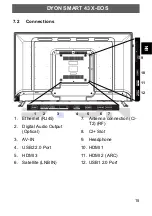
Page 15: ...Connections 1 Ethernet RJ45 2 Digital Audio Output Optical 3 AV IN 4 USB2 2 0 Port 5 HDMI 3 6 Satellite LNB IN 7 Antenna connection C T2 RF 8 CI Slot 9 Headphone 10 HDMI 1 11 HDMI 2 ARC 12 USB1 2 0 Po...

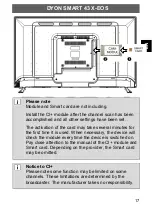
Page 16: ...he TV set from power 2 Before inserting the module into the device insure that the Smart card has been properly installed into the module Pay close attention to the direction when inserting The printi...

Page 17: ...several minutes for the first time it is used When necessary the device will check the module every time the device is switched on Pay close attention to the manual of the CI module and Smart card De...

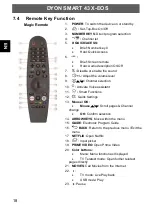
Page 18: ...vel 9 Channel selection 10 Activate Voice assistant 11 Smart Functions 12 Quick Settings 13 Mouse OK Mouse Scroll pages Channel change OK Confirm selection 14 ARROWKEYS Move within the menu 15 GUIDE E...

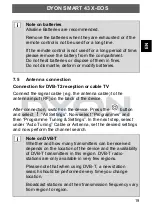
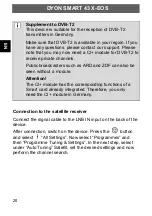
Page 19: ...antenna input RF on the back of the device After connection switch on the device Press the button and select All Settings Now select Programmes and then Programme Tuning Settings In the next step sele...

Page 20: ...RD and ZDF can also be seen without a module Attention The CI module has the corresponding functions of a Smart card already integrated Therefore you only need the CI module in Germany Connection to t...

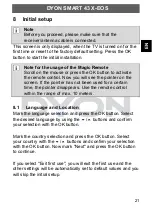
Page 21: ...try with the buttons and confirm your selection with the OK button Now mark Next and press the OK button to continue If you select Exit first use you will exit the first use and the other settings wil...

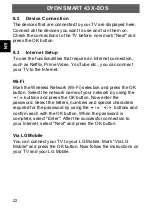
Page 22: ...net Wi Fi Mark the Wireless Network Wi Fi selection and press the OK button Select the network name of your network by using the buttons and press the OK button Now enter the password Select the lette...

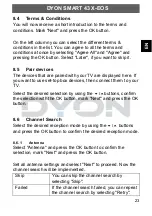
Page 23: ...to use set top box devices then connect them to your TV Select the desired selection by using the buttons confirm the selection with the OK button mark Next and press the OK button 8 6 Channel Search...

Page 24: ...n Select the satellite service operator and mark Next Set the settings for the Satellite search and mark Next to proceed Now the channel search will be implemented Skip You can skip the channel search...

Page 25: ...to reduce power consumption Cinema Optimizes the screen for movies Sports Optimizes the screen for sports games Sharpens the image of rapid movements 9 2 Sound Mode In the Sound Mode you can select th...

Page 26: ...via Bluetooth Mobiles Device Optical TV audio is played through an external audio device connected to the digital optical port HDMI ARC TV audio is played through an external audio device connected to...

Page 27: ...ideo etc you can connect your TV to the Internet via LAN or WLAN 9 5 1 Wired Connection Ethernet If you want to connect via LAN simply plug an Ethernet cable into the LAN port on the back of your TV w...

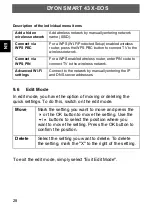
Page 28: ...network Advanced Wi Fi settings Connect to the network by manually entering the IP and DNS server addresses 9 6 Edit Mode In edit mode you have the option of moving or deleting the quick settings To d...

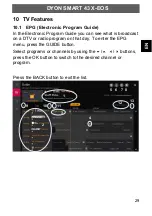
Page 29: ...Guide you can see what is broadcast on a DTV or radio program on that day To enter the EPG menu press the GUIDE button Select programs or channels by using the buttons press the OK button to switch to...

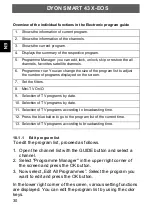
Page 30: ...9 Selection of TV programs by date 10 Selection of TV programs by date 11 Selection of TV programs according to broadcasting time 12 Press the blue button to go to the program list of the current time...

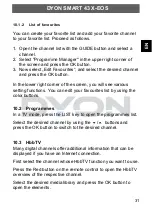
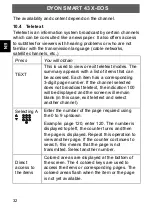
Page 31: ...n you will see various setting functions You can edit your favourites list by using the color buttons 10 2 Programmes In a TV mode press the LIST key to open the programmes list Select the desired cha...

Page 32: ...mber If the channel selected does not broadcast teletext the indication 100 will be displayed and the screen will remain blank in this case exit teletext and select another channel Selecting A Enter t...

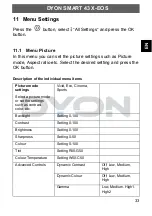
Page 33: ...tton Description of the individual menu items Picture mode settings Select a picture mode or set the settings such as contrast color etc Vivid Eco Cinema Sports Backlight Setting 0 100 Contrast Settin...

Page 34: ...ema Clear Natural Smooth User Apply to all inputs Reset picture setting values to default Aspect ratio settings Set aspect ratio 16 9 Original Full Wide 4 3 Vertical Zoom 4 Way Zoom Energy Saving Adju...

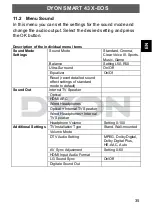
Page 35: ...L50 R50 Ultra Surround On Off Equalizer On Of Reset revert detailed sound effect settings of standard mode to default Sound Out Internal TV Speaker Optical HDMI ARC Wired Headphones Optical Internal...

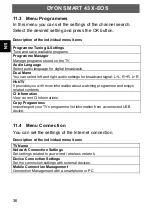
Page 36: ...Audio Language Select audio language for digital broadcasts Dual Mono You can select left and right audio settings for broadcast signal L L R R L R HbbTV It provides you with more information about wa...

Page 37: ...e Secondary Audio Language Keyboard Languages Primary Teletext Languages Secondary Teletext Language Location Set the region and country Time Time Date Time Zone Timers Safety the default password is...

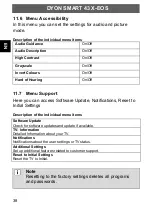
Page 38: ...rt Here you can access Software Update Notifications Reset to Initial Settings Description of the individual menu items Note Resetting to the factory settings deletes all programs and passwords Softwa...

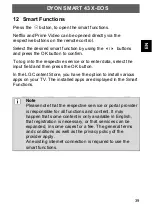
Page 39: ...s the OK button In the LG Content Store you have the option to install various apps on your TV The installed apps are displayed in the Smart Functions Note Please note that the respective service or p...

Page 40: ...eps below to use the voice assistant 1 Press and hold the button on the Magic Remote to activate the Voice Assistant 2 Now speak the desired command The screen shows that the voice assistant is activa...

Page 41: ...rage capacity of your USB hard drive Now follow the steps below to use the recording function 1 Connect a USB HDD or USB Flash Drive to a USB port It is recommended that you record to a USB HDD 2 Duri...

Page 42: ...HD channels If the rate is too low there may be interference during recording or the recording may be aborted Please note that recordings can only be played back on this device For playback call up th...

Page 43: ...he GUIDE button select TV Scheduler at the left column and then select Go to TV Scheduler At the upper right corner of the screen you will see the following functions Sort Filter Sort Filter the list...

Page 44: ...lows you to continue watching from where you were previously if you go out for a while Now follow the steps below to use the live playback 1 Input the USB HDD in the USB port 2 Press the OK button and...

Page 45: ...V Now just unplug the module If a Module is set in some more options are available at the CI Information page of the OSD 1 Press the button to open the system settings 2 Us the arrow keys to select CI...

Page 46: ...odule and smart card are compatible with each other The device can be operated with CI capable modules Which channels and contents are enabled depends on the CI module and Smart card used Note that no...

Page 47: ...Select the desired drive and press the OK button to display the file and directory list or press the BACK button to return to the media selection menu 18 2 Photo and Video playback Press the button a...

Page 48: ...EN DYON SMART 43 X EOS 48 18 3 Music playback Press the button and select Music by using the buttons and press the OK button Now select the desired music file...

Page 49: ...used and you do not want to use a module please change the transmitter Check whether the module is inserted correctly Restart the device Error code 17 The module used is not suitable or configured fo...

Page 50: ...an unused reception path has been selected or the station search has not been completed successfully Check the input source using the SOURCE button Check the antenna cable In TV mode press the OK but...

Page 51: ...ar motorcycle fluorescent light Normal Picture Mute Volume check if mute is activated or if the audio system connections are not correct No picture Mute Power cord is not inserted Power switch is not...

Page 52: ...30 MHz UHF 470MHz 606 MHz Input Impact 75 Transmitter Bandwidth 7MHz 8MHz Modulation DVB T COFDM 2K 8K QPSK 16QAM 64QAM DVB S S2 QPSK 8PSK DVB T2 QPSK 16QAM 64QAM 256QAM DVB C 16QAM 32QAM 64QAM 128QAM...

Page 53: ...ormation about the energy efficiency of this device according to EU regulation EU 2019 2013 can be found on the following website of the European Union from 1st of March 2021 To open please scan the f...

Page 54: ...T40 17 8 Disposal This symbol on the product or in the instructions means that your electrical and electronic equipment should be disposed at the end of life separately from your household waste There...

Page 55: ...amplifies them simultaneously Mute Key of the remote control for turning off sound OSD On screen display Menu control displayed on the screen PID Identification number of a received data stream The PI...

Page 56: ...re is no warranty obligation in the event of marginal differences compared to the target appearance and workmanship provided these have a negligible effect on the product s fitness for use in the even...

Page 57: ...t liable for data loss from clients devices that are sent in Axdia reserves the right to restore the factory settings on devices that are sent in Please therefore make a note of your personal settings...

Page 58: ...ranty obligations in accordance with the warranty conditions and will return the product to the sender with carriage and insurance paid Service outside of warranty AXDIA can refuse any service claim m...

Reviews: