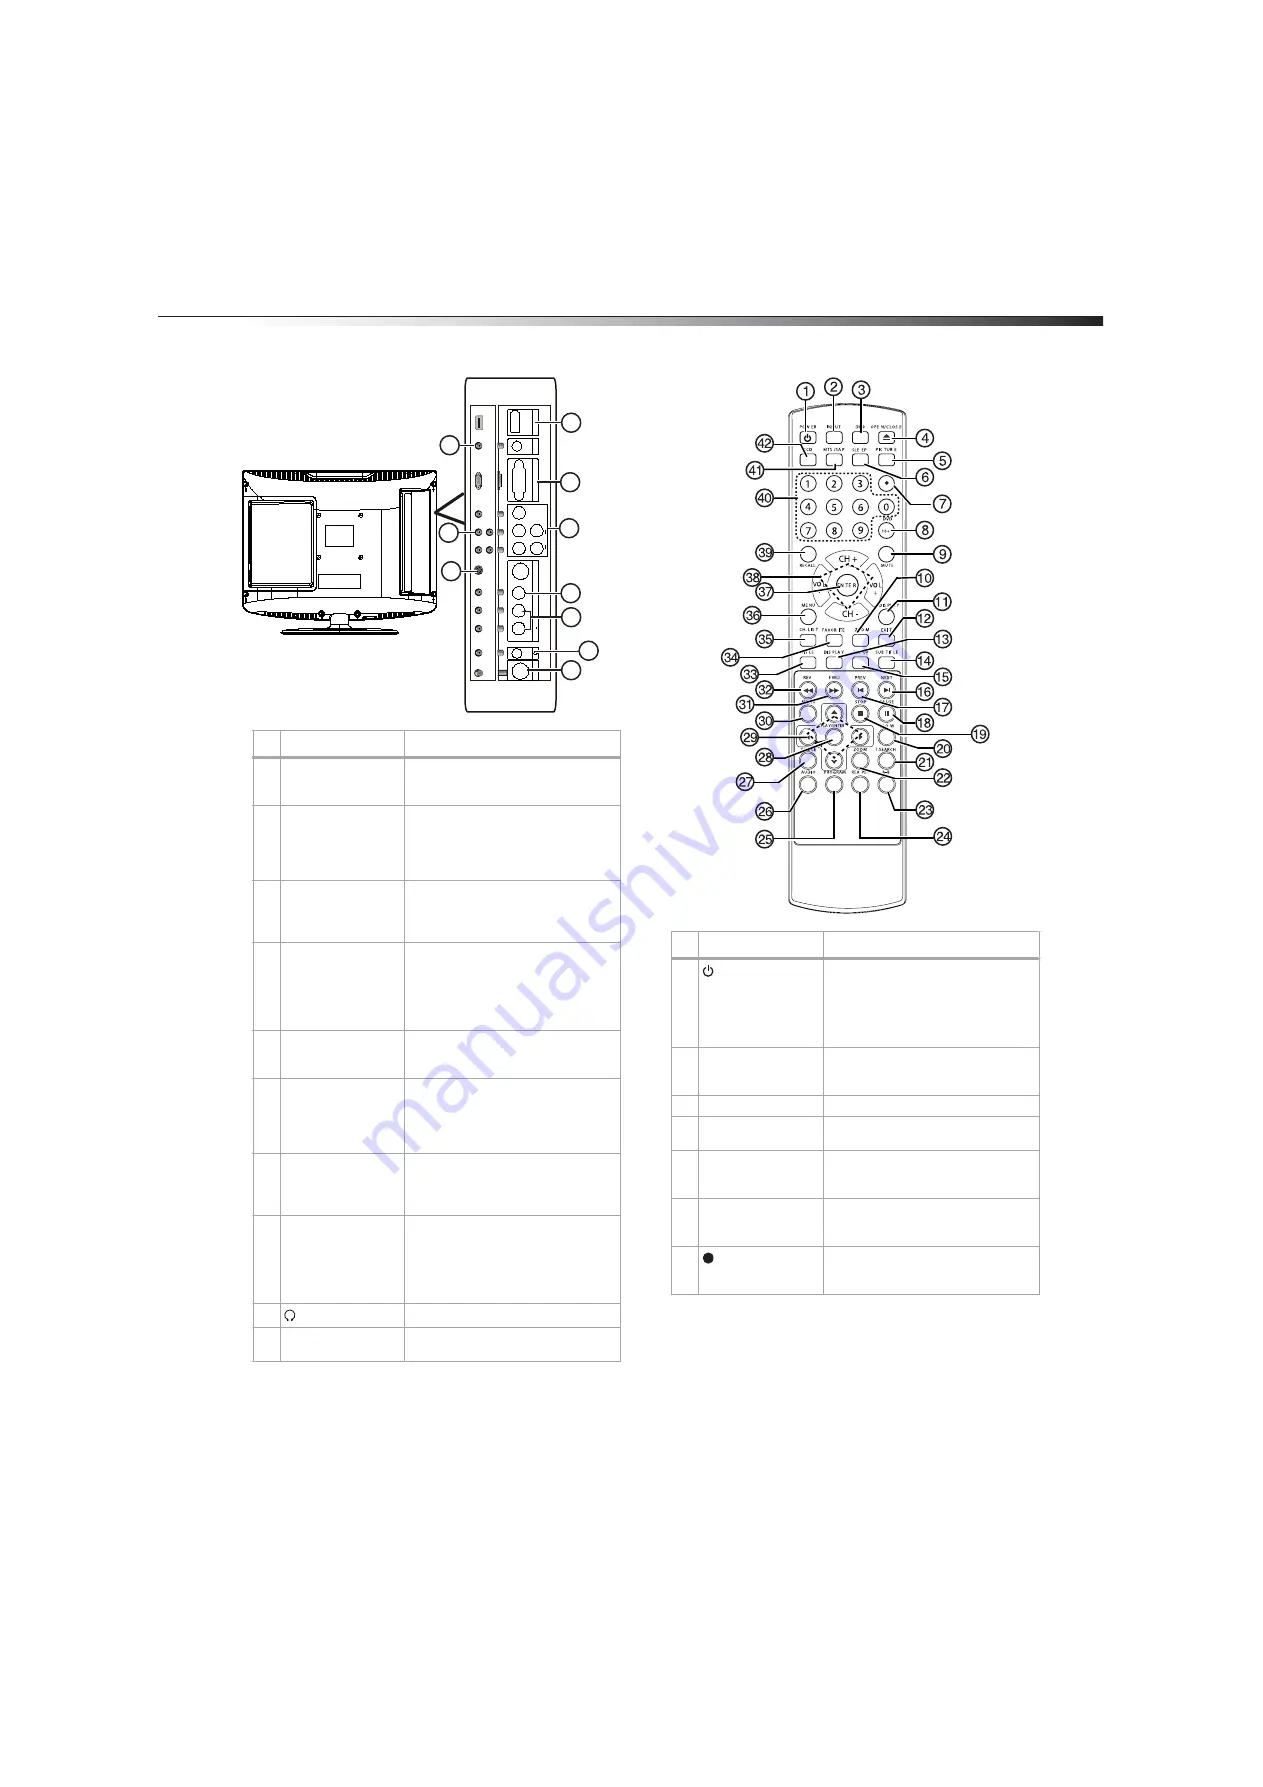
TV/DVD combo components
7
Back
Remote control
#
Jack
Description
1
PC AUDIO IN
Connect the audio for a computer to
this jack. For more information, see
“Connecting a computer” on page 12.
2
Pr, Pb, Y
Connect the video for a component
video device to these jacks. For more
information, see “Connecting a
component video device” on page
11.
3
S-VIDEO
Connect an S-Video device to this
jack. For more information, see
“Connecting a VCR with an S-Video
cable” on page 11.
4
HDMI
Connect an HDMI device to this jack.
An HDMI cable carries both video and
audio. You do not need to make an
additional audio connection. For
more information, see “Connecting
an HDMI device” on page 11.
5
VGA IN
Connect the video for a computer to
this jack. For more information, see
“Connecting a computer” on page 12.
6
R and L AUDIO
Connect audio for a component
video device to these jacks. For more
information, see “Connecting a
component video device” on
page 11.
7
VIDEO IN
Connect a standard AV device to this
jack. For more information, see
“Connecting a VCR with a standard
AV cable” on page 10.
8
R and L AUDIO
Connect the audio for an S-Video or
standard AV device to these jacks. For
more information, see “Connecting a
VCR with an S-Video cable” on page
11 or “Connecting a VCR with a
standard AV cable” on page 10.
9
(headphone)
Connect headphones to this jack.
10
ANT IN
Connect a TV antenna or cable TV to
this jack.
P
r
Pb
Y
AU
DIO
R
L
S
-V
IDE
O
RA
U
DI
O
INL
V
ID
EO
IN
ANT
IN
VG
A
IN
P
C
AUD
IOI
NH
DMI
10
9
8
7
3
2
6
5
1
4
#
Button
Description
1
POWER
Press to turn on your TV/DVD combo
or to put it in standby mode. When
your TV/DVD combo is in standby
mode, power is still flowing into your
TV/DVD combo. To disconnect all
power, unplug the power cord.
2
INPUT
Press to select the video input source.
For more information, see “Selecting
the video input source” on page 13.
3
DVD
Press to switch to DVD mode.
4
OPEN/CLOSE
Press to eject the disc from the disc
slot.
5
PICTURE
Press to select the picture mode. For
more information, see “Selecting the
picture mode” on page 14.
6
SLEEP
Press to set the sleep timer. For more
information, see” Setting the sleep
timer” on page 15.
7
Press to select a digital sub-channel.
For more information, see “Changing
TV channels” on page 13.
Summary of Contents for DX-LTDVD19-09
Page 1: ...USER GUIDE 19 LCD TV DVD Combo DX LTDVD19 09 ...
Page 26: ...26 Legal notices ...
Page 27: ......


