BlueWave
®
200 Version 3.0 User Guide
UV Light-Curing Spot Lamp System
■
Instructions for Safe Use
Setup and Operation
Maintenance
Ordering Spare Parts and Accessories
Page 1: ...BlueWave 200 Version 3 0 User Guide UV Light Curing Spot Lamp System Instructions for Safe Use Setup and Operation Maintenance Ordering Spare Parts and Accessories ...
Page 2: ...low for 100 in line inspection and increase throughput System designs enable stand alone configuration or integration into your existing assembly line Please note that most dispensing and curing system applications are unique Dymax does not warrant the fitness of the product for the intended application Any warranty applicable to the product its application and use is strictly limited to that cont...
Page 3: ...00 On 12 Setting an Operating Mode 13 Introduction to Operating Modes 13 Choosing an Operating Mode 13 Operating in Manual Mode 17 Manual Mode Description 17 Procedure 17 Operating in Timer Mode 18 Timer Mode Description 18 Procedure to Adjust Timer 18 Operating in PLC Mode 20 PLC Mode Description 20 Start Up Screen for PLC Mode 20 Using the PLC Switch 21 Wiring the PLC Interface 23 PLC Front Pane...
Page 4: ...ng 31 Frequently Asked Questions 32 Diagnostic Display 33 Spare Parts and Accessories 34 Spare Replacement Parts 34 Options Accessories 34 Specifications 35 System Specifications 35 Bulb Spectral Output 36 Definition of Terms 37 Warranty 38 Replacement Bulb Warranty 38 Index 39 ...
Page 5: ... you use this UV light curing system without first reading and understanding the information in this user guide injury can result from exposure to high intensity UV light To reduce the risk of injury read and ensure you understand the information in this user guide before assembling and operating the Dymax BlueWave spot lamp To use this system safely it must be set up and operated in accordance wi...
Page 6: ...d bulbs have been designed to primarily emit UVA light Figure 1 UVA light is generally considered the safest of the three UV ranges UVA UVB and UVC Although OSHA does not currently regulate ultraviolet light exposure in the workplace the American Conference of Governmental Industrial Hygienists ACGIH does recommend Threshold Limit Values TLVs for ultraviolet light The strictest interpretation of t...
Page 7: ...so desired These rigid plastic films are water clear or tinted Flexible Film UV blocking flexible urethane films can be used to quickly create workstation shielding This UV blocking flexible urethane film is available from Dymax call for assistance High Temperature Surfaces Surfaces exposed to high intensity curing lights will rise in temperature The intensity distance exposure time cooling fans a...
Page 8: ... a control loop is provided to keep the lamp housing and internal components of the power supply at the optimum operating temperature The cooling fan must not be covered or otherwise blocked Ideal operation of this equipment suggests at least 12 305 mm of clearance behind the system for proper ventilation Confirm that the intake fan is not feeding from the exhaust of other equipment The UV source ...
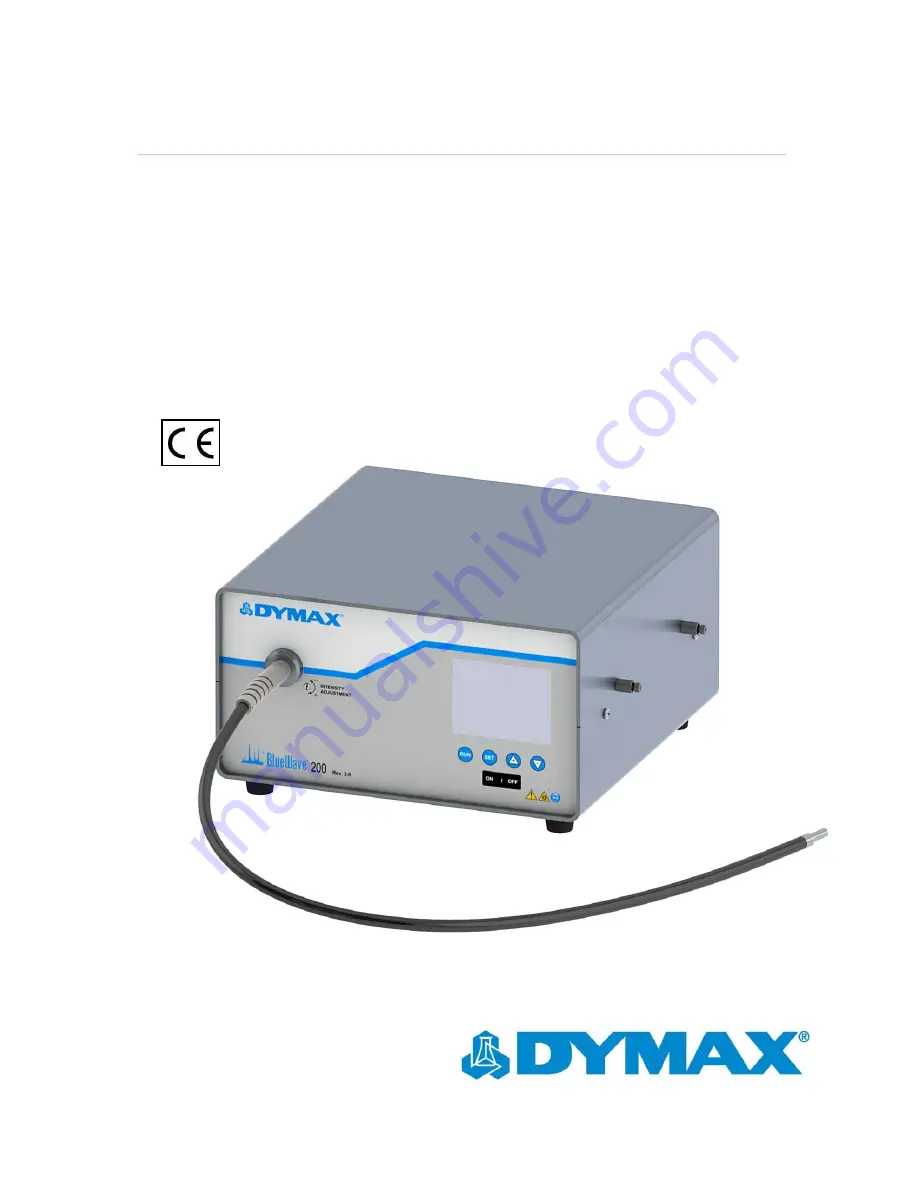
Page 9: ...ur order match those listed below If parts are missing contact your local Dymax representative or Dymax Customer Support to resolve the problem NOTE Lamps are shipped with the bulb reflector installed Figure 2 BlueWave 200 Rev 3 0 Components Parts Included with the BlueWave 200 Spot Lamp BlueWave 200 Rev 3 0 Spot Lamp 1 Power Cord 2 41015 North American Version with 115V Power Cord 41014 Asian Ver...
Page 10: ...ds of a Dymax liquid filled Lightguide can be cleaned with isopropyl alcohol as required to remove foreign material and deposition from outgassing 5 Insert the large end of the Lightguide into the Lightguide Mount until it snaps into place Figure 5 A Lightguide Seated Indicator Icon will illuminate when the Lightguide is properly installed and the BlueWave 200 is turned on WARNING Engage the Light...
Page 11: ...ex Wrench Becoming Familiar with the Controls There are 4 simple controls which can adjust all features of the BlueWave 200 Figure 7 Figure 7 Front Panel Controls LCD Display Displays operating mode menus settings instructions and special messages Bulb On Button Pressing this button turns the bulb on except in PLC Mode Bulb Off Button Pressing this button turns the bulb off In PLC Mode a press sto...
Page 12: ...ve 200 up for PLC operation according to the instructions in Operating in PLC Mode Page 20 the bulb will be controlled by the PLC and the starting screens will be slightly different See Start Up Screen for PLC Mode Page 20 Figure 8 Back Panel On Off Switch Figure 9 Product Configuration Screen 3 Turn on the internal UV Bulb by pressing the On Button located on the front panel CAUTION This is an ar...
Page 13: ... foot pedal and run button are released the shutter closes and no UV light passes through the lightguide Timer Mode The shutter opens for a specific time period each time the foot pedal or run button is pressed You must set the specific time by adjusting the timer s value on the screen Momentarily pressing the foot pedal or run button starts the timer and opens the shutter When the shutter is open...
Page 14: ... Use the or Arrows to select TIMER MODE TIMER MODE will flash when it has been selected Figure 12 3 Press and release the Button 4 The BlueWave 200 will show the Adjust Timer Menu with the last used timer value Figure 11 If the value on the timer is correct then simply press the Button If the value needs to be changed press the or Arrows to correct the Timer s value Press and release the Button af...
Page 15: ...utton down for a long enough time Use the and Arrows to select CANCEL and press the Button No changes are made and you can try again 3 Use the and Arrows to select PLC MODE When selected PLC MODE will flash 4 Press and release the Button The screen should look like Figure 16 NOTE If the PLC Switch was not set correctly the screen in Figure 17 will appear Turn off the BlueWave and refer to Using th...
Page 16: ...he PLC Switch Page 20 2 Press and hold the Button until the screen changes to Figure 21 NOTE If you do not see PLC MODE on the screen then you did not hold the button down for a long time Use the and Arrows to select CANCEL and press the Button No changes are made and you can try again 3 Use the and Arrows to select PLC MODE It will flash when selected 4 Press and release the Button The screen sho...
Page 17: ...en the shutter is open UV light passes through the lightguide The shutter remains open only as long as the foot pedal or run button is pressed When the foot pedal and run button are released the shutter closes and no UV light passes through the lightguide We recommend you follow the instructions in Setting the Intensity Page 27 Procedure CAUTION Always wear protective goggles or a face shield when...
Page 18: ...hutter closes Once the exposure cycle is completed the timer is automatically reset to the value that you set The BlueWave 200 is immediately ready to accept another foot pedal or run button press to open the shutter NOTE A timed exposure can be interrupted with the Foot Pedal or the Button on the front panel We recommend you follow the instructions in Setting the Intensity Page 27 periodically Pr...
Page 19: ...ause the Lightguide End to become cloudy from vapors coming off the curing material This cloudiness can reduce UV output by as much as 50 9 Press the Foot Pedal or the Button on the front panel to start the Timer NOTE An exposure cycle can be cancelled at anytime by momentarily pressing the Button or Foot Pedal If the Lightguide is not inserted the Shutter will not open The LCD Screen will display...
Page 20: ...machinery when the BlueWave 200 becomes ready or perhaps start the BlueWave 200 when other machinery is ready The Input Signals and Output Signals are present on a special connector on the back of the BlueWave 200 NOTE Output Signals are always provided in Manual Mode and Timer Mode to allow simple interfacing to alarms counters other interlocks etc even if a PLC will not be controlling the BlueWa...
Page 21: ...removed Then the Inner Cover must be removed After the Switch is located and set to the intended position both the Inner and Outer Covers must be replaced CAUTION Always unplug the unit before opening the Cover Locating the PLC Switch 1 Loosen the four Screws on the Outer Cover and remove it Figure 31 2 Remove the four Screws on the Inner Cover and remove it Figure 31 3 Locate the PLC Switch Figur...
Page 22: ...h see below and replace the Inner and Outer Covers Adjusting the PLC Switch When Switch 2 is moved towards the back panel PLC Mode is enabled PLC Mode can be activated from front panel key presses When Switch 2 is moved towards the front panel PLC Mode is disabled Figure 33 Figure 33 Dip Switch Setting ...
Page 23: ...er supply and also the return for all output signals Remote Shutter Activate 3 When asserted this signal will cause the shutter to open if 1 The lightguide is fully inserted 2 The bulb is Ready 3 The BlueWave 200 is operating without faults 4 The remote shutter inhibit signal is not asserted 5 The PLC remote enable signal is asserted 6 The BlueWave 200 is in PLC Mode 7 The BlueWave 200 has power a...
Page 24: ...the shutter mechanism and the BlueWave 200 cannot operate normally Temperature Fault Detected 10 When asserted this signal means the unit is too hot or too cold or cannot read its temperature sensor The BlueWave 200 cannot operate normally 1 950 Hour Warning 11 When asserted the bulb has been operating for 1 950 hours or more and a replacement will be needed soon The BlueWave 200 can operate norma...
Page 25: ...Diagram 24VDC POWER SUPPLY BLUEWAVE 200 PLC INTERFACE 24VDC 24VDC RETURN 2000 Ω USE ONLY THE SIGNALS REQUIRED BY THE PLC PROGRAM FROM PLC 10000 Ω TO PLC 3 4 5 6 7 8 9 10 11 12 13 14 15 Connector Pin Out The PLC Connector pin numbers are shown in Figure 35 below Figure 35 Connector Pin Out 1 2 ...
Page 26: ...ming and wiring Table 2 Table 2 LCD Indications and Input Signal States Signal Text On LCD Screen Signal State Remote PLC Enable PLC Enable In Yes Asserted PLC Enable In No Un Asserted Remote UV Lamp Control PLC Bulb In Yes Asserted PLC Bulb In No Un Asserted Remote Shutter Activate and Remote Shutter Inhibit PLC Shutter In Closed Remote Shutter Inhibit is Un Asserted Remote Shutter Activate is Un...
Page 27: ... the Shutter open adjust the Intensity Adjustment Screw as required to achieve the desired output intensity Figure 37 Adjust Intensity with a Tool or the Removable Knob Setting Up the Curing Process Methods Prior to production Dymax advises customers to conduct testing to determine the time and intensity required to fully cure their resin in their specific application Typically users validate by o...
Page 28: ...g the BlueWave 200 The BlueWave 200 was designed to operate with minimum maintenance Typically the Bulb must be replaced after it has operated for 2 000 hours Bulb Replacement Warning As the Bulb nears the end of its 2 000 hour life the LCD Display will begin flashing the Bulb Hours The 1 950 Hour Warning output on the PLC connector also becomes asserted Bulb Replacement Procedure 1 Bulb replaceme...
Page 29: ...e sure that the center Electrode connecting the Bulb to the wire from the Reflector is parallel to the bottom of the system Figure 40 Bulb Figure 41 Installed Bulb 7 Plug in and turn on the BlueWave 200 Press and release the red Reset Button on the back of the BlueWave 200 Figure 42 This completes Bulb installation When the BlueWave 200 is turned on the Bulb will now ignite and is now reset to ope...
Page 30: ...ueWave 200 Spare Fan Filters are provided with each BlueWave 200 and with replacement Bulbs The Fan Filters are washable and may be reused Remove the Fan Filter by removing the snap on cover from the rear of each grill Figure 43 Intake Fan with Fan Filter Removed Fuse Replacement The BlueWave 200 has two Fuses that are installed in the Power Receptacle To remove the Fuses unplug the BlueWave 200 a...
Page 31: ...00 operates Remove the Fuse from the Power Receptacle and check it with an Ohmmeter Replace the Fuse if defective Low Output Intensity or Fails To Cure Adhesive In Allotted Time Bulb beyond useful life Use a Radiometer ACCU CAL 50 or equivalent to measure output intensity Replace the Bulb Reflector assembly if beyond useful life typical 2 000 hours Transmission loss in Lightguide too great Compare...
Page 32: ...be fully seated into the Lightguide Mount The end of the Lightguide may have a build up of adhesive Carefully remove with isopropyl alcohol or use a razor blade for heavier deposits The condition of the Lightguide will also affect the intensity All Lightguides degrade with time but intensity will also drop if the Lightguide is bent or compressed The intensity reading from the Lightguide should be ...
Page 33: ...e the Fan Filter Media on the Intake vent located in the back of the equipment This is your first line of defense against airborne dust and debris Ideal operation of this equipment suggests at least 12 of clearance behind the BlueWave 200 for proper ventilation Confirm that the Intake Fan is not feeding from the exhaust of other equipment Equipment may already be full of dust and debris Diagnostic...
Page 34: ...Number Lightguides Lightguide Simulator 38408 Liquid D Lightguide 5 mm x 1 Meter 5720 Liquid D Lightguide 5 mm x 1 5 Meter 5721 Liquid D Lightguide 8 mm x 1 Meter 5722 Liquid D 2 Pole Lightguide 3 mm x 1 Meter 38476 Liquid D 3 Pole Lightguide 3 mm x 1 Meter 38477 Liquid D 4 Pole Lightguide 3 mm x 1 Meter 38478 Fiber Optic 2 Pole Lightguide 3 mm x 1 Meter 39783 Fiber Optic 3 Pole Lightguide 3 mm x ...
Page 35: ...ivate shutter deactivate lamp control PLC enable Outputs Unit status temperature fault shutter fault lamp status power status shutter status lightguide status bulb life warning bulb life expired Cooling Filtered single fan arrangement thermally controlled to maintain proper lamp temperature Operating Conditions Temperature range 0 40 C humidity limit non condensing Display LCD monochromatic 320 by...
Page 36: ...ser Guide Bulb Spectral Output Figure 48 200W Bulb Spectral Chart UV Spectral Output 0 1 2 3 4 5 6 282 305 328 352 375 398 421 444 467 489 512 535 558 580 603 625 647 Wavelength Intensity Dual Filter No Filter Black Light Standard Filter ...
Page 37: ...0 nm Dymaxbulbs burners do not radiate energy in deep ultraviolet there are very minute amounts below 220 nm and practically nothing can be sensed below 200 nm This is due to the use of ozone blocking quartz Bulb Envelope See Ozone 1 Ultraviolet A UV A UV of long wavelength from within approximately 400 to 320 nm of the spectral band 4000 to 3200 predominately produced by Dymax Flood Lamps 2 Ultra...
Page 38: ...by Dymax Corporation will void any effective warranties and may result in damage to the equipment Replacement Bulb Warranty If the Bulb fails to ignite during the warranty period of 2 000 hours and all Bulb history cards for a specific BlueWave 200 have been returned to Dymax the Bulb will be replaced under warranty IMPORTANT NOTE DYMAX CORPORATION RESERVES THE RIGHT TO INVALIDATE ANY WARRANTIES E...
Page 39: ...de 13 Timer Mode 18 Turning on the Unit 12 Operation Modes 13 Optional Equipment 34 Parts Included 9 PLC Mode 20 Front Panel Emergency Stop 26 Wiring the PLC Interface 23 Product Overview 8 Safety 5 Safety of UV Light Bright Visible Light 7 High Temperature Surfaces 7 Ozone 7 UV Exposure 6 Set Up 10 Spare Parts and Accessories 34 Specifications 35 Bulb Spectral Output 36 Support 5 System Settings ...
Page 40: ...equipment trial rental and leasing programs to assist in such testing and evaluations Data sheets are available for valve controllers or pressure pots upon request PN 41017 MAN050 7 25 2013 Dymax Corporation 1 860 482 1010 info dymax com www dymax com Dymax Oligomers Coatings 1 860 626 7006 info_oc dymax com www dymax oc com Dymax Asia H K Limited 852 2460 7038 dymaxasia dymax com www dymax com cn...