EN
1905V003
9000-606-31/30
Installation and operating instructions
VSA 300 S
0297
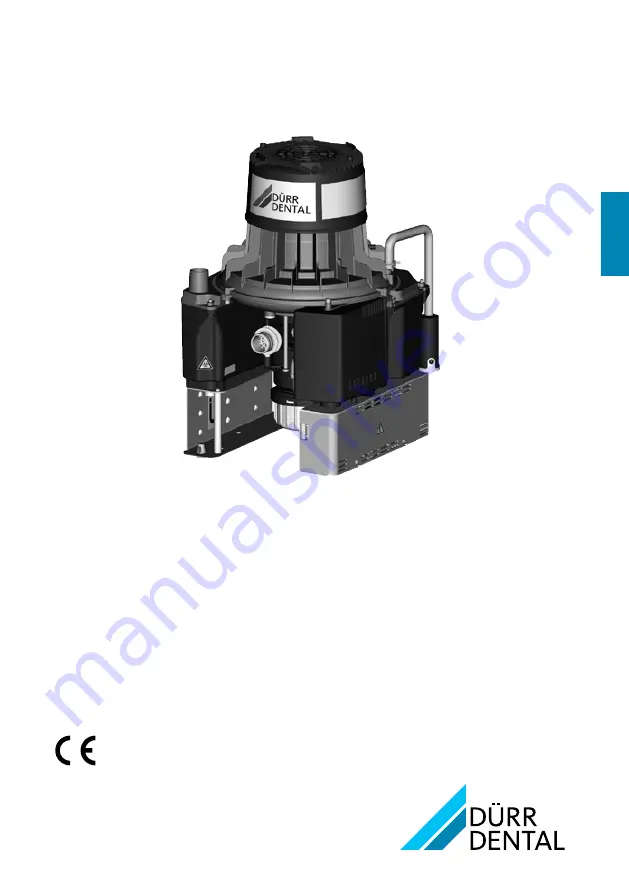
Page 1: ...EN 1905V003 9000 606 31 30 Installation and operating instructions VSA 300 S 0297 ...
Page 2: ......
Page 3: ...etwork 23 10 Adjustment options 25 10 1 Setting the afterrun delay time 25 11 Service program 26 12 Description of the service program 27 12 1 Service program ON OFF 27 12 2 Display test 27 12 3 Sediment level measurement 27 12 4 Motor start motor braking 27 12 5 Input and output signals 27 EN Contents Important information 1 About this document 3 1 1 Warnings and symbols 3 1 2 Copyright informati...
Page 4: ...ng the unit via the network 29 14 1 Monitoring operation 29 14 2 Querying messages 29 14 3 Creating a report 30 15 Disinfection and cleaning 30 15 1 After every treatment 30 15 2 Daily after the end of treatment 31 15 3 Once or twice a week before the midday break 31 16 Replace the amalgam collector vessel 31 16 1 Disposal of amalgam collecting container 32 17 Maintenance 33 17 1 Tests 34 Troubles...
Page 5: ...information in these installation and operating instruc tions are not followed Dürr Dental will not be able to offer any warranty or as sume any liability for the safe operation and the safe functioning of the unit 1 1 Warnings and symbols Warnings The warnings in this document are intended to draw your attention to possible injury to persons or damage to machinery The following warning symbols ar...
Page 6: ... unshielded plug connections on the device at the same time i i Replace any damaged cables or plugs imme diately 2 Safety Dürr Dental has designed and constructed this unit so that when used properly and for the in tended purpose it does not pose any danger to people or property Nevertheless residual risks can remain You should therefore observe the following notes 2 1 Intended purpose The suction...
Page 7: ...onics plastic and metal parts etc should be disposed of in accordance with the local waste disposal reg ulations i i If you have any questions about the correct disposal of parts please contact your dental trade supplier Observe the EMC rules concerning medical devices i i The unit is intended for use in professional healthcare facilities in accordance with IEC 60601 1 2 If the appliance is operat...
Page 8: ...rey Hose LW 20 Hose LW 30 aluminium Disposable amalgam container Installation and operating instructions Operating Handbook OroCup 3 2 Accessories The following items are required for operation of the device depending on the application Rinsing unit conversion set for VSA 300 S 7100 120 51 Rinsing unit II 7100 250 50 3 3 Optional accessories The following optional items can be used with the device...
Page 9: ... Usable volume of collecting container ap prox ccm 150 Replacement interval Months 6 9 Max unimpeded flow rate l min 670 770 Max suction system pressure mbar hPa 180 190 Flow rate min max l min l min 0 1 4 Max suction height cm 50 General data Speed min 1 2750 3120 Duty cycle 100 S1 Dimensions H x W x D cm 48 x 31 x 31 Weight approx without housing with housing kg kg 14 21 5 Noise level approx wit...
Page 10: ...y connection CISPR 11 2015 AMD1 2016 Group 1 Class B Electromagnetic interference radiation CISPR 11 2015 AMD1 2016 Group 1 Class B Emission of harmonics IEC 61000 3 2 2018 Compliant Voltage changes voltage fluctuations and flicker emis sions IEC 61000 3 3 2013 AMD1 2017 Compliant Electromagnetic compatibility EMC Interference immunity measurements cover Immunity to interference discharge of stati...
Page 11: ...RS 460 FRS 460 430 470 28 LTE band 13 17 704 787 9 GSM 800 900 TETRA 800 iDEN 820 CDMA 850 LTE band 5 800 960 28 GSM 1800 CDMA 1900 GSM 1900 DECT LTE band 1 3 4 25 UMTS 1700 1990 28 Bluetooth WLAN 802 11 b g n RFID 2450 LTE band 7 2400 2570 28 WLAN 802 11 a n 5100 5800 9 Electromagnetic compatibility EMC Interference immunity measurements supply input Immunity to interference rapid transient burst...
Page 12: ...munity to interference due to voltage dips short inter ruptions and voltage variations IEC 61000 4 11 2004 AMD1 2017 Compliant Electromagnetic compatibility EMC Interference immunity measurements SIP SOP Immunity to interference rapid transient bursts I O SIP SOP ports IEC 61000 4 4 2012 1 kV 100 kHz repetition frequency Compliant Immunity to interference line conducted disturbances induced by hig...
Page 13: ...on of conformity This device has been subjected to conformity acceptance testing in accordance with the cur rent relevant European Union guidelines This equipment conforms to all relevant require ments 4 3 Approvals Centre of Competence in Civil Engineering Berlin Test number Z 64 1 15 Separation method compliant with stand ard ISO 11143 Type 1 EN ...
Page 14: ...e aspirated fluids and solid particles pass through a two stage separation system and are separated from the suction air This separation system consists of a cyclone separa tor and a separation turbine The aspirated mixture flows into the cyclonic separator where it is set into a spiral motion In this first stage the resulting centrifugal forces force the fluid constituents and any remaining solid...
Page 15: ... collector vessel easier A pump connected to the centrifuge keeps the fluid level constant in the collecting container This prevents accidental overflow when replacing the collecting container The air separated from the liquid is sucked off by the vacuum pressure generated by the turbine wheel The air is then blown through the noise reduction hood and over the exhaust air connection and out of the...
Page 16: ...ry The following types of hoses must not be used Rubber hoses Hoses made completely of PVC Hoses that are not sufficiently flexible 6 Requirements The unit can be installed on the same level as the surgery room or in a floor below Further information can be found in our suction planning information leaflet Order number 9000 617 03 6 1 Installation setup room The room chosen for set up must fulfil ...
Page 17: ... or from the unit at a sufficient incline If incorrectly laid the hoses can be come blocked with sedimentation 6 7 Information about electrical connections i i Ensure that electrical connections to the mains power supply are carried out in accord ance with current valid national and local reg ulations and standards governing the installa tion of low voltage units in medical facilities i i Install ...
Page 18: ...rected into the suction pipe a spittoon valve needs to be installed between the drain of the spittoon bowl and the suction pipe The spittoon valve must switch on the suction machine if required 7 3 Flow accelerator In order to keep the suction system free of de posits a flow accelerator can be fitted in con junction with a spittoon valve When using a bowl rinse system water will collect before the...
Page 19: ...tion between the pipe line and unit suction connection should be kept as short as pos sible and straight without bends i i Install the drain hoses with a downward gradient so that the waste water can drain off i i Waste water connections must be implemented in accordance with applicable local and national regulations 2 3 2 1 5 4 6 5 1 2 12 2 1 5 13 11 14 11 13 10 9 8 7 5 1 Hose connector 30 mm 2 H...
Page 20: ...18 9000 606 31 30 1905V003 Assembly 11 Hose clip 28 mm 12 Suction hose 30 mm internal 13 Hose sleeve 14 Waste water hose 20 mm internal EN ...
Page 21: ...eeve piece double tapered ring and locking nut onto the rinsing unit i i Apply the T piece for Tecalan water hose with 4 mm or 6 mm in the water supply i i Apply the Tecalan hose with sleeve piece double tapered ring and locking nut to the T piece i i Alternatively apply the Tecalan hose with adapter piece seal R3 4 screw connection sleeve piece double tapered ring and locking nut onto a water tap...
Page 22: ...2 24V output voltage and switching contact to suction unit in the treatment unit X3 Display panel X4 Sediment sensor light barriers X5 Sediment sensor lifting magnet X6 Collecting container safety switch X7 Motor connection X8 Mains connection X9 Network connection X12 Ground contact to the unit housing X13 Display panel X16 SD card holder for Micro SD X18 Connection of the hall sensor for monitor...
Page 23: ... container safety switch X7 Motor connection X8 Mains connection X9 Network connection X10 Diagnosis X12 Ground contact to the unit housing X13 Display panel X16 SD card holder for Micro SD X17 JTAG programming interface X18 Connection of the hall sensor for monitoring the speed X20 Ground contact to the unit housing F1 Main fuse F2 Brake fuse F3 Main fuse H1 Rinsing unit H2 Display green as with ...
Page 24: ...the network con nection on the unit optional when using moni toring software i i Plug in the network cable at the network socket 1 1 Network cable 8 5 Display panel connection There must be a direct line connecting the network socket on the unit and the network socket on the display panel Do not toggle network units e g switch or router Observe the resistance of the network cable between the netwo...
Page 25: ...h or fillings i i Do not operate the unit without a coarse filter i i Check that the coarse filters are installed in the suction system e g in the spittoon i i Turn on the unit power switch or the main sur gery switch i i Carry out a function check of the device i i Check all connections for leak tightness i i Carry out an electrical safety check in accord ance with applicable regulations e g regu...
Page 26: ...ange the position of the device block click on the block and with the mouse key pressed drag it to the required location Add device Connection icons The unit is present in the network and connected to the software The unit is present in the network but not connected to the software The network connection between the software and the unit has been interrupt ed e g the device is switched off Require...
Page 27: ...f devices The block with the current button parame ters and the name of the device appear in the Contents area i i Use the and buttons to adjust the time in increments of 1 s Manually starting the device Manually starting the device for testing Requirements Service technician access level selected i i Select the device in the device list i i Click on the Start button with the left mouse key on som...
Page 28: ...26 9000 606 31 30 1905V003 Assembly 11 Service program 1 2 3 4 amalgamrecycling DÜRR DENTAL EN ...
Page 29: ... panel If a start signal is applied to socket X2 lift out the suction hose on the hose manifold the green LED illuminates on the display panel 12 Description of the service program Wear protective equipment to avoid any risk of infection e g liquid tight protec tive gloves protective goggles face mask The various unit functions can be checked with the aid of the service program The individual prog...
Page 30: ...container Switch on the unit Green LED lights up Ready for operation If this error message occurs when the collecting container is correctly inserted this indicates that there is a technical de fect inform your Service Technician 13 Display handling 1 2 4 3 5 1 GREEN LED 2 RED display 3 Audible signal melody 4 Reset service key 5 YELLOW LED 13 1 Ready for operation GREEN LED lights up 13 2 Amalgam...
Page 31: ...pted If a message occurs for an device the symbol next to the device in the side bar changes The message appears in the cockpit and in the de vice details 13 5 Motor fault Red display and green LED flash alternately Audible signal Occurs during the start up of the amal gam separator Press the reset button briefly to switch off the audible signal If the reset button is pressed for longer than 2 sec...
Page 32: ...n systems 15 1 After every treatment i i Aspirate a glass of cold water through the large and the small suction hoses Do this even if only the small suction hose was actual ly used during treatment Suction through the large suction hose causes a large amount of air to be drawn up thereby considerably in creasing the cleaning effect If several messages occur the symbol of the highest message level ...
Page 33: ...d amalgam collecting container into its original packaging and seal i i Insert a new amalgam collecting container in the unit and lock it in position with the vessel lift Only use original amalgam collecting container i i Switch on the power supply The unit is ready for operation again 15 2 Daily after the end of treatment After higher workloads before the midday break and in the evening The follo...
Page 34: ... the amalgam collecting container are contaminated with heavy metals and must not be disposed of as household waste or the environment Collection and waste disposal by a waste management company specialised in surgery waste Collection and waste disposal by an approved waste management company EN ...
Page 35: ... of the device i i Replace the amalgam collecting container when a fill level of 95 or 100 is indicated on the display panel Notes concerning prophy powders The amalgam separator is not functionally affected by conventional prophy powders Under certain circumstances however increased soiling of lines and hoses and a more frequent changing of the amalgam collecting con tainer can be expected Annual...
Page 36: ...andbook This op erating handbook must document all maintenance work service work checks and amalgam disposal Annual inspection This inspection should only be carried out by suitably trained staff Work steps to be performed i i General functional check e g aspiration spit toon inlet i i During the sediment fill level measurement visually inspect the operability of the sediment sensor i i Service pr...
Page 37: ...trician if necessary Control electronics defective i i Replace the electronics Motor fault Rotational speed sensor not working i i Check that the Hall sensor is correctly seated i i Check the plug connections of the sensor cable i i Check the magnets in the fan wheel The unit generates unusu al noises Solid particles in the turbine chamber i i Disassemble the unit and clean the turbine and housing...
Page 38: ... blocked i i Clean the coarse filter at the intake connection Leak in the suction line i i Check and if necessary establish leak tightness of suction system and connections Mechanical sluggishness of tur bine caused by soiling i i Disassemble the unit and clean the turbine Only to be done by service technicians EN ...
Page 39: ...s protective goggles face mask i i Before disassembly clean and disinfect the suction unit and the unit using a suitable disin fectant approved by Dürr Dental i i Disinfect a defective unit using a suitable sur face disinfection agent i i Seal all connections with sealing caps i i Pack the unit securely in preparation for trans port 1 2 3 4 1 Suction connection sealing caps 2 Water outflow sealing...
Page 40: ......
Page 41: ......
Page 42: ......
Page 43: ......
Page 44: ...Hersteller Manufacturer DÜRR DENTAL SE Höpfigheimer Str 17 74321 Bietigheim Bissingen Germany Fon 49 7142 705 0 www duerrdental com info duerrdental com ...