95
7. User Supportware
Step 2: Connect the projector to a LAN.
Connect the projector to the LAN by following the instructions in “Connecting to a Wired LAN” (
→
) and “Con-
necting to a Wireless LAN (Optional: NP05LM
)” (
→
page
81
).
Step 3: Start Image Express Utility Lite.
1. On Windows, click “Start”
→
“All programs”
→
“NEC Projector UserSupportware”
→
“Image Express Utility
Lite”
→
“Image Express Utility Lite”.
Image Express Utility Lite will start.
The select window for network connection will be displayed
2. Select Network and click “OK”.
The select window for destination will show a list of connectable projectors.
• When connecting the computer directly to the projector by one-to-one, “Simple Access Point” is recommended.
• To check for the network available for connected projectors, from the menu, select [INFO.]
→
[WIRELESS LAN]
→
[SSID].
3. Place a check mark for projectors to be connected, and then click “Connect”.
• When one or more projectors are displayed, from the menu on the projector, select [INFO.]
→
[WIRELESS LAN]
→
[IP ADDRESS].
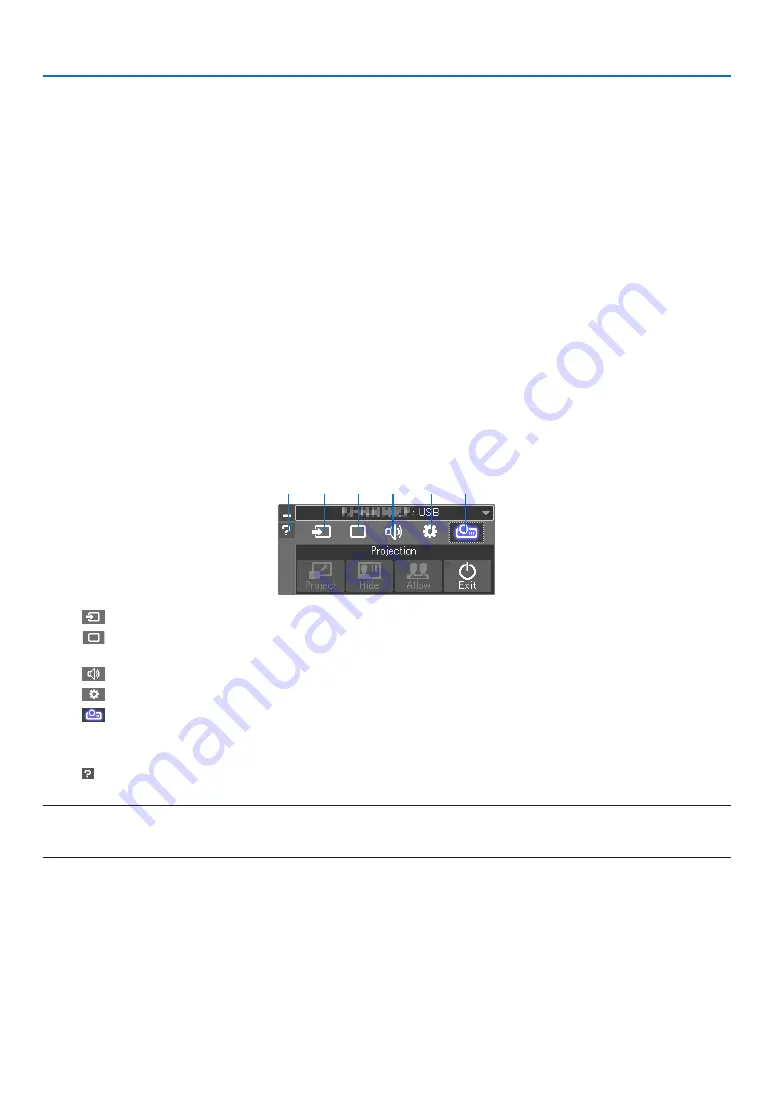
When connected to the projector, the Image Express Utility Lite control window appears at the top of the screen.
The computer can be controlled by operating the control window.
4. Operate the control window.
(1)
(2)
(3)
(4)
(5)
(6)
(1)
(Source) ��� Selects an input source of the projector�
(2)
(Picture) ��� Turns on or off AV-MUTE (Picture mute), FREEZE (Freeze a picture), display, and GCT (geometric correction
tool)� Refer to page
(3)
(Sound) ���� Turns on or off AV-MUTE (Sound mute), play the sound and control the volume�
(4)
(Others) ���� Uses for “Update”, “HTTP Server”, “Settings” and “Information”�
(5)
(Project) ��� Enables to change screen size for presentation, menu indication (hide/indicate), interruption prohibition/
accept interruption�
It also enables to power off the projector�
(6) (Help) ����������� Displays the help of Image Express Utility Lite�
NOTE:
• When [NORMAL] is selected for [STANDBY MODE] from the menu, the projector that is turned off will not be displayed in the
select window for destination


