HeatMax II Furnace Installation and Operation Manual
53
If you do get brown stains on the glass you can remove them with special cleaners for
wood furnace glass doors. Do not use abrasives to clean your furnace’s door glass.
The deposits that form on the glass are the best indication of the quality of your fuel and
how well you are doing in operating the furnace. Your goal should be clear glass with no
brown stains. If you continue to see brown stains on the glass, something about your fuel
and operating procedure needs to be changed. Stains on the glass indicate incomplete
combustion of the wood, which also means more smoke emissions and faster formation of
creosote in the chimney.
If you see brown streaks coming from the edge of the glass, it is time to replace the gasket
around the glass. Visit your furnace retailer to get the self-adhesive glass gasket and
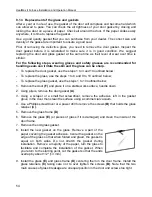
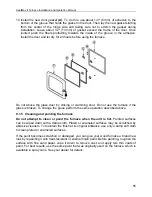
follow the Section 9.1.4: Replacement of the glass and gaskets instructions for
installation.
Check the glass regularly to detect any crack or damage. Replace damaged glass
immediately; do not use the furnace with a broken glass.
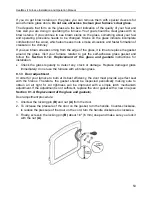
9.1.3 Door adjustment
In order for your furnace to burn at its best efficiency, the door must provide a perfect seal
with the firebox. Therefore, the gasket should be inspected periodically making sure to
obtain an air tight fit. Air tightness can be improved with a simple latch mechanism
adjustment. If the adjustment is not sufficient, replace the door gasket with a new one (see
Section 9.1.4: Replacement of the glass and gaskets).
Door adjustment procedure:
1. Unscrew the locking pin (B) and nut (A) from the door.
2. To increase the pressure of the door on the gasket, turn the handle. Counter-clockwise,
to reduce the pressure of the door on the cord, turn the handle clockwise to clockwise.
3. Finally, screw-in the locking pin (B) about 1/4" (6 mm) deep and make sure you lock it
with the nut (A).
Summary of Contents for HEATMAX II DF01001
Page 30: ...HeatMax II Furnace Installation and Operation Manual 30 ...
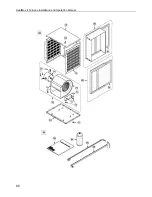
Page 64: ...HeatMax II Furnace Installation and Operation Manual 64 11 Exploded diagram and parts list ...
Page 65: ...HeatMax II Furnace Installation and Operation Manual 65 ...
Page 66: ...HeatMax II Furnace Installation and Operation Manual 66 ...
Page 67: ...HeatMax II Furnace Installation and Operation Manual 67 ...
Page 68: ...HeatMax II Furnace Installation and Operation Manual 68 ...
Page 74: ...HeatMax II Furnace Installation and Operation Manual 74 12 2 1 Technical data HeatMax II ...
Page 75: ...HeatMax II Furnace Installation and Operation Manual 75 ...


