background image

6555-065-A-12-18

37

Please read 

SECTION 5 - OPERATING INSTRUCTIONS 

for more information about operating this gate operator.

A KEY has been supplied that will 
unlock the power switch cover on 
this gate operator.

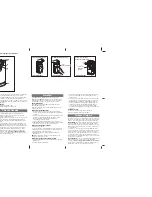
7.1 Alarm Sounding and Gate WILL NOT Operate

When alarm is sounding . . 

ALWAYS CHECK GATE AREA FOR ANY OBSTRUCTIONS FIRST.

The audio alarm will sound for five minutes, or until the operator’s reset button is pushed. After (5) five minutes the 
alarm will “chirp every 5 sec.” and the hard shutdown condition will remain in affect until the reset button is pushed.

UNLOCK

 the power switch 

cover with 

KEY

 and press 

RESET BUTTON

.

This will reset the gate 
operator and allow normal 
gate operation again.

Note:

 The 

owner

 of the gate 

operator is responsible for 
the 

KEY

 availability.

SECTION 7 - OWNER OF THE GATE OPERATOR

AC

POWER

OFF

RESET

Gate Operator is in a Hard Shutdown Condition when Alarm is Sounding

This occurs when:
1. The inherent entrapment protection system (Type A) gets activated TWO consecutive times before the gate completes 
  the open or close cycle.
2. The reversing edge contact sensor (Type B2) gets activated and reverses but before the gate completes the reverse 
  cycle the inherent entrapment protection system (Type A) gets activated.

If the cause of the alarm cannot be corrected, shut-off power and

DO NOT

 place this operator back into service until the malfunction 

can be identified and 

CORRECTED

.

IMPORTANT:  

Putting this gate operator back into service without 

CORRECTING the cause of the alarm could result in serious injury 
or DEATH!

RESET BUTTON

Power

Switch

Cover

Summary of Contents for 6555

Page 1: ...ided for the gate system where the risk of entrapment or obstruction exists The operator will NOT run without one or more monitored type B1 or B2 entrapment protection devices in EACH entrapment area...

Page 2: ...OFF ON Internal alarm will NOT sound Internal alarm will sound before gate starts and throughout gate s cycle Auto close timer is OFF Manual input required to close gate Auto close timer is ON Adjusta...

Page 3: ...port of the circuit board Main Terminal 3 Note Exceeding 250 mA of power from this terminal may cause the circuit board transformer to overheat causing intermittent problems QUICK GUIDE Terminal Desc...

Page 4: ...trapment Protection Device Inherent Reverse Sensor System Type A External Entrapment Protection Device Inputs Connection inputs for Non contact Sensor Photo Sensor Type B1 Monitored Inputs Connection...

Page 5: ...tection Wiring 4 4 Loop Detector Wiring SECTION 7 OWNER OF THE GATE OPERATOR 37 37 38 39 41 7 1 Alarm Sounding and Gate WILL NOT Operate 7 2 Manual Gate Operation 7 3 Gate Operators Monthly Checkup Pr...

Page 6: ...tection is REQUIRED for this area B C B Closed Gate With the hinge mounted on the corner of the pilaster the entrapment area is eliminated and entrapment protection is NOT required for this area Close...

Page 7: ...CLOSE Sensor Type B2 Reverse Loop Shadow Loop Automatic Exit Loop Minimizes the potential of the gate closing when a vehicle is present Number and placement of loops is dependent on the application R...

Page 8: ...operator clutch pressure relief valve or reduce reversing sensitivity to compensate for a damaged gate For gate operators utilizing Type D protection 1 The gate operator controls must be placed so th...

Page 9: ...s are installed a minimum distance of 6 feet away from the gate and gate operator or in such a way that a person cannot touch the gate or gate operator while using the device If access control devices...

Page 10: ...ct closer than 16 inches 406 mm are not required to be provided with a means of entrapment protection Horizontal Slide Vertical Lift Vertical Pivot Swing Vertical Barrier Arm A B1 B2 or D A B1 B2 C or...

Page 11: ...for vehicular traffic flow at entrances or exits to areas such as parking garages lots or toll areas VEHICULAR HORIZONTAL SLIDE GATE OPERATOR OR SYSTEM A vehicular gate operator or system that control...

Page 12: ...5 safety and ASTM F2200 construction standards The proper installation of the vehicular swing gate operator is an extremely important and integral part of the overall access control system Check all l...

Page 13: ...46 15 63 32 Min 52 25 34 46 15 43 63 37 Measured Length 2 24 67 88 86 26 Connecting Arm Drive Arm Drive Arm 67 88 2 33 94 round number up 34 inches Connecting Arm 86 26 33 94 52 32 round number down...

Page 14: ...to the concrete pad using six 6 3 8 x 3 sleeve anchors not supplied 1 5 Securing Operator to Pad Sleeve Anchor Not supplied 3 8 208 230 460 Step Down Transformer Plate Remove breather pin from gear r...

Page 15: ...elease hub with release tool DO NOT REMOVE HUB Bolt crank arm to operator Slide elbow assembly on crank arm Bolt control arm to gate bracket Slide control arm into elbow assembly KEEP ARM ASSEMBLY LEV...

Page 16: ...King Swing Gate Operator is shipped with two warning signs The purpose of the warning sign is to alert uninformed persons and to remind persons familiar with the gate system that a possible hazard exi...

Page 17: ...ection of photo sensors Type B1 and or reversing edges Type B2 entrapment protection required by UL 325 standards Entrapment Protection must be provided for the gate system where the risk of entrapmen...

Page 18: ...ent or obstruction exists less than 16 from the open gate then entrapment protection is REQUIRED for this area OPTIONAL wireless transmitter can be used Receiver MUST monitor for the presence of the t...

Page 19: ...Disconnect Switch Route incoming high voltage power through conduit and into the operator as shown Be sure wiring is installed in accordance with local codes Be sure to color code all wiring It is re...

Page 20: ...ee page 20 Inherent Reverse Sensors Motor Plug P6 Self test when turned on SW 2 switch 1 CAUTION Do not run self test with the operator connected to the gate The drive chain MUST be disconnected befor...

Page 21: ...und before gate starts and throughout gate s cycle Auto close timer is OFF Manual input required to close gate Auto close timer is ON Adjustable from 1 23 seconds to close gate 6 Relay activates and L...

Page 22: ...is installed in the EXIT loop port of the circuit board Which must be installed for the OFF setting to function Switches 4 5 These work in conjunction with each other and determine when the relay on...

Page 23: ...TOM Limit Bracket EXIT LOOP LMT LMT Opens Counter clockwise SW 1 1 ON 2 3 4 5 6 7 8 Switch 1 ON Opens Clockwise P2 Note If P2 plug is not connected to the circuit board and AC power is turned on alarm...

Page 24: ...nsidered a turn The number of turns through the sensing coil is dependant on the operating voltage of the operator the speed of the gate and the weight of the gate In general light weight gates may re...

Page 25: ...i ci an us e on ly MI N MA X MIN MAX Min Max Speed 3 6 Gate Speed Description and Adjustment Knob Adjustment The 6555 models are equipped with an AC module that allows you to adjust the speed of the g...

Page 26: ...m a plug in loop detector installed in the EXIT loop port of the circuit board Main Terminal 3 Note Exceeding 250 mA of power from this terminal may cause the circuit board transformer to overheat cau...

Page 27: ...use a separate power source 4 Opens gate P9 1 2 3 Main Terminal 3 Note Exceeding 250 mA of power from this terminal may cause the circuit board transformer to overheat causing intermittent problems O...

Page 28: ...ONAL Expansion Kit sold separately will allow connection for additional devices 1 2 3 4 5 6 OPEN Beam STOP Switch 1 CLOSE Beam REVERSE Switch 2 OPEN Edge Beam REVERSE Switch 3 CLOSE Edge Beam REVERSE...

Page 29: ...apment or obstruction exists less than 16 from the open gate then entrapment protection is REQUIRED for this area Receiver MUST monitor for the presence of the transmitter Type of wiring to be used on...

Page 30: ...C NO DoorKing Plug In Single Channel Loop Detector 9410 DoorKing Plug In Dual Channel Loop Detector 9409 LOOP 1 LOOP 2 LOOP 1 To help protect the operator from accidentally closing on vehicles in the...

Page 31: ...just and retest the gate operator properly can increase the risk of injury or death 5 Use the emergency release only when the gate is not moving and power has been shut off 6 KEEP GATES PROPERLY MAINT...

Page 32: ...sensed by the inherent system the gate will reverse and run back to the closed position The time clock input is still present but the gate will not re open Example 2 If the gate is closing and an entr...

Page 33: ...t loop Activation of a close command will run the gate to the closed position Before resetting a hard shutdown determine why the shutdown occurred Inspect the gate for any obstructions along its path...

Page 34: ...nual Release Remove release tool and place where shown Release hub Gate can now be manually operated B C Unlock the cover and rotate sliding door A CAUTION DO NOT REMOVE HUB Never attempt to manually...

Page 35: ...should be performed anytime a malfunction is observed or suspected High cycle usage may require more frequent service checks Operator Component Maintenance Monthly Interval 6 1 12 Alarm Arms Drive Be...

Page 36: ...to the DoorKing Loop and Loop Detector Information Manual located on DoorKing s web site 4 Check to be sure that there are no shorted or open control wires from the keying devices to the gate operato...

Page 37: ...Section 6 2 Shutdown Conditions page 32 Check the gate and gate hardware for any binding correct where necessary Gate may be too heavy Check for any input or loop detector LED s that are ON Check that...

Page 38: ...Single channel detector with aux relay P N 9411 010 Single channel low power draw detector P N 9416 010 Dual channel low power draw detector P N 9415 010 External Loop Detector Reno A E 12 24 VDC or...

Page 39: ...e TWO allen screws on bottom of hub to remove the complete hub assembly Limit Sensor Assemblies Loosen set screws on plastic limit assemblies to remove them Be CAREFUL not to damage limit sensor wires...

Page 40: ...9 8 7 6 5 4 3 2 1 Board Ground 1 ft s 5 ft s 0 ft s 2 ft s 1 5 ft s Shield Orange Black Black Shield Orange Red Black Black Black Black Black NO Black Black Black Black Green Green NO White White Whi...

Page 41: ...on again Note The owner of the gate operator is responsible for the KEY availability SECTION 7 OWNER OF THE GATE OPERATOR AC POWER OFF RESET Gate Operator is in a Hard Shutdown Condition when Alarm is...

Page 42: ...the cover and power switch cover on this gate operator Please read SECTION 5 OPERATING INSTRUCTIONS for more information about operating this gate operator Note The owner of the gate operator is respo...

Page 43: ...the gate will resume opening when the beam is clear If gate does NOT respond like it should in either direction of gate travel contact a trained service technician to make adjustments or repairs Test...

Page 44: ...6555 065 A 12 18 40 This page intentionally left blank...

Page 45: ...of the alarm cannot be corrected shut off power and DO NOT place this operator back into service until the malfunction can be identified and CORRECTED IMPORTANT Putting this gate operator back into s...

Page 46: ...n exists The operator will NOT run without one or more monitored type B1 or B2 entrapment protection devices in EACH entrapment area UL 325 August 2018 Standard THIS PRODUCT IS TO BE INSTALLED AND SER...

Reviews: