background image

MOBILE COOLING

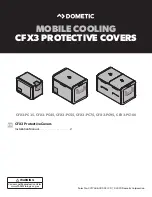
CFX3 PROTECTIVE COVERS

Form No. 3317446.000  02/20  |  ©2020 Dometic Corporation


WARNING

Cancer and Reproductive Harm 

www.P65Warnings.ca.gov

CFX3-PC35, CFX3-PC45, CFX3-PC55, CFX3-PC75, CFX3-PC95, CFX3-PC100 

EN

CFX3 Protective Covers

Installation Manual . . . . . . . . . . . . . . . . . . . . .2

Summary of Contents for CFX3 Series

Page 1: ...VE COVERS Form No 3317446 000 02 20 2020 Dometic Corporation WARNING Cancer and Reproductive Harm www P65Warnings ca gov CFX3 PC35 CFX3 PC45 CFX3 PC55 CFX3 PC75 CFX3 PC95 CFX3 PC100 EN CFX3 Protective Covers Installation Manual 2 ...

Page 2: ...bserve the following directives before proceeding to install this appliance Read and follow all safety information and instructions Read and understand these instructions before installing this product The installation must comply with all applicable local or national codes 1 4 General Safety Messages NOTICE Failure to obey the following notices could result in product failure Avoid improper insta...

Page 3: ...pare the protective cover 2 Making sure the lid of the cooler is secure place the cooler on its side 3 Align the foot holes and drain holes on the protective cover with the feet and drains on the bottom of the cooler q q w w 2 Standing the Cooler Up CFX3 45 and 75 shown qCooler wProtective Cover 4 Stand the cooler up keeping the protective cover in alignment with the holes underneath 3 2 Attaching...

Page 4: ...close both zippers w q 5 Securing the Handle Tab qHandle Tab wCooler Handle 10 Secure the handle tabs under the cooler handles 3 2 2 For CFX3 55 CFX3 75 CFX3 95 and CFX3 100 Coolers e w r q 6 Aligning the Molded Panel CFX3 75 shown qMolded Panel eDisplay wCooler rHandle Tab 1 Align the molded panel with the display clearance hole to the display on the cooler display end 2 Keeping the zipper clear ...

Page 5: ...emoving the Lid Gasket CFX3 45 shown qCooler Lid wLid Gasket 1 Gently pull out the lid gasket on the two long sides of the lid e w q 9 Attaching the Lid Cover qLid Cover eGasket Groove wLid Cover Hook 2 Position the lid cover in alignment with the latch clearance slot 3 Insert the lid cover hooks into the gasket groove 4 Refit the lid gasket pushing it fully into the groove 3 3 2 For CFX3 55 and C...

Page 6: ...sket 3 Gently pull out the lid gasket on the two long sides of the lid e w q 14 Attaching the Lid Cover qLid Cover eGasket Groove wLid Cover Hook 4 Insert the lid cover hooks into the gasket groove 5 Refit the lid gasket pushing it fully into the groove 6 Repeat steps 1 5 for the other cooler lid and lid cover 4 Maintenance Clean the protective cover regularly using a sponge or clean towel with cl...

Page 7: ...y of the receipt with purchasing date A reason for the claim or description of the fault 6 2 1 Australia Only Our goods come with guarantees that cannot be excluded under the Australian Consumer Law You are entitled to a replacement or refund for a major failure and for compensation for any other reasonably foreseeable loss or damage You are also entitled to have the goods repaired or replaced if ...

Page 8: ...com dealer YOUR LOCAL SUPPORT dometic com contact YOUR LOCAL SALES OFFICE dometic com sales offices A complete list of Dometic companies which comprise the Dometic Group can be found in the public filings of DOMETIC GROUP AB Hemvärnsgatan 15 SE 17154 Solna Sweden ...

Reviews: