


138
Camera
Switching to normal still image shooting or movie
recording :
m
e
3
e
1
or
2
・
When Bar code reader has not been started from
Camera or the stand-by display, the switching is
unavailable.
Adjusting flicker :
m
e
1
e
1
-
3
Select the power supply frequency of your area.
When selecting "Auto", the power supply frequency
is adjusted automatically.
・
This setting is kept even when Camera is ended.
・
Reflected to the flicker adjustment settings of
Videophone and Camera.
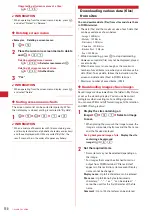
2
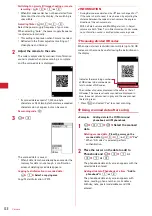
Adjust the camera to the code.
The code is automatically scanned. A confirmation
sound is played when code scanning is complete
and the scanned data is displayed.
・
If scanned data exceeds 11,000 one-byte
characters or 5,500 two-byte characters, exceeded
characters do not appear, but can be saved.
Rescanning code :
p
3
m
e
4
The scanned data is saved.
・
When 5 data items have already been saved or the
memory for data is not enough, a confirmation
screen of deleting saved data appears.
Copying text information in scanned data :
m
e
1
e
Select a copying area
Copy/Paste information
→
P273
✔
INFORMATION
・
During Bar code reader stand-by,
icon is changed to
.
・
If the code is hard to read, it may be read by adjusting the
distance between the code and out-camera, the angle or
direction of the out-camera, etc.
・
With Call alert volume and Mail/Msg alert vol. in Adjust
volume are both "Silent" or in Silent mode or Public mode,
no confirmation sound is emitted when scanning code.
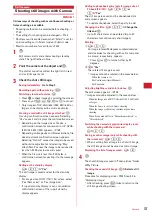
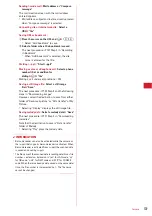
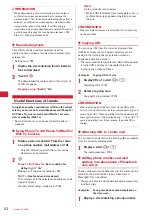
❖
Scanning divided QR codes
When one data item is divided into multiple (up to 16) QR
codes, scan them one by one following the instructions on
the display.
・
Press
c
and select "Yes" to cancel scanning.
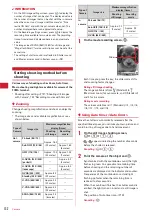
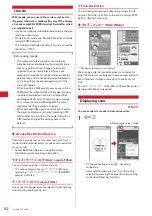
◆
Using scanned data after saving
<Example>
Adding data to the FOMA terminal
phonebook or UIM phonebook
1
m
e
61
e
p
e
Select the scanned
data
Deleting scanned data :
Place the cursor on the
scanned data
m
e
3
e
1
or
2
e
"Yes"
・
When "All codes" is selected, perform
authentication.
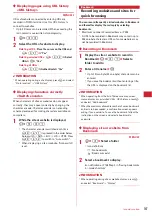
2
Place the cursor on the data to add to
Phonebook and
m
e
3
e
1
or
2
e
1
or
2
The phonebook data entry screen appears with the
selected data entered.
Adding all data to Phonebook at a time :
"Add to
phonebook"
e
1
or
2
The phonebook data entry screen appears with
name, reading, phone number, mail address,
birthday, note, postal code/address and URL
entered.
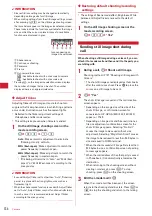
The number of squares displayed is the same as that of
QR codes. The squares already scanned are displayed in
blue, those not yet scanned in gray and the one scanned
the last in green.
Indicates the remaining number
of QR codes to be scanned and
total number of QR codes.
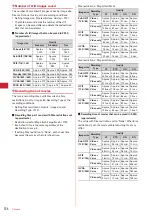
Summary of Contents for F-05A
Page 124: ......
Page 142: ......
Page 164: ......
Page 200: ......
Page 224: ......
Page 248: ......
Page 278: ......
Page 286: ......
Page 308: ...306 Appendix External Devices Troubleshooting Pictogram Reading Pictogram Reading...
Page 309: ...307 Appendix External Devices Troubleshooting Pictogram Reading Pictogram Reading...
Page 310: ...308 Appendix External Devices Troubleshooting Pictogram Reading Pictogram Reading...
Page 338: ...336 MEMO...
Page 339: ...337 MEMO...
Page 340: ...338 MEMO...
Page 341: ...339 MEMO...
Page 342: ...340 MEMO...
Page 343: ...341 Index Quick Manual Index 342 Quick Manual 348...
Page 349: ...347 MEMO...