


136
Camera
✔
INFORMATION
・
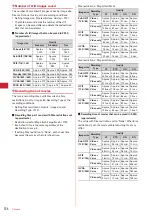
Size restrictions setting may be changed automatically
depending on Image size for still image.
・
When making settings from the still image settings screen
after pressing
m9
on the still image shooting screen,
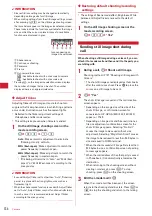
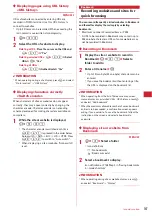
the icons below appear on the image size selection screen.
These icons indicate the functions available for the image
size on which the cursor is placed. Icons of unavailable
functions are displayed in gray.
a
Shake reduce
b
Continuous shooting
c
Panorama
d
Frame
e
Out-camera/In-camera
: Available to shoot with out-camera/in-camera
: Available to shoot with out-camera only
・
Pressing
m
on the image size selection screen displays
the number of images that can be shot. The number
displayed here is an approximate value.
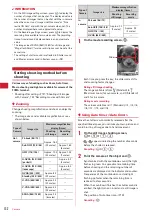
◆
Adjust flicker
Adjusting flicker of still image or movie to shoot can
suppress the flicker phenomena in which Fringe patterns
occur under illumination such as fluorescent lights.
・
Reflected to the flicker adjustment settings of
Videophone and Bar code reader.
・
This setting is kept even when Camera is ended.
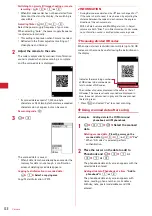
1
On the still image shooting screen or the
movie recording screen,
m
e
23
e
1
-
3
Auto :
Make automatic adjustment to eliminate
flickering. Usually, set Auto.
50Hz (East-Japan) :
Make adjustment to match the
power frequency in eastern Japan.
60Hz (West-Japan) :
Make adjustment to match the
power frequency in western Japan.
・
If flickering still remains in "Auto", set "50Hz (East-
Japan)" or "60Hz (West-Japan)" according to the
area you stay.
✔
INFORMATION
・
Even with Adjust flicker set to other than "Auto", flicker may
persist in a place with a strong light source such as a
fluorescent light.
・
When the shake reduce function is used with Adjust flicker
set to "Auto", Adjust flicker may not function satisfactorily.
In such a case, it is recommended to set Adjust flicker
according to the area you stay.
◆
Restoring default shooting/recording
settings
・
The settings of Scene mode/effect, Brightness, White
balance and Adjust flicker are reset to the default
settings.
1
On the still image shooting screen or the
movie recording screen,
m
e
24
e
"Yes"
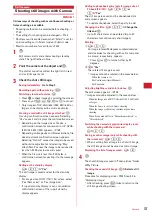
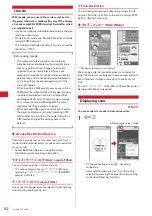
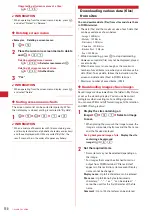
Sending still image shot during
call
When shooting a still image during a voice call, you can
attach it to i-mode mail and then send it to the party you
are talking with.
1
During a call,
a
e
Shoot a still image
Shooting method
→
P127 "Shooting still images with
Camera"
・
The shot still images are displayed as thumbnails
after the continuous shoot. Press
k
to place the
cursor on a still image to be sent.
2
a
e
"Yes"
The shot still image is saved and the mail creation
screen appears.
・
Depending on the image size or file size of the
shot still image, a confirmation screen for
conversion to H/V-QVGA (320
u
240, 240
u
320)
appears.
→
P169
・
Depending on Image size and Size restrictions, a
file size adjustment confirmation screen for the
shot still image appears. Selecting "No limit"
causes the image to be saved without size
adjustment. Selecting "Msg attach:Small" causes
the image to be reduced to less than 90 Kbytes in
size and saved in FOMA terminal.
・
When the shot or saved still image file is less than
90 Kbytes in size, a confirmation screen of pasting
to message appears.
・
When the mail address of the other party is saved
in Phonebook, it is automatically entered as the
destination.
・
When returning to the shooting screen without
creating i-mode mail, press
c
. To stop
shooting, press
c
on the shooting screen.
3
Edit the i-mode mail
e
p
When the i-mode mail has been sent, the screen
returns to the shooting stand-by state. Press
c
or
f
to stop the shooting and return to the talking
screen.
a
e
d
c
b
Icons appearing on
image size set screen
Summary of Contents for F-05A
Page 124: ......
Page 142: ......
Page 164: ......
Page 200: ......
Page 224: ......
Page 248: ......
Page 278: ......
Page 286: ......
Page 308: ...306 Appendix External Devices Troubleshooting Pictogram Reading Pictogram Reading...
Page 309: ...307 Appendix External Devices Troubleshooting Pictogram Reading Pictogram Reading...
Page 310: ...308 Appendix External Devices Troubleshooting Pictogram Reading Pictogram Reading...
Page 338: ...336 MEMO...
Page 339: ...337 MEMO...
Page 340: ...338 MEMO...
Page 341: ...339 MEMO...
Page 342: ...340 MEMO...
Page 343: ...341 Index Quick Manual Index 342 Quick Manual 348...
Page 349: ...347 MEMO...