


4:
Operating Instructions
55
Saving Features
Most software programs have Save and Save As options for saving a file. In addition to the standard
options, GelCapture has the Save Image with Reference feature which lets you create and save an
image of a sample that was stained with both chemiluminescent and visible dyes. This process creates
a new image which is actually a combination of two separate images. Read the following section to
learn more about the saving options.
To Save an Image
After setting your preferences (Exposure, Capture Type, Binning), continue to capture the image and
save it in one of the following manners.
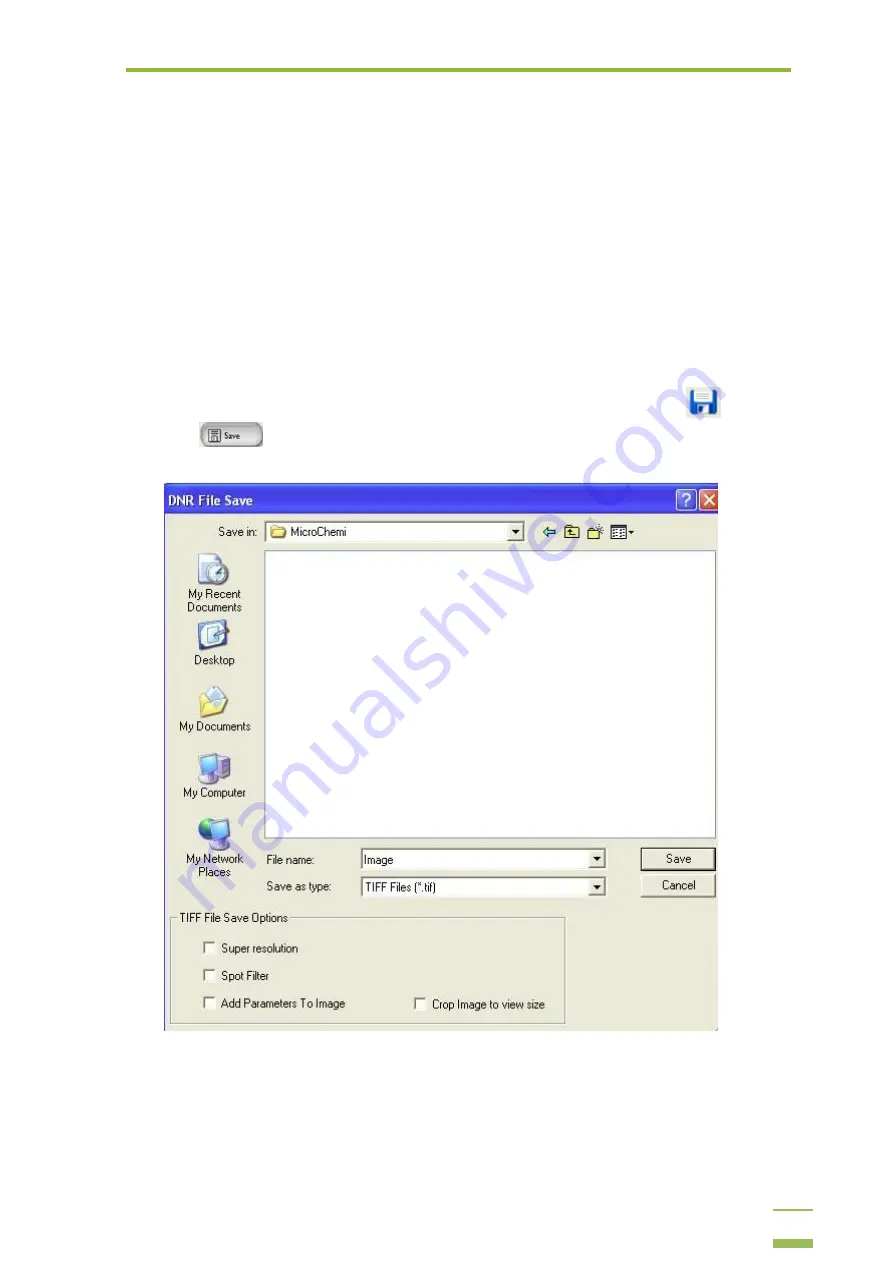
1
After the image is captured and you are happy with the results, click the Save
icon or the
Save
button.
The DNR File Save dialog window appears.
2
Browse to where you want the image to be saved, enter a name for the image and select the
required Saving Options (see explanation below).
3
Click Save.
The file is saved to the selected directory.