background image

XWEB5000 Operation Manual 

20/115 

1592010600 


2.2.4  SYSTEM CONFIGURATION 


After the first loading of the operative system, you are required to setup the unit by using a Wizard program. 
This wizard will appear only during the very first power-on of the unit.  


Before proceeding please notice that in the right side of the fields that you will see during setup procedure 
there is a question mark. By clicking on it a pop-up windows with a contextual help will appear. 
The first windows ask you to choose your language and keyboard layout:  

2.2.4.1 

LANGUAGE 


2.2.4.2 

KEYBOARD 

Choose the keyboard layout, this setup will load the correct font name for the graphical user interface 

2.2.4.3 

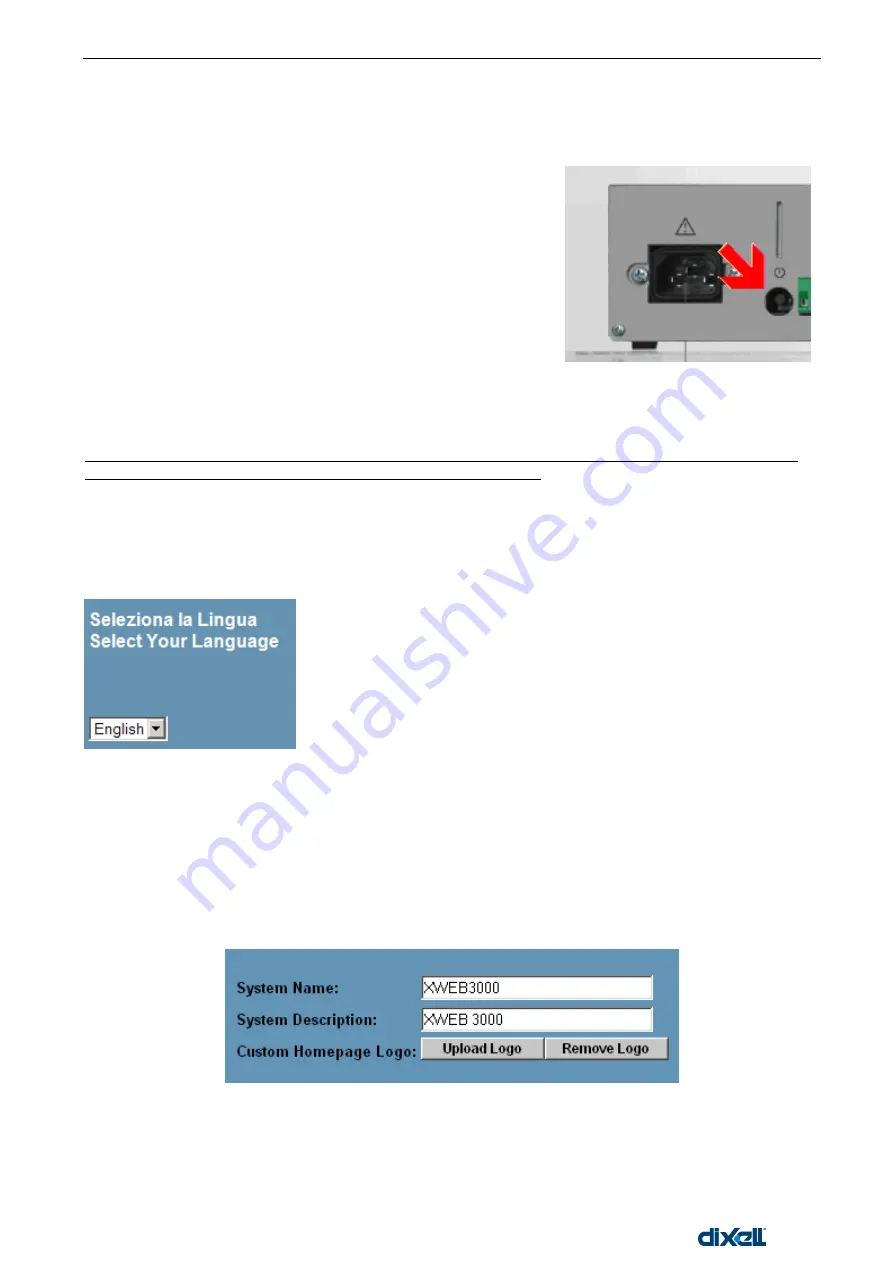
SYSTEM IDENTIFICATION 


Now  choose  a  proper  name  for  the  unit.  You  can  use  two  data  fields:  “System  name”  and  “System 
description”. We strongly suggest that you always use the same criteria. This will help you manage more than 
one XWEB. It is possible to load a custom log in the Home-Page. Supported file format are: JPG, GIF e PNG. 
The logo file is: 600 pixels width per 50 pixel high. Maximum file size is 150KB.


2.2.4.4 

DATE/TIME 


The on/off button is on the back of the unit. 


POWER  ON:  press  and  release  the  button,  the  system  will  be 
switched on.  For few minutes the Server starts loading the operative 
system,  the  local  monitor  shows  the  loading  messages  of  each 
system while the HDD (hard disk) LED is blinking. 


POWER OFF: With system ON, press and release th

e button. You‟ll 

hear  a  beep  from  internal  speaker  and  the  system  will  be  switched 
off.  For few seconds the HDD (hard disk) LED is blinking 

and it‟ll be 

switched OFF when the system will be OFF. 


If the POWER OFF procedure doesn‟t work, there is the possibility to 
switch  off  immediately  the  system  by  pressing  and  holding  the 
ON/OFF  button.  This  procedure  has  not  to  be  used  during  normal 
functioning. 


Summary of Contents for xweb 5000

Page 1: ...OPERATION MANUAL...

Page 2: ......

Page 3: ...ESENCE OF IMPORTANT OPERATING AND MAINTENANCE SERVICING INSTRUCTIONS IN THE LITERATURE ACCOMPANYING THE APPLIANCE WARNING Use only modems supported by this monitoring unit Dixell S p a can accept no r...

Page 4: ...ON 14 2 1 8 2 INTRANET ETHERNET CONNECTION 14 2 1 8 3 INTERNET CONNECTION 15 2 2 CONFIGURATION AND ACCESS 16 2 2 1 MICROSOFT WINDOWS POP UP BLOCKER AND COOKIES 16 2 2 2 MICROSOFT WINDOWS CACHE FILES 1...

Page 5: ...EVICES MENU 55 3 4 1 SINGLE VIEW 55 3 4 1 1 PARAMETER AND SINGLE VIEW 57 3 4 2 RUN TIME 57 3 4 3 PARAMETERS 60 3 4 4 LAYOUT FUNCTION 62 3 4 4 1 LAYOUT EDITOR 62 3 4 4 2 LAYOUT VIEW 69 3 4 5 GLOBAL COM...

Page 6: ...MAIL FAX OR SMS SENDING 103 3 9 3 2 SENDING AUTOMATIC REPORTS 104 3 9 3 3 EXAMPLE OF REPORT E MAIL 104 3 9 4 RS485 TEST 105 3 10 INFORMATION MENU 105 3 10 1 SYSTEM RELEASE 105 3 10 2 SYSTEM UPDATE 106...

Page 7: ...atest technology of the Internet world to display the WEB pages contained into the unit itself The Linux operative system guarantees maximum efficiency and stability support for this kind of product A...

Page 8: ...ick setup manual Fast installation One CD Rom containing the Operative manual and software If you find one of the above damaged items do not hesitate to contact your supplier MODEM not included When w...

Page 9: ...ty Local directly on the XWEB hardware plugging in Monitor Mouse and the Keyboard Modem point to point through local and remote modem devices Creating a Remote Access under Windows Intranet Internet w...

Page 10: ...RS485 terminals or the TTL RS485 interface XJRS485 or XJ485 Check the controller s manual for more information The RS485 line is mainly based on two polarised terminals Please make sure that respect...

Page 11: ...ompatibility 2 1 4 SERIAL ADDRESS OF THE INSTRUMENTS Each instrument must be defined by its unique address Check the address into the Adr parameter value Take reference to the instruction manual of th...

Page 12: ...Check Force Device On status and all the other categories needed such as Device Type and Sampling Push Update 2 1 6 2 XEV MANAGEMENT The XEV driver for the electronic expansion valve On Off can be lin...

Page 13: ...inside XWEB is loaded a standard browser to allow the user setting up the unit If necessary check the instructions manual of each device connected to the unit The operative procedure to work with XWE...

Page 14: ...th the phone cable included into the modem packaging Remember to check if there is a switching machine The connection procedure is divided in two parts In the first part it is necessary to create the...

Page 15: ...ternet connection is established through a device called Router that receives and sends the data as interface between an Intranet and Internet The Provider also assigns the address of the router that...

Page 16: ...k with Be sure the Pc clients are provided with Java Virtual Machine Launch the Browser and insert the default address 192 168 0 200 Ask your network administrator to avoid IP number conflicts 2 2 1 M...

Page 17: ...dIXEL Manual de operare Xweb5000 Pag 17 115 1 Go to Tools and then Internet Options 2 From the TAB Privacy apply the Default settings and press the button Settings on the bottom right corner...

Page 18: ...ally takes your computer less time to display a Web page when it can call up some of the page s elements or even the entire page from your local Temporary Internet Files folder but at the same time ca...

Page 19: ...lbars Yahoo and Google bar may prevent you from connecting properly to XWEB We strongly suggest to check these softwares setup and add the IP address of XWEB to the trusted site list of your software...

Page 20: ...ngly suggest that you always use the same criteria This will help you manage more than one XWEB It is possible to load a custom log in the Home Page Supported file format are JPG GIF e PNG The logo fi...

Page 21: ...d to be reached from outside We can compare this situation to a close environment communication is possible only among IPs belonging to this private range For example IP numbers 192 168 xxx yyy define...

Page 22: ...onnection next step Please remember that only modems approved by Dixell can be used You can get more information and ordering codes reading APPENDIX E 2 2 4 6 1 XWEB MODEM When XWEB modem is in use it...

Page 23: ...u to create a new e mail account to use with XWEB In this case e mail header will be something like this xweb your company name com This is very useful to apply e mail filtering in the client PC Is no...

Page 24: ...be able to see your printer If your printer is not visible on the list you should repeat the scanning procedure otherwise the printer is not compatible with XWEB After that like for local printer you...

Page 25: ...correct then click on confirm At this point the system is going to restart You may need to wait for few minutes to be able to log in again For future uses you can come back to the setup window first y...

Page 26: ...ing User name Admin Password Admin Please consider to change the default password to increase system security anybody can reads this manual and steals the admin account ATTENTION After the first insta...

Page 27: ...by the Administrator System lock button allows you to forbid access to user other than administrator s This feature is helpful when the system is under maintenance to avoid unwanted changes by users...

Page 28: ...ssion Transmission status Average cycle time Time to complete the instrument reading Remote connection Connection status Last connection Time and date of the last connection It is important that CPU t...

Page 29: ...some specific addresses eg 2 4 34 means that the unit research only those addresses After finishing click on GO button and wait for the result Check the total number of found instruments and compare i...

Page 30: ...ld Name and insert the word or the words that more represents the application The most common category should be set as Default by clicking into its box It helps to save time for most part of the inst...

Page 31: ...the new item into the list Wait the screen refresh The Default is marked with into the category list of items To modify an existing item Select the item from the Selection list Change the Name descri...

Page 32: ...d or the words that more represents the application Only one Default can be selected for this category Click Insert do include the new item into the list Wait the screen refresh To modify an existing...

Page 33: ...sary Click on Modify Wait the screen refresh To delete one of the item of the list Select the item from the Selection list Click on Cancel Confirm the operation if necessary Wait the screen refresh To...

Page 34: ...if necessary Click on Modify Wait the screen refresh To delete one of the item of the list Select the item from the Selection list Click on Cancel Confirm the operation if necessary Wait the screen re...

Page 35: ...Click on Modify Wait the screen refresh To delete one of the item of the list Select the item from the Selection list Click on Cancel Confirm the operation if necessary Wait the screen refresh To rese...

Page 36: ...on new Wait the screen refresh To delete all the items of the list Click on Cancel All Confirm the operation if necessary Wait the screen refresh How to program the list of the Stand by events Click...

Page 37: ...the function related to that day The day are divided in Enabled Green colour Partly Enabled Yellow colour Disabled Grey colour Disabled day represent the 24 ore where the resource is not active e g ho...

Page 38: ...nd select Set As Weekly Partly Enabled The tiles become yellow Define the period of activity of a day Eg from 08 00 to 20 00 for Enabled day and from 08 00 to 13 00 for Partly Enabled Under the Indivi...

Page 39: ...ay and click the right button Single day setting The attribute of a single day can be defined as follow Point the mouse arrow into the appropriate day Click on the left mouse button and select from th...

Page 40: ...ough the next days to be included Release the mouse button and select the proper attribute all the selected tiles will change into the new corresponding colour Calendar Management Under this section t...

Page 41: ...re is a timeline 00 00 to 24 00 each hour is marked with a vertical line This main window is very useful to build a complete time table in a very easy and fast way File Submenu A SAVE This function al...

Page 42: ...n Activation Time Choose a marker and its colour Push Confirm to add this event to the Scheduler After having selected Add Printing Event use the drop down menu Fast Selection or if you prefer you can...

Page 43: ...me and choose a mark colour Press confirm D EDIT CLASS Use this menu to modify an existing class choose the class you want to modify then press Edit If you want to delete a class choose it and press D...

Page 44: ...esent in that moment in your PC screen This means that the first time you start working with the scheduler the default day is displayed Point a day then with left mouse button click on it A menu with...

Page 45: ...llows to switch between different days definition 3 3 3 3 USING THE SCHEDULER Once you have created a schedule it is possible to check or modify an existing event in a very simple way Use left mouse b...

Page 46: ...s also designed and named by the user Each alarm level can be assigned with one or many alarm typologies The alarm levels starts the appropriate action in case of alarm event and depending on the leve...

Page 47: ...self The alarm level also assigns the number of receivers and the transmission mode Fax and E mail It is also possible to switch on off the status of the onboard relay Check uncheck AUX1 or AUX2 in th...

Page 48: ...ature alarms of the frozen food can be identified by the typology Severe Alarm The user can assign a typology name for the desired alarm event such as High temperature low temperature High or pressure...

Page 49: ...an entry in the Alarm Historical log 3 3 4 DEVICE CONFIGURATION The configuration of the devices allows to assign the appropriate monitoring system attributes The configuration is subordinated to the...

Page 50: ...EGORY TO THE DEVICE DEVICE CATEGORY SETUP Make sure of having selected the right instrument under the Selection field Depending on the instrument model there are different available categories to defi...

Page 51: ...THE STATUS The lower area is dedicated to the analogue inputs probe digital inputs digital outputs and status assignments NAME The first time each name is displayed by following the internal XWEB arch...

Page 52: ...r that are compatible The compatible instruments are only the ones who belong to the same model In this situation the user is requested to made only one setup then using clone button in few seconds de...

Page 53: ...to allow you to setup a detailed user account privileges system The first level allow you to grant the user access to the system in read only mode The second level allow you to grant the user access...

Page 54: ...you can fold unfold all the options available Then you can use the check box to properly setup user s permissions View box means that the user can only see the web page no other interactions are allo...

Page 55: ...checked user can start global command editor Devices SINGLE VIEW DETAILS Set Point Edit If checked user can modify setpoint Devices SINGLE VIEW DETAILS Commands Send If checked user can send commands...

Page 56: ...e inputs digital inputs output status alarms commands A grey label means a function not available for this particular instrument Remember that you are looking at a still page therefore the instrument...

Page 57: ...eter programming window and vice versa Simply press the corresponding button Use the below images as reference 3 4 2 RUN TIME The run time function provides to display into a unique window many device...

Page 58: ...n colour Each device is represented by an horizontal row that includes as many rows as many information are available from the instrument For each row the blue bar contains the address and the instrum...

Page 59: ...page you are allowed to interact with the instruments by sending commands to them The user is requested to select the instrument or the instruments to which the command has to be sent To do that click...

Page 60: ...is displayed 3 4 3 PARAMETERS The Parameter function allows management of the parameters of a selected device The parameters can be displayed and modified From the Home Page select the Parameters item...

Page 61: ...bel as described into the instruction manual of the instrument itself Description Description of the parameter function Actual Actual value of the parameter loaded from the instrument New New value of...

Page 62: ...Client pc Click on Load from File from the Action menu Use the find button to search among the files of the message box Click on find or insert the file name including the path These system always pr...

Page 63: ...o possibility to save a Layout with a particular name and then build up a new one P SAVE This function allow you to save the changes done till now Beware that the system can not go back to a previous...

Page 64: ...en you take a digital picture your camera save it according to its setup Once you download these photos to your PC you need to resize them to the value you want to use in the layout Example Table 1 Di...

Page 65: ...ll appear Choose an image and press Ok When you use images the system has to send them to your client Depending on the speed of the connection the download procedure may take up to some minutes W REMO...

Page 66: ...ent You can check uncheck the name It is also possible to change BG background colour TX text colour SZ font size Analog values You can check uncheck the values or modify them It is also possible to c...

Page 67: ...layer then point to the top left corner of the rectangular area hold down left mouse and drag the pointer to the bottom right corner Release left mouse button move the rectangular area to centre it a...

Page 68: ...nside background image with your editing software instead use text area Insert your text here By using the four drop down menu choose font type style size and colour CC RECTANGLE This function is usef...

Page 69: ...to download an image to the hard disk of your computer Once you have selected an image push Ok Standard Windows file manager will open Layout Submenu GG START It allows you to test your layout Once yo...

Page 70: ...layout 3 4 5 1 GLOBAL EDIT In the homepage go to Devices and choose Global Edit Go to insert menu and choose Global Command Here select the proper category Once you have made your choice the system l...

Page 71: ...t the proper meaning by using the blank field BG button background colour TXT button text colour SZ button font size Dim button size Code check it if you need a password protected command Here it is s...

Page 72: ...o Insert menu then Insert data output event This window will appear Go to Data Output and pick up your previously setup printing event Add a name for this new button Setup colours dimensions and size...

Page 73: ...a samples Avg Factor this number will be multiply by the Sampling to obtain the average time interval length This value is computed to calculate the average value for the interval Normal Range min and...

Page 74: ...reated before Circular Data Interval the sampled data comes from the circular archive see 3 6 1GENERAL INFORMATIONDisplay the graphs with XWEB Main data interval the sampled data comes from the main a...

Page 75: ...frost Tdef Finally it shows the percentage of cool Cool The latter is the most important value it is calculated by using the following math formula 100 DEFROST COOL T T T Cool COOL T cool time corresp...

Page 76: ...em will not restore the initial conditions when they are required Considering the importance of this new working device Dixell has tried to make this as simple as it is possible in order to help the f...

Page 77: ...th all the OR or with a logic OR it is only necessary one true value to give a true condition If it is a check with numerical values set the condition major minor equal and the correspondent threshold...

Page 78: ...nergy Saving ON command Fill in ODS Active Label and ODS Not Active Label forms It is useful to have the possibility to insert some notes in order to understand the meaning of the logical block that i...

Page 79: ...go to Available ODC and choose Lights and blinds and Setpoint Please remember to add some brief notes regarding what the project does Press OK 3 5 1 6 THE COMPLETE PROJECT The complete project is sho...

Page 80: ...tarts the ODC The simulation stops here No real command has been sent to the controllers 3 5 1 10 FIELD SIMULATION By means of this test it is possible to force the status of the inputs Now the system...

Page 81: ...compressor rack and the worst case cabinet The former is detected via a XC1000D controller ver 1 1 or higher by Dixell the latter is computed according to a special algorithm based on the time switch...

Page 82: ...lation represented in percentage let the user define a threshold for the C R O below the value there is no action above the algorithm sends the new set point Dead band is set across the worst case set...

Page 83: ...ulate and or send the dew point value to devices that are able to regulate the anti sweat heaters First of all you have to create a class of devices that will receive the dew point value in order to p...

Page 84: ...ut and the maximum duration is 48hours Under this archive it is possible to explore only the last 48 hour of the whole information recorded before the date time of the request The circular archive log...

Page 85: ...labels write some words reminding you the meaning of the graphs On the other side if you want to display the values in different graphs you have to chose AG1 for the first values AG2 for the second an...

Page 86: ...h displayed to select the desired graph Click with the left button of the mouse into the top bar of the information of graph itself To zoom in you just have to keep pressed to left mouse button To zoo...

Page 87: ...ph info The graph information area is immediately displayed with the graph itself If necessary move or drag it where it does not cover part of the interested area To close the information window click...

Page 88: ...me Proceed as usual to fill in the different field push Next Device button The actual form is been resetted The user can pick up to 5 different controllers On the top right corner there is a counter h...

Page 89: ...b5000 Pag 89 115 The first time you run it depending on your PC security setup you are required to let the software start You can do this by clicking with right mouse button in the window header and c...

Page 90: ...nual 90 115 1592010600 Answer Yes to the following window Finally this window will open Pushing Open a graph button first you are required to confirm java virtual machine start then you can browse you...

Page 91: ...dIXEL Manual de operare Xweb5000 Pag 91 115 Use the following window to load a previous saved graph...

Page 92: ...lect or deselect all the controllers 3 Yellow rectangular area let you a select all the values available b deselect all the values available c clone the selected values of this controller to all the c...

Page 93: ...st be installed in the PC To help the user collect different files the name has been formatted in the following way export_15 02 2006_30 03 2006 xls From To Excel file extension The following image sh...

Page 94: ...security check made by Internet Explore follow this step by step guide to solve the problem a In the drop down menu Tools of your Internet Explorer choose Internet options b Select Security tab and C...

Page 95: ...ected from the XWEB system It is also possible to setup a search filter Alarm view and filters To enter the alarm view from the Home Page select Historical from the Alarms menu The Device Alarm Page i...

Page 96: ...vent is now ended Systop ending column Someone has stopped the recording activity Restart ending column System has been rebooted by someone something Actual view of a device included into the alarm li...

Page 97: ...e colour Recording interval 2 red arrows is the one set in category recording interval 3 9 TOOLS MENU In this menu it is possible to use special tools intended for system maintenance Back up let the u...

Page 98: ...in graphs The right side of the windows allows selection of device resources you ll see at maximum speed After doing the selection you want you have to press the start button the following window will...

Page 99: ...torage USB device must be plugged only for the necessary time to complete the backup restore procedure then it must be unplugged 3 9 2 1 BACKUP To start a backup the system must be stopped Use Tools m...

Page 100: ...5 1592010600 Once the download procedure is over the following window will appear Push Close to end the procedure If during the downloading of the file you will receive the following window please go...

Page 101: ...115 This is a security check made by Internet Explore follow this step by step guide to solve the problem d In the drop down menu Tools choose Internet options e Select Security tab and Custom level...

Page 102: ...ration System menu 3 9 2 3 INCREMENTAL BACKUP This back up can be run automatically The system will save only a small portion of data according to the scheduled time interval To manage this kind of ba...

Page 103: ...ally and manually according to an event calendar defined by the user see Scheduler Moreover if the system is working out of the standard operative range i e cpu temperature automatically a report will...

Page 104: ...tion then Scheduler Choose Event and finally Add system event The following window will appear In the above example the system will send a report everyday at 09 00 a m For an in deep explanation on Sc...

Page 105: ...that come back the system is able to calculate a percentage that can give an idea of goodness of the line 3 10INFORMATION MENU In this menu you can find all the web pages that allow the final user to...

Page 106: ...ts On the contrary only the module needed is download The second step is a completely automatic local procedure that update the software Beware if a power loss occurs during this procedure the system...

Page 107: ...dIXEL Manual de operare Xweb5000 Pag 107 115 To check the system version please go to Information roll down men and select Modules Version...

Page 108: ...les and the point where they exit from the appliance Slots and openings in the cabinet are provided for ventilation and to ensure reliable operation of the appliance and to protect it from overheating...

Page 109: ...dIXEL Manual de operare Xweb5000 Pag 109 115 5 5 A AP PP PE EN ND DI IX X Appendix A DEVICE ADVANCED SECTION Appendix B GLOSSARY...

Page 110: ...uring is not a Dixell instrument Row Category allows you to link the macro category you have defined using Configuration roll down men to the real topology of the device Before proceeding beware that...

Page 111: ...ity to send commands to the instruments This is necessary because for example if you have changed Generic Alarm to Ausiliary in digital Resources section then you have to mark Aux on and Aux off in Co...

Page 112: ...es 8 bits to make a byte character of data BNC Connector Bayone Neill ConcELSan Standard connector used to connect 10Base2 coaxial cable Bridge Devices that connect and pass packets between two networ...

Page 113: ...Infrared Electromagnetic waves whose frequency range is above that of microwaves but below that of the visible spectrum Intranet Network internal to an organization that uses Internet protocols Inter...

Page 114: ...to a section of cable on a network In Ethernet networks two types of segments are defined A populated or trunk segment is a network cable that has one or more nodes attached to it A link segment is a...

Page 115: ...e manufactured with the wires twisted to certain specifications Available in shielded and unshielded versions U USB Universal Serial Bus Port A hardware interface for low speed peripherals such as the...

Reviews: