EN
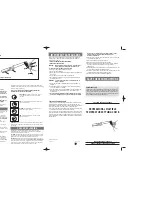
KEY FEATURES:
1) 2200W (112°C) Heating element with a high precision
thermostat
2) AC long-life motor: 1000+ hours
3) Airflow 110m³/h
4) 4 heat & 2 speed settings
5) Long-life switches: 100,000 cycles
6) Ionic conditioning with indicator light: 71,000,000 ions/
cm³ to eliminate frizz & static
7) Ceramic & Tourmaline Grille
8) True Cold Shot
9) Includes fast dry & slim styling concentrators
10) Removable easy clean rear grille
11) Super-tough Nylon housing
12) 3m soft, flexible power cord
Power Statistics:
Air Speed 77 km/h
Air Volume 110m³/h
Maximum Air Temperature 112°C
OPERATING INSTRUCTIONS:
• To use the dryer with the styling attachments always
ensure the dryer and the attachments are completely
cool. Ensure the dryer is switched off then connect the
attachment by firmly clicking it onto the dryer barrel until
it is secure, plug in to the mains and turn on by using the
speed switch on the handle. Use a low/medium heat and
speed setting when using the attachments.
• To use the dryer without the styling concentrator, plug
in to the mains and turn on by using the speed switch on
the handle.
• Adjust the heat and speed switches on the handle to the
desired setting (higher heat and speed settings for drying
and; lower heat and speed settings for styling).
• To use the cold shot, press and hold the button at the
front of the hairdryer. This will cool the hair and help to
set the style.
• After use, turn the speed setting to 0 to turn the hairdryer
off.
STYLING INSTRUCTIONS:
Blow-drying with a brush to create volume (brush not
included):
•
Apply a heat protection spray/serum to towel dried hair
to help protect your hair from heat damage.
•
Divide and clip the hair into several neat sections
2-4inches wide (preferably the same width as the brush
you will be using).
•
Select and lift hair up and place hairbrush at root
allowing hair to fall over the brush.
•
Anchor the section of hair being dried with the brush and
hold the dryer so that the airflow is directed down the hair
shaft from root to tip. Move the brush and dryer together
down the hair shaft to the hair ends.
•
Press and hold the cool shot button to cool down the
section and set the style.
Using the styling wand to create curls and texture:
•
Follow the first 2 points as described above:
•
Ensure the dryer is switched off. Lift hair section and
place styling wand at the roots.
•
Carefully wind the hair section around the wand. Use a
low/medium heat speed to gently help form the curl.
•
Press and hold the cool shot button to cool down the
section and set the style. Finish the style using your
fingers to create the desired look.
CLEANING AND MAINTENANCE:
To maintain peak product performance and to prolong
motor life, it is important to regularly remove dust and dirt
from the rear grille and clean.
To remove – Turn the rear-grille anti-clockwise (as marked
on the grille) and pull out.
To clean –Clean with a soft brush and replace.
To replace – Align the grille guides with the slots in the
casing (on the dryer) and turn clockwise.
IMPORTANT INSTRUCTIONS:
SAFETY CAUTIONS:
WARNING – FOR ADDITIONAL PROTECTION THE INSTAL
LATIONOFARESIDUALCURRENT(RCD)
WITH A RATED RESIDUAL OPERATING CURRENT NOT
EXCEEDING 30mA IS ADVISABLE. ASK AN ELECTRICIAN
FOR ADVICE.
WARNING – THIS APPLIANCE MUST NOT BE
TAKEN INTO A BATHROOM, IT SHOULD NOT
BE USED NEAR BASINS OR OTHER VESSELS
CONTAINING WATER.
THE HAIRDRYER SHOULD BE UNPLUGGED FROM MAINS
SUPPLY WHEN NOT IN USE.
Do not leave the dryer unattended when switched on.
Allow the dryer to cool down before storage.
Do not immerse in water or other liquids.
Do not wrap the cord around the unit. Check cord regularly
for any sign of damage. Damaged cords can be dangerous.
In use, take care that the inlet and outlet grilles are
not blocked in any way as this will cause the unit to
automatically stop. Should this occur, switch off and allow
the unit to cool down. Ensure the inlet grille is free from
obstructions such as household fluff, loose hair etc.
Do not place hairdryer on soft material e.g. carpet,
bedding, towels, rugs etc.
Do not leave the dryer switched on when you set it down.
Always ensure the voltage to be used corresponds to the
voltage stated on the unit.
Do not direct the airflow towards the eyes or other
sensitive areas.
Keep this product out of reach of children. The use of this
appliance by persons with reduced physical, sensory or
mental capabilities or lack of experience and knowledge
can give cause to hazards. Persons responsible for their
safety should give explicit instructions or supervise the use
of the appliance.


