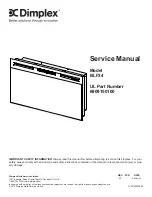
Dimplex BLF34 Service Manual Download Page 1

Service Manual

Model

BLF34

UL Part Number

6909150100


7400730000R00

In keeping with our policy of continuous product development, we reserve the right to make changes without notice.

© 2014 Dimplex North America Limited

Dimplex North America Limited

1367 Industrial Road   Cambridge ON Canada N1R 7G8

1-888-346-7539   www.dimplex.com

REV PCN

DATE

00

-

24-Jan-14

IMPORTANT SAFETY INFORMATION

: Always read this manual first before attempting to service this fireplace. For your 

safety, always comply with all warnings and safety instructions contained in this manual to prevent personal injury or prop-

erty damage.

Summary of Contents for BLF34

Page 1: ...America Limited Dimplex North America Limited 1367 Industrial Road Cambridge ON Canada N1R 7G8 1 888 346 7539 www dimplex com REV PCN DATE 00 24 Jan 14 IMPORTANT SAFETY INFORMATION Always read this ma...

Page 2: ...injury or death OPERATION 3 MAINTENANCE 4 EXPLODED PARTS DIAGRAM 5 WIRING DIAGRAM 6 PREPARATION FOR SERVICE 7 INSTRUCTIONS FOR REMOVING FROM WALL 7 Surface Mount 7 Recessed Mount Partial In wall 8 Fl...

Page 3: ...ery Replacement To replace the battery 1 Slide battery cover open on the remote control Figure 2 2 Install one 1 12 Volt A23 battery in the battery holder 3 Close the battery cover Battery must be rec...

Page 4: ...tory dur ing the assembly operation During shipment installation handling etc the partially reflective glass may collect dust particles these can be removed by dusting lightly with a clean dry cloth T...

Page 5: ...RP 6 Flicker Motor 2000220100RP 7 Flicker Assembly 5902720100RP 8 Cutout 2300201500RP 9 LED Light Panel 3000830100RP 10 Remote Receiver 3000821000RP 11 Switch Board 3000821100RP 12 LED Driver Board 30...

Page 6: ...6 www dimplex com WIRING DIAGRAM M M RL1 RL2 RL3 N N N N L1 120V 60Hz LED CONTROL BOARD LED LIGHTS...

Page 7: ...minutes for lights and heating elements to cool off to avoid accidental burning of skin NOTE Only required for replacement of the power cord or removal from service CAUTION Follow Preparation for Ser...

Page 8: ...of the opening by slightly lift ing and pulling forward 4 Carefully lay the unit down on a solid flat surface with the front of the unit facing up NOTE If the surface you are using as a work area is a...

Page 9: ...ower before attempting any maintenance or cleaning to reduce the risk of electric shock or damage to persons CAUTION If unit was operating prior to servicing allow at least 10 minutes for lights and h...

Page 10: ...the switchboard in its original configuration 8 Reassemble in the reverse order as above REMOTE CONTROL RECEIVER REPLACEMENT WARNING Disconnect power before attempting any maintenance or cleaning to...

Page 11: ...Remove the 2 retaining screws Figure 12 on the bracket that the flicker motor is mounted to remove the assembly 5 Carefully remove the entire assembly NOTE It may be easier to remove the flicker rod...

Page 12: ...the left and right side of the Partially Reflective Glass Figure 14 3 Remove the 2 screws that secure the controls assem bly Figure 9 located at the top of the mirror on the right side of the unit 4...

Page 13: ...ions before proceeding 1 Remove the decorative glass ember bed pieces from the media tray which lies along the bottom of the interi or Partially Reflective Glass A medium sized container such as a buc...

Page 14: ...the assembly is removed care fully ensuring that no wires are caught or over strained 5 Remove the Partially Reflective Glass Carefully place the glass assembly aside in a safe location 6 Remove the h...

Page 15: ...he heater is on Defective power cord Replace power cord if cord gets too hot to touch Appearance Fireplace does not turn on Manu ally Improper operation Refer to Operation Section No incoming power fr...

Page 16: ...ion Defective Heating Element Replace Heating Element Heater fan turns on but heater lacks heat Improper operation Refer to Operation Section Loose wiring Trace wiring in unit Defective Heating Elemen...

Reviews: