background image

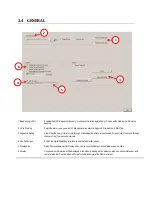
2.4   GENERAL  


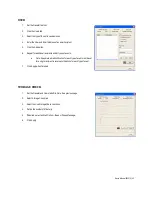
1. Beep on Login Fail 

Enables the NVR to beep continuously in response to a failed login attempt. Only an authorized login will stop the 
beeping. 

2. Voice Warning 

Select the alarm voice you wish to have whenever an alarm is triggered. File must be in WAV form. 

3. Sequence Setting 

Allows the video-out picture to cycle through channels automatically at s set speed. For example, it can cycle through 
channels 1-6 at four seconds intervals. 

4. Use Full Screen 

Stretch the Digital Watchdog interface to use the full monitor screen. 

5. Display Size 

Select from available monitor display sizes. Use to correctly display video on wide screen monitors. 

6. Display 

Choose which information will be displayed in the video, including motion detection area box, sensor status bar, and 
control status bar. You can also modify the font size and style of the OSD menu text. 


Summary of Contents for Nexus

Page 1: ......

Page 2: ...for any direct consequential incidental special punitive or other damages whatsoever including without limitation damages for loss of business profits business interruption or loss of business information even if DIGITAL WATCHDOG has been advised of the possibility of such damages or whether in an action contract or tort including negligence This software and documentation are copyrighted All othe...

Page 3: ...against them Pay particular attention to cords convenience receptacles and the points where they exit from the product Overloading Do not overload wall outlets extension cords or integral convenience receptacles as this can result in a risk of fire or electrical shock UPS Uninterruptible Power Supply Highly recommended Object and Liquid Entry Points Never insert foreign objects into the NVR unit a...

Page 4: ...o qualified personnel only The following words and symbols mark special messages throughout this guide WARNING Text emphasized in this manner indicates that failure to follow directions could result in bodily harm or loss of life CAUTION Text emphasized in this manner indicates that failure to follow directions could result in damage to equipment or loss of information WARNING SYMBOLS ...

Page 5: ...G THE NVR IP ADDRESS 15 1 5 SCREEN DISPLAY AND LIVE OPTIONS 16 1 5 1 LOOP 17 1 5 2 LIVE CAMERA OPTIONS 17 1 5 3 LIVE DIGITAL ZOOM 17 1 5 4 INSTANT RECORDING 18 1 6 CAMERA VIEW 19 1 6 1 RECORDING STATUS INDICATOR 19 1 6 2 SPECIAL RECORDING 20 1 6 3 SCREEN DIVISION BUTTONS 20 CHAPTER 2 SETUP OPTIONS 21 2 1 CAMERA SETUP 22 2 2 NETWORK VIDEO 23 2 2 1 CONNECTING A NETWORK DEVICE MANUALLY 24 2 2 2 CONNE...

Page 6: ...UP 36 2 5 9 CREATING A SYSTEM RESTART SCHEDULE 37 2 6 NETWORK 38 2 7 ADMINISTRATION 39 2 7 1 DISK MANAGEMENT 40 2 7 2 USER MANAGEMENT 40 2 7 3 ADDING A NEW USER 41 2 7 4 CHANGING ADMINISTRATOR PASSWORD 41 2 7 5 DEFAULT ADMINISTRATOR PASSWORD 41 2 7 6 SETUP LOG MANAGEMENT OPTIONS 42 2 7 7 STATUS CHECK EMAIL 42 2 8 INFORMATION 45 2 9 PAN TILT ZOOM PTZ 46 2 9 1 PTZ SETUP TAB 46 2 9 2 ENABLE THE PTZ S...

Page 7: ...7 1 PERFORMING A PREVIEW SEARCH 61 3 8 STATUS SEARCH 62 3 8 1 PERFORMING A STATUS SEARCH 62 3 9 OBJECT SEARCH 63 3 9 1 PERFORMING AN OBJECT SEARCH 64 3 10 AUDIO PLAYBACK 64 3 11 SEARCH IN LIVE 65 3 12 BACKING UP VIDEO DATA 66 3 12 1 NERO EXPRESS 66 3 12 2 GENERAL SCREEN OVERVIEW 67 CHAPTER 4 INCLUDED SOFTWARE 69 4 1 WEB VIEWER 69 4 1 1 CONFIGURING SERVER 70 4 1 2 CONNECT TO NVR USING WEB VIEWER 70...

Page 8: ...LING DIGITAL VERIFIER 79 4 5 2 USING THE DIGITAL VERIFIER 79 4 6 BACKUP VIEWER 80 4 6 1 INSTALLING BACKUP VIEWER 80 4 6 2 LOADING VIDEO FROM DVD OR HARD DRIVE 80 4 7 DW VIDEO MANAGEMENT SOFTWARE 81 4 7 1 CONFIGURING THE SERVER 81 4 7 2 CONNECTING TO AN NVR 81 CHAPTER 5 LAN ISDN PTSN CONNECTIONS 82 5 1 LAN OVERVIEW 82 5 2 CONNECTING TO A LAN USING TCP IP 82 5 2 1 CONFIGURING TCP IP SETTINGS 82 ...

Page 9: ...are is now available for purchase Build your own computer and just load DW s software to begin recording up to 32 IP cameras The Nexus NVR Software is a cost effective solution to your surveillance needs FEATURES Record up to 32 IP Cameras View and Record from Anywhere in the World Continuous Motion Detection and Sensor Recording Modes HDD Field Upgradeable Removable HDD Bays for Easy Maintenance ...

Page 10: ... with the latest technology 8CH Intel Intel i3 2120 3 3Ghz Quad Core 16CH Intel Intel i5 2400 3 4Ghz Quad Core 32CH Intel Intel i7 2600 3 8Ghz Quad Core 10 100 1000 Gigabit Network Card 4 GB of System Memory 1 MG Video Card DVD RW Recorder Full Duplex High fi Sound Functionality 500 GB 20TB Video Storage Drive 1 1 2 FRONT PANEL CONTROLS AND LEDS 1 DVD RW Drive 2 DVD RW Eject Tray Button 3 Lock to ...

Page 11: ...1 3 REAR PANEL CONNECTORS 7 USB Ports 2 0 10 RJ 45 Network Jack 2nd Network Card 13 USB Ports 3 0 8 IEEE AC Power Connector 110V 220V Switch 11 USB DVI I DVI D Outputs 14 Audio In Out 9 E SATA Port 12 HDMI Outputs 15 VGA Output ...

Page 12: ...les Identify the following components to make sure everything has been included with your new NVR unit If any of the following items are missing contact your dealer to arrange a replacement NVR Unit Mouse Keyboard Rack Mount Attachments with Screws Power Adapter NVR Key User Manual NVR Repair Disc NVR Software Disc ...

Page 13: ...e into one of the available USB ports in the back of the NVR Refer to the Rear Panel Connectors image for more information 1 2 4 MONITOR SETUP You can connect a monitor to the NVR using the HDMI or the DVI I output Attach the monitors to the back of the NVR unit using the cables supplied by the monitor manufacturer Refer to your monitor manual for detailed information on how to setup and use it No...

Page 14: ...in mind when using this feature You can use the VFormat tool to update the time zone and select the TV out settings 16 32 Channels enable disable AGC mode and log view You cannot use this function On NVRs that are different models When upgrading the software versions This feature cannot be used when upgrading from v2 x to v3 x 1 4 1 EXPORTING SETTINGS 1 Exit to Windows by clicking the red Exit but...

Page 15: ...n Display and Live Options section 2 Right click My Network Places and click Properties 3 On the General tab click Internet Protocol TCP IP and then click Properties 4 Select Use the Following IP address 5 Enter the following values or as specified by the department responsible for network administration a IP Address The first three sets of numbers should match the router s local IP address and th...

Page 16: ...nd 4 x 4 3 Options Menu 4 Exit Exit software with one of the several options Logout Shut Down Restart and Restart in Windows Mode 5 Storage Capacity Displays the total free space available in the NVR When the storage capacity reaches 100 NVR will begin rewriting new data over the older recorded videos The number indicates how much free space is available in the HDD 6 Sensor Alarm Status Bar Relay ...

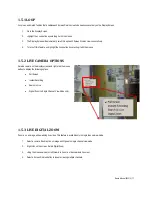
Page 17: ... 2 LIVE CAMERA OPTIONS Select a camera on the display screen and right click the mouse button to display the following options Full Screen Instant Recording Search In Live Digital Zoom in Single Channel View Mode only 1 5 3 LIVE DIGITAL ZOOM Zoom in on an image while watching live video This feature is available only in single channel view mode 1 Select a camera Double click on image until it goes...

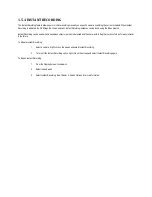
Page 18: ...be used when a suspicious object or person is detected and the user wants to flag that section of video for easy retrieval in the future To activate Instant Recording 1 Select a camera Right click on the screen and select Instant Recording 2 To turn off the Instant Recording option right click on the screen and select Instant Recording again To Search Instant Recording 1 From the Display Screen cl...

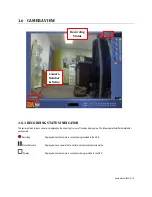
Page 19: ...e video display area The following are the different status for each camera Recording Displayed when the camera is currently being recorded to the NVR Motion Detection Displayed when a camera that is set for motion detection detects motion Display Displayed when the camera is currently not being recorded to the NVR Recording Status Camera Number Name ...

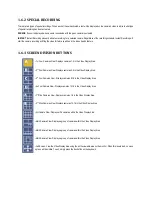
Page 20: ...ur Cameras View Displays cameras 5 8 in the Video Display Area 3rd Four Cameras View Displays cameras 9 16 in the Video Display Area 4th Four Camera View Displays cameras 13 16 in the Video Display Area 1st Nine Cameras View Displays cameras 1 9 in the Video Display Area 2nd Nine Cameras View Displays cameras 10 16 in the Video Display Area All Camera View Displays all 16 cameras within the Video ...

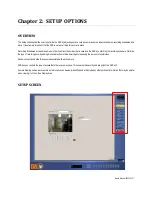
Page 21: ...ed on the NVR by optimizing the recording schedule Optimize the type of recording done by adding motion detection to this as well again increasing the amount of useful video Sensor connections define the sensors associated with each camera NVR Access controls the type of access that other users may have This ensures the security and integrity of the NVR unit Camera Naming names each camera so the ...

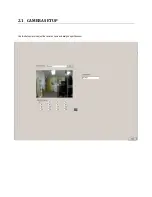
Page 22: ...2 1 CAMERA SETUP Use this Setup menu to adjust the camera s name and assign a specific sensor ...

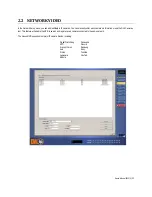
Page 23: ...each camera s information or use the Find Cameras tool This feature will enable the NVR to search and register every camera connected to the same network The Nexus NVR supports most major IP camera brands including Digital Watchdog Panasonic ACTi Piuxord Arecont Vision Samsung Axis Sony D Link Toshiba Lumenera VivoTek Mobotix ...

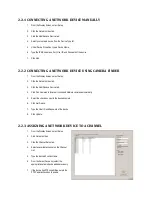
Page 24: ...ork Video tab 3 Click the Add Remove Device tab 4 Click Find Cameras to locate all connected Network cameras automatically 5 Select the check box next to the desired camera 6 Click Get Device 7 Type the User ID and Password of the device 8 Click Update 2 2 3 ASSIGNING A NETWORK DEVICE TO A CHANNEL 1 From the Display Screen select Setup 2 Click Network Video 3 Click the Channel Setup tab 4 Select a...

Page 25: ...WORK DEVICE 1 From the Display Screen select Setup 2 Click Network Video 3 Select the Audio Setup tab 4 Click an available audio channel on the Channel List 5 From Select Device list select a network device added previously 6 To record the network audio select the Record Network Audio checkbox The audio channel will be available on the search screen 7 To access the audio channel from the Live View...

Page 26: ...he Camera Configuration tab can be customized to display only the information you use most Click the Select Column button to add or remove specific columns The following columns are available Capture FPS Record FPS Schedule Manufacturer Model IP Address Port Number Resolution Record FPS Frame Rate Codec Quality PTZ ...

Page 27: ...s 1 From the Display Screen select Setup 2 Click Network Video 3 Select the Camera Configuration tab 4 Highlight the desired camera 5 Select the Setup Network Device button 2 2 7 DISPLAYING MORE COLUMNS The Camera Configuration tab can be customized to display the information you use most Click Select Column to add or remove specific columns ...

Page 28: ... motion is detected Choose from Full Screen Pop up on Motion Beep on Detect Full Screen Pop up on Sensor 4 Motion Region Setup Select the regions where camera will have motion detection enabled 5 Motion Sensitivity Set the camera s sensitivity to motion in the selected region 6 Noise Filter Modify the level of noise filter performed on the image 7 Pre Post Alarm Duration Select the recorded time f...

Page 29: ... Area shape button 8 Drag the mouse over the camera image Note To create a polygon shape click the mouse at each point and double click to close the shape 9 Select OK 10 Move the sliders to adjust motion sensitivity and the noise filter 11 Define the pre alarm and post alarm recording time for a motion event Pre Alarm 0 50 Seconds number of seconds the NVR records before motion is detected Post Al...

Page 30: ... channels automatically at s set speed For example it can cycle through channels 1 6 at four seconds intervals 4 Use Full Screen Stretch the Digital Watchdog interface to use the full monitor screen 5 Display Size Select from available monitor display sizes Use to correctly display video on wide screen monitors 6 Display Choose which information will be displayed in the video including motion dete...

Page 31: ... browse for a WAV file The selected file will display in the box on the left 2 Click the Test icon to verify the audio file 3 Select Motion Event and or Sensor Event to trigger the audio file 2 4 2 VOLUME The volume control allows fine tuning of the volume settings on the NVR Volume Options Slider Controls Used to adjust the literal volume for the respective devices listed Mute Checkbox Select the...

Page 32: ...or sequencing Custom Mode Create non standard screen divisions Skip 0 FPS Channel Sequence skips cameras with no video signal Intervals sec Select interval between switching cameras 2 4 4 CREATING CUSTOM AUTO SEQUENCE 1 Open General setup and click Sequence Setting 2 Click individual cameras in the left pane or click Select All to include all cameras in the sequence 3 Select an Interval in seconds...

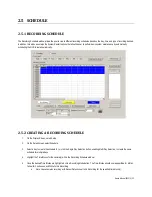
Page 33: ...SCHEDULE 1 On the Display Screen select Setup 2 On the Setup Screen select Schedule 3 Select a day to create the schedule for or click the Single Day Selection button enabling Multi Day Selection to create the same schedule for multiple days 4 Highlight the Time Blocks for the camera s within the Recording Schedule window 5 Once the desired Time Blocks are highlighted click a Recording Mode button...

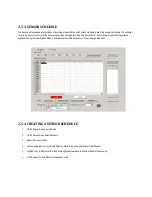
Page 34: ...d and searchable using the Index Search Mode Cameras are associated with sensors in the Camera Setup menu 2 5 4 CREATING A SENSOR SCHEDULE 1 On the Display Screen select Setup 2 On the Setup Screen select Schedule 3 Select the Sensor option 4 Choose a single day or click Single Selection Mode to include multiple days in the schedule 5 Highlight the Time Blocks within the Recording Schedule window ...

Page 35: ...p 2 On the Setup screen select Schedule 3 Select either Recording or Sensor 4 Highlight time blocks that have been set to Motion or Sensor and click the desired Event buttons Alarm Event Central Station Emergency Agent A corresponding letter will display in the selected time blocks 5 Click Delete Alarm to cancel all changes 2 5 6 EMERGENCY AGENT SCHEDULE Video recording triggered by motion or sens...

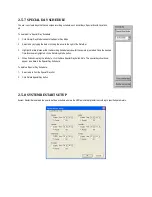
Page 36: ...n the Recording Schedule window for the camera s selected Once the desired Time Blocks are highlighted click a Recording Mode button 4 When finished creating the schedule click the Save Special Day button Note The special day should now appear as a date in the Special Day Schedule To delete a Special Day Schedule 1 Select a date from the Special Days list 2 Click Delete Special Day button 2 5 8 SY...

Page 37: ...Select the day s of the week to schedule an automatic system restart and select the Enable checkbox to enable shut down Note This step alone does not trigger the NVR to restart only to shut down 5 Specify the time of day to schedule the system restart 6 Select the Restart option Note If Off is selected the NVR will shut down at the specified time but not restart ...
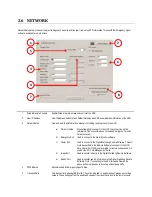
Page 38: ...connect to the Alarm Monitor software c Center Port Used to connect to the Digital Watchdog Remote Software This port must be specified in the Remote Software to connect to the NVR Note Center Port 1025 is not available for remote connections It is used by the ATI VGA Management Suite d Image Port Used to transfer video s to the Digital Watchdog Remote Software e Search Port Used to transfer searc...

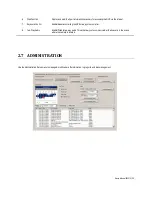
Page 39: ...oard Control Enable disable controlling the NVR via a joystick controller 8 Two Way Audio Enable Disable two way audio This will allow you to communicate with whoever is in the scene where the camera is located 2 7 ADMINISTRATION Use the Administration Setup menu to manage modify users file information log reports and disk management ...

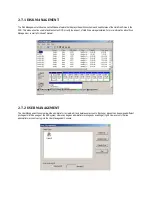
Page 40: ...e storage installed For more information about Disk Management consult a Windows 7 manual 2 7 2 USER MANAGEMENT The User Management Console allows the administrator to create edit and delete user accounts Each user account can be assigned different privileges to limit the usage of the NVR system Users can be given administrator privileges by enabling all rights However only the true administrator ...

Page 41: ...e appropriate Permissions 7 Select Camera s and Audio channel s to hide from the user 8 Click OK to save changes and close the window 2 7 4 CHANGING ADMINISTRATOR PASSWORD 1 Inside Administrative setup click User Management When the prompt appears select Change Password 2 Enter the new password and click OK 2 7 5 DEFAULT ADMINISTRATOR PASSWORD The default administrator login is User Administrator ...

Page 42: ...Log and Drive Check Log b Select the Delete All button 3 Click the OK button to save the settings and close the window 2 7 7 STATUS CHECK EMAIL GENERAL 1 On the Display Screen select Setup 2 Select Administration 3 Click Status Check Email button 4 Select the General tab 5 Select the Enable Email Alarm checkbox 6 Enter a From Name and From Email Address This name and address will appear in the Fro...
Page 43: ...nd or types of events a Note A separate email notification for each type of event must be set for a single recipient to receive notifications for each type of event 7 Click Apply when finished STORAGE CHECK 1 Set the General and Users tabs first Note See previous page 2 Select Storage Check tab 3 Select the Use Storage Check checkbox 4 Define the number of Minute s 5 If desired select an Alert Opt...

Page 44: ...tion Method 6 Click Apply SMART INFORMATION The SMART Information tab displays hard drive HDD information SMART ALERT 1 Set the General and Users tabs 2 Select Smart Alert tab 3 Select the Enable SMART Alarm checkbox 4 Define the number hour s between SMART checks 5 Select the type of SMART event to trigger an action 6 Define the maximum HDD Threshold Temperature 7 Select an Action Method 8 Click ...

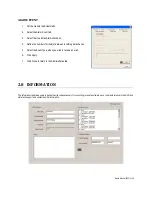
Page 45: ...ute s between recording data checks 5 Select the Event Type when you wish to receive an alert 6 Click Apply 7 Click Close to return to the Administrative tab 2 8 INFORMATION The Information tab allows users to define the site code necessary for connecting to remote software save comments relative to the NVR and store tech support and contact number information ...

Page 46: ... RS 232 signal and converts it to an RS 485 signal that is sent to the PTZ camera Refer to the Connections section of this manual for information on how to connect the PTZ camera to the NVR 2 9 2 ENABLE THE PTZ SETTINGS 1 Click the Setup button on the display screen 2 Click the PTZ tab 3 Select the PTZ camera using the camera Channel list 4 Enable the PTZ functions of the camera by placing a check...

Page 47: ... 251 HONEYWELL KDEC 300 HONEYWELL HD6 HMC 250 HSCP INTER M VSD 640 INTER M VRX 2101 JAVELIN ORBITOR JVC TK C676 C655 KALATEL CYBER DOME KDC KODITEC LG LPT A100L LG LVC A70X S LG LVC M300 310 LG MULTIX LG SPEED DOME MERCER MERIT LI LIN MERIT LI LIN V6 MIC1 300 MOLYNX NICECAM NIKO OPENEYE OPTIX 500 OPENEYE OPTIX 510 OPENEYE OPTIX PELCO D ORX 1000 KRE 303 PANASONIC PANASONIC V2 PELCO P PROTOCOL 4800B...

Page 48: ...nformation including Baud Rate Parity Data Bits and Stop Bits to enable better control of the PTZ camera 7 On Screen Compass Enable Disable on screen compass 8 Preset Tour Use this section to setup modify or delete the camera s presets sequence and tours 9 Open PTZ Controller Opens the PTZ remote controller 10 Tour Schedule Setup the camera to tour on specific dates time 11 Address Setting Modify ...

Page 49: ... Internal PTZ Onscreen menu Since every PTZ camera is different the functions of these options can vary slightly The NVR provides an easy way to access the camera s options For explanations on those camera options please refer to your camera manual Note Use the arrow buttons on the PTZ Controller to move through the PTZ Menu options or highlight the options 1 X Button Close the PTZ remote controll...

Page 50: ...are available only for select protocols Only four of the PTZ Arrow buttons work for all protocols UP DOWN LEFT RIGHT 2 To select a new camera click the video display of a different camera on the Live Display Screen USING THE NON GRAPHICAL PTZ CONTROLLER 1 On the Display Screen select Setup 2 Click PTZ 3 Select the On Screen Compass checkbox to enable the feature 4 Click Apply 5 Exit Setup menu to ...

Page 51: ...efines a Mimic Tour The Start Position button begins the recording process Setting End Pos Defines a Mimic Tour The Stop Position button ends the recording process Pan Swing Enables the Horizontal Pan Guard Tours Tilt Swing Enables the Vertical Guard Tours Run Runs the selected Pan or Tilt Tour Stop Stops the selected Pan or Tilt Tour 2 9 9 PTZ TOUR SCHEDULE Camera Selected Hours 0 23 24 hours Day...

Page 52: ...he hours of the days you wish to setup a tour schedule for You can select individual blocks of time or click ALL to select all days and all 24 hours of the day 5 Select the specific preset tour you wish to apply to the schedule 6 Click the Select button 7 When finished click the OK button to save the changes and close the window 8 To delete changes select Clear ...

Page 53: ... NVR Search features 3 1 SEARCH PLAYBACK OVERVIEW 1 Date Time Displays current date and time The date and time is stamped onto the recorded video and is displayed whenever the video is played back 2 Screen Division Buttons View cameras in groups such as 2x2 3x3 and 4x4 3 Time Control Bar Move the slide bar to select the time you wish to view 4 Date Box Displays the date and time of the current vid...

Page 54: ...layback 4 Play Play video 3 1 2 PERFORMING A BASIC SEARCH There are several different types of searches that can be performed on the NVR 1 On the Display Screen select Search 2 Click the yellow Calendar button 3 Select the date time Press OK 4 Choose a Screen Division option or select the corresponding number of a single camera on the bottom of the screen 5 On the Playback Controls click Play User...

Page 55: ...ide of the Bright Sliding bar 3 1 5 ZOOMING IN ON A RECORDED IMAGE 1 Select an image see Performing a Basic Search 2 Move the Zoom Slide bar to the right or left to zoom in or out of an image or right click the image and select Zoom a Repeat to zoom in further 3 To reset the Zoom a Move the slider back to its original position on the bar or b Select the X on the left side of the Zoom Slide bar or ...

Page 56: ...e Play button to continue playback 5 Click the Stop button at the end of the desired clip 6 Right click the video at the desired end point and select End Bookmark 7 In the Title box type a name to identify the bookmark 8 In the More Information box enter a memo or a note 9 If you want select additional channels you wish to bookmark for the same time frame 10 Click Create MODIFY BOOKMARKS Modify a ...

Page 57: ...Select the date when DST lost an hour The Daylight Saving checkbox appears 4 To playback the lost hour check the Daylight Saving box and enter the repeated hour in the time box 5 Click OK to confirm the date and begin playing the video using standard search features 3 4 SAVE AS JPEG AVI The NVR can export single images in a JPEG file format and save video clips in an AVI format Both JPG and AVI fi...

Page 58: ...with the Digital Watchdog software The single camera backup also known as Clip Backup allows the user to back up a single camera at a given time The Clip Backup option allows the user to choose a backup time frame choose a specific camera add a memo and even include the Backup Viewer if needed 1 On the Display Screen select Search 2 Click the Save button 3 From the file tree select the Drive where...

Page 59: ...ackup clip on any windows machine 8 Click the Add Memo button to include additional information 9 Click the Backup button to begin backup Note If backing up to a removable USB device click the Unplug or Eject Hardware button after backup is complete to remove the device safely 3 6 INDEX SEARCH Using the Index Search can greatly decrease the amount of time spent searching through saved video The In...

Page 60: ...lts Each line represents a segment of video If no results are found NO IMAGE FOUND will appear in the column 8 Once the results are displayed double click any one of the results and press Play to view the associated video 9 Once the desired image is found apply it to the main search by selecting Close at the bottom of the results column INDEX SEARCH RESULTS DISPLAY ...

Page 61: ...uring a period of the day nothing will be displayed on the screen where the image should be 4 Break down an hour into ten minute increments by double clicking on one of the twenty four images 6 images will display If needed return to the previous 24 image view by right clicking on an image 5 Break down a ten minute video into one minute increments by double clicking on one of the six images 10 ima...

Page 62: ... Display Screen select Search 2 Click the Status Search button 3 Select the yellow Calendar icon to select a day 4 Click a Blue area in the graph Only one camera can be displayed at a time 5 Recorded video from the corresponding camera and time block will display on the screen located above the graph 6 Use the mouse or arrow buttons to move through the recording blocks and to view the video 24 hou...

Page 63: ...xus Manual 022012 63 3 9 OBJECT SEARCH Object Search is a powerful search utility that is used to search a region on the video for any motion changes Results are neatly displayed and can be viewed quickly ...

Page 64: ...Select a motion event from the search results list displayed on the right 10 Click the Apply to Main Search button to display the selected image in the main search screen 11 Use the Play Controls to view the video 12 To start a new Object Search using the original image click Object Search again and then click the Reload First Frame button 13 To exit Object Search without selecting an image click ...

Page 65: ...vent or suspicious activity 1 Move the mouse cursor over the desired live video display on the live Display Screen 2 Press the Scroll button on the mouse 3 The Search in Live Controls will display at the bottom of the image 4 Use the controls to pause rewind fast forward move frame by frame or resume playing 5 To exit Search In Live mode right click on image and select Search In Live to remove che...

Page 66: ...en the file size exceeds the capacity of a single disk You may also specify multiple locations for backup as well as the order they are recorded to The NVR backs up video data using a proprietary compression format that can only be read by the NVR Backup Program This ensures the integrity of the data Throughout the backup process the NVR will continue recording without interruption This is the res...

Page 67: ...he calendar to select the date s Dates highlighted in BLUE contain recorded data 3 Select the blocks of time to back up using the Hour Minute Grid Blocks of time with recorded video are highlighted in GREEN Blocks of time selected for backup are highlighted in RED 4 Select the backup drive s using the Select Backup Media list Network Drive button or Browse button When selecting the CD ROM Drive yo...

Page 68: ...the backup Start Time and End Time in the Time Setup box 4 Select the Cameras to back up in the Channel Selection box 5 Select the Backup Drive to save the backup video to 6 Check the Include Viewer box to include the Backup Viewer Application 7 Enter any relevant clip information into the Clip Information section in the Description box 8 Click the Backup button to begin the backup process A progr...

Page 69: ...an access the Web Viewer simultaneously The Web Viewer is an easy secure way to view live video from virtually any computer with an internet connection using Microsoft Internet Explorer To login to the NVR server a user account must be made for the user This ensures that only authorized personnel are able to log in In addition each user can be assigned different privileges that allow or deny acces...

Page 70: ...er version 2 Enter the IP Address of the NVR into the Address Bar 3 When attempting this for the first time on a Computer a window will open and you will be asked to accept an Active X installation Select Yes Note If you receive a message saying Internet Explorer security settings do not allow you to download Active X components you will need to adjust the browser security settings One way to do t...

Page 71: ... Emergency Agent on the NVR follow these steps 1 On the Display Screen select Setup 2 Select the Camera Setup button 3 Select a Camera and then associate Sensor s to that camera using the Sensor Connection checkboxes Click Apply 4 Click the Network Setup tab and make sure that Disable Remote Control is cleared Note The Emergency Agent uses one port to transfer the data through the Emergency Port T...

Page 72: ...e Edit window that opens Click OK 3 Click the Options menu and select Setup 4 Confirm that the Network Port in the Setup window is set to the same number as the Emergency Port in Network tab on the NVR If the numbers are different adjust the Network Port on the client PC to match the NVR 5 Click the OK button 6 Restart the Client PC 4 2 3 SETUP WINDOW Network Port Listens for incoming events This ...

Page 73: ...ENT LIST 1 Select an NVR from the NVR list in the Filter Options section 2 Select the Date to include 3 Select the type of Event s to include 4 Select the event status type Read Unread All from the Read list 5 Click the Filter button to display filtered event listings ...

Page 74: ...ted JPG image With the Digital Signature Verifier user could verify integrity of these exported images and prevent tampering 4 2 7 VIEW RECORDED VIDEO 1 Double click an event listing to open the Search Alarm window 2 Use the Playback Controls to locate the desired video 3 Select the Continue Playing checkbox to watch all recorded events When cleared playback stops at the end of the alarm event 4 S...

Page 75: ...rchived video export images and video clips and have full Setup control Digital Watchdog Remote Software is Microsoft Vista XP and Windows 7 compatible Highlights Search Archived Video View Live Video Export Images and Video Clips Control Relay Outputs Setup Administration Basics The NVR can support up to five simultaneous remote connections Each user can perform functions on the NVR and it will n...

Page 76: ...connection may work with reduced performance and frame rates TCP IP Installed Microsoft Windows 7 Vista or XP Operating System 1024 x 768 Display Resolution 32 Bit Color Depth or Better 4 4 2 RECOMMENDED REQUIREMENTS Note The follow are minimum requirements for a system receiving data from an NVR using H 264 compression Pentium Core2 Duo or Equivalent 1GB System Memory DirectX 9 0c or Higher 512MB...

Page 77: ... Select Start Programs Digital Watchdog Remote Digital Watchdog Remote Center The Digital Watchdog Remote Software opens and the Local Connection window opens 2 Click New to open the Site Info window 3 Select the Site Type and enter a Site Name The Site Name will be the name displayed inside the connection box to help identify the unit 4 Enter the IP Address of the NVR server By default the NVR is...

Page 78: ...THE SERVER FOR REMOTE CONNECTION 1 On the Display Screen select Setup 2 Click the Network tab 3 Clear the Disable Remote Control option You should now be able to adjust the port settings Note If you are using a Firewall it may be necessary to adjust the port settings on both the NVR and the Firewall Contact the Network Administrator for more information 4 Click OK 5 Make sure a user account is cre...

Page 79: ...ERIFIER 1 Insert the Software Installation CD into the CD ROM Do not install on the NVR 2 Select the Digital Verifier option to begin installation 3 When the Welcome screen appears click Next 4 When the Setup Complete window appears click Finish Installation is complete 4 5 2 USING THE DIGITAL VERIFIER 1 Open the Digital Verification program by selecting Start Programs Digital Watchdog Digital Ver...

Page 80: ...on Click Next Note The POS component is only necessary when connecting to a server running the POS Upgrade 5 When the Choose Destination Location window opens click Next This will install Backup Viewer in the default destination folder 6 Select the shortcuts you wish to install or clear all boxes for no shortcuts Click Next 7 When the Install Shield Wizard Complete window appears click Finish Setu...

Page 81: ...ch user can be assigned different privileges that allow or deny access to the different functions 4 7 1 CONFIGURING THE SERVER 1 On the Display Screen select Setup 2 Click the Network button 3 Clear the Disable Remote Control option You should now be able to adjust the port settings Note If you are using a Firewall it may be necessary to adjust the port settings on both the NVR and the Firewall Co...

Page 82: ...g options available on Windows 7 Embedded The NVR comes equipped with a 10 100 1000 Network Interface Card NIC This card uses a standard RJ 45 connector 5 2 1 CONFIGURING TCP IP SETTINGS 1 Click the red Exit button on the Display Screen and select Restart in Windows Mode 2 Right click Network icon located on the desktop and select Properties 3 Click Local Area Connections and select Properties The...

Page 83: ...ten permission from Digital Watchdog The information in this publication is believed to be accurate in all respects However Digital Watchdog cannot assume responsibility for any consequences resulting from the use thereof The information contained herein is subject to change without notice Revisions or new editions to this publication may be issued to incorporate such changes ...

Reviews: