


Control connections
Digital Projection Ltd. E-Vision Laser 13000 WU Series
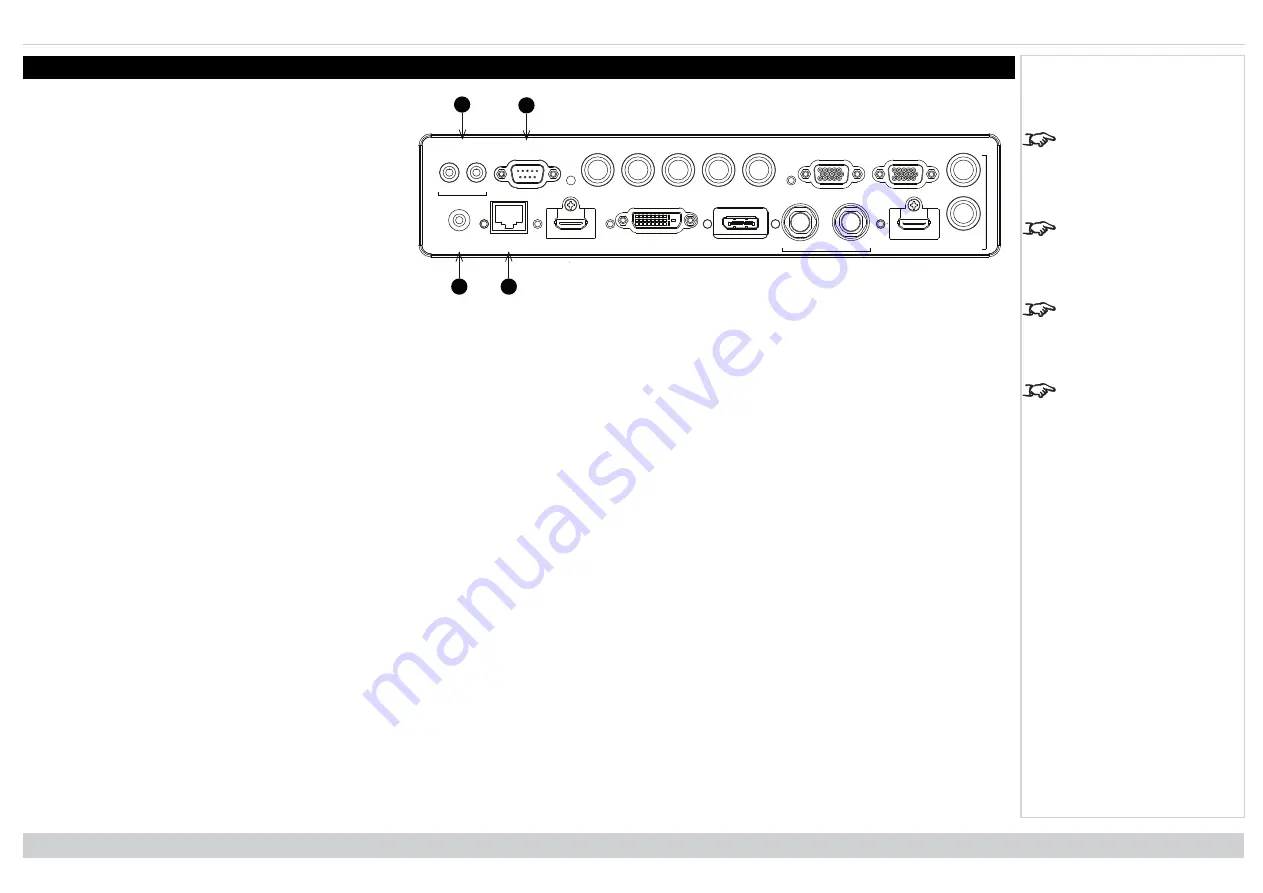
Control connections
For a list of all commands
used to control the
projector via LAN, see the
Protocol Guide
(available
separately).
Only one remote
connection (RS232 or
LAN) should be used at
any one time.
With a LAN connection the
projector can serve a web
page offering status and
projector controls.
Projector Controller
is
available for download,
free of charge, from the
Digital Projection website.
1
2
WIRED
REMOTE
HDBaseT/LAN
HDMI 1
DISPLAYPORT
DVI-D
IN
OUT
HDMI II
IN
TRIGGER
I
II
RS-232
V
H
B/Pb
G/Y
R/Pr
VGA
OUT
MONITOR OUT
SDI
3D SYNC
3
4
1.
Trigger 1 & Trigger 2
The Trigger outputs are defined in the
Setup
menu.
Each ouput can be triggered by one of the following
conditions:
l
Screen trigger
. A trigger output can be used to
control an electrically operated screen. The
screen will be automatically deployed when the
projector starts up and retracted when the
projector shuts down.
l
Aspect ratio trigger
. A trigger output can be
used to control screen shuttering for different
aspect ratios.
l
RS232 trigger
. A trigger output can be used to
control the screen or screen shuttering on
receipt of an RS232 command.
2.
RS232
All of the projector’s features can be controlled via a serial connection, using commands described in the
Protocol Guide
.Use a straight-through cable to
connect directly to a computer.
3.
Wired Remote
The remote control can be connected using a standard 3.5 mm mini jack cable (tip-ring-sleeve, or TRS).
4.
HDBaseT/LAN
The projector’s features can be controlled via a LAN connection, using Digital Projection’s
Projector Controller
application or a terminal-emulation
program.
Connection Guide
Rev A June 2019
page 31
Notes


