Chapter 20: Working with Regions and Selections
433
Defining the Grid Value
In addition to affecting the placement of re-
gions, the Grid value also constrains Timeline
and Edit selections, and determines how the Re-
gion > Quantize to Grid command works.
To set the Grid value:
1
Do one of the following:
• From the View > Main Counter menu, se-
lect the Time Scale for the Grid value.
– or –
• To keep the Main Time Scale and use a dif-
ferent time format for the Grid, deselect
Follow Main Timebase in the Grid value
pop-up menu in the Edit window.
2
Do one of the following:
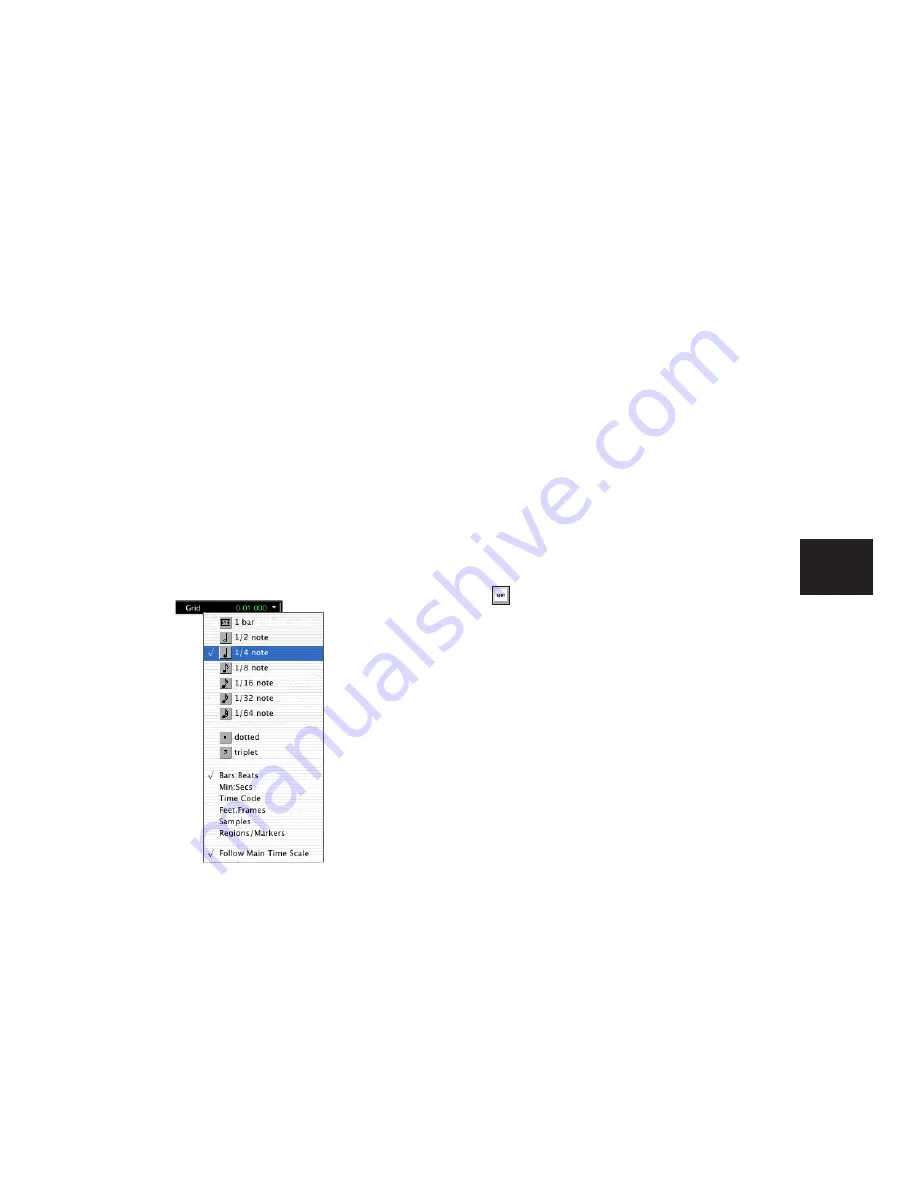
• From the Grid value pop-up menu in the
Edit window, select the time value for de-
fining the Grid boundaries.
– or –
• To define a Grid based on the session’s
Markers, selections, and region boundaries,
select Regions/Markers from the Grid value
pop-up menu.
Absolute and Relative Grid Mode
Grid mode can be applied in Absolute or Rela-
tive mode.
◆
In Absolute Grid mode, moving any region
snaps the region start to Grid boundaries
.
If a re-
gion’s start point falls between beats, and the
Grid is set to 1/4 notes, dragging the region will
snap
its start time to the nearest 1/4 note (the
current absolute Grid value).
◆
In Relative Grid mode, regions can be moved
by Grid (or Nudge)
units
. If a region’s start point
falls between beats and the Grid is set to 1/4
notes, dragging the region will be constrained to
1/4 notes, preserving the region’s relative posi-
tion to the nearest beat.
To select Absolute or Relative Grid mode:
■
Click the Grid mode selector and choose Ab-
solute or Relative.
To place or move a region while in Grid mode:
1
Configure the Grid value (see “Defining the
2
Do one of the following:
• Drag a region from the Region List to an ex-
isting track.
– or –
• With the Time Grabber tool, drag a region
already in a track to a new location.
The region’s start point snaps to the closest Grid
boundary. If the region has a sync point de-
fined, the sync point snaps to the Grid bound-
ary.
Grid value pop-up menu showing Bars:Beats
To temporarily suspend Grid mode and
switch to Slip mode while dragging a region,
hold down the Control key (Windows) or
Command key (Mac).
Summary of Contents for Pro Tools
Page 1: ...Pro Tools Reference Guide Version 7 3 ...
Page 15: ...1 Part I Introduction ...
Page 16: ...2 ...
Page 33: ...19 Part II System Configuration ...
Page 34: ...20 ...
Page 44: ...Pro Tools Reference Guide 30 ...
Page 94: ...Pro Tools Reference Guide 80 ...
Page 95: ...81 Part III Sessions Tracks ...
Page 96: ...82 ...
Page 108: ...Pro Tools Reference Guide 94 ...
Page 130: ...Pro Tools Reference Guide 116 ...
Page 269: ...255 Part IV Recording ...
Page 270: ...256 ...
Page 310: ...Pro Tools Reference Guide 296 ...
Page 345: ...331 Part V Editing ...
Page 346: ...332 ...
Page 402: ...Pro Tools Reference Guide 388 ...
Page 496: ...Pro Tools Reference Guide 482 ...
Page 548: ...Pro Tools Reference Guide 534 ...
Page 571: ...557 Part VI MIDI Editing ...
Page 572: ...558 ...
Page 596: ...Pro Tools Reference Guide 582 ...
Page 637: ...623 Part VII Mixing ...
Page 638: ...624 ...
Page 702: ...Pro Tools Reference Guide 688 ...
Page 771: ...757 Part VIII Video Sync Surround ...
Page 772: ...758 ...
Page 792: ...Pro Tools Reference Guide 778 ...
Page 806: ...Pro Tools Reference Guide 792 ...
Page 856: ...Pro Tools Reference Guide 842 ...


