


Pro Tools AVoption|V10 and Media Station|V10 Guide
32
or wait to convert them on export to Pro Tools.
It is recommended that you convert on import
to Media Station|V10 to avoid making a third
copy on export.
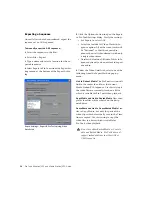
To convert audio on import:
• Click the Options button in the Select Files
to Import dialog.
• Click the Audio tab in the Import Set-
tings–Current dialog.
• Select Convert source sample rate to
project sample rate on import.
• Select Convert source sample bit-depth to
project sample bit-depth on import.
• Select convert source sample rates with au-
dio pull-up or pull-down to project sample
rate on import. If you do not select this op-
tion, the imported audio will retain the
original sample rate of the source file, but it
will be marked in the Bin as a 48/44.1 khz
file (depending on the Project sample rate)
regardless of the actual sample rate of the
file. If the sample rate of a file differs from
the Project sample rate, the file will play
back at a different speed and pitch.
• Click OK to close the Import Settings–Cur-
rent dialog.
5
Select the drives to store the new media files.
Audio and video media must be stored on sepa-
rate drives. Click the button to the left of the
drive selector until there are separate selectors
for audio and video.
6
Click Open.
The selected files are imported into the selected
Bin.
Preparing a Sequence for
Export
Adding Captured Media Files to a
Sequence
Before exporting captured audio and video from
Media Station|V10 for import into Pro Tools,
you must add them to a new or existing se-
quence. To do this you will need to:
• Set the default start time and timecode for-
mat for the sequence.
• Create a new sequence
– or –
• Open an existing sequence
• Add clips to the sequence
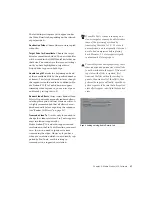
To set the default start time and timecode format
for a sequence:
1
In the Project window, click the Settings tab.
2
Double-click General from the Settings list.
The General Settings dialog opens.
3
In the Default Starting Timecode field, enter
the default start time for your sequences, in
hh:mm:ss:ff. Enter colons as separators for non-
drop frame timecode. Enter semi-colons as sep-
arators for drop-frame timecode. All new se-
quences in the project will use this setting.
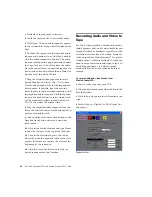
To create a new sequence:
1
Select the Bin to store the sequence.
2
Select Clip > New Sequence.
3
Select the sequence in the Bin and type a
name for the sequence.


