
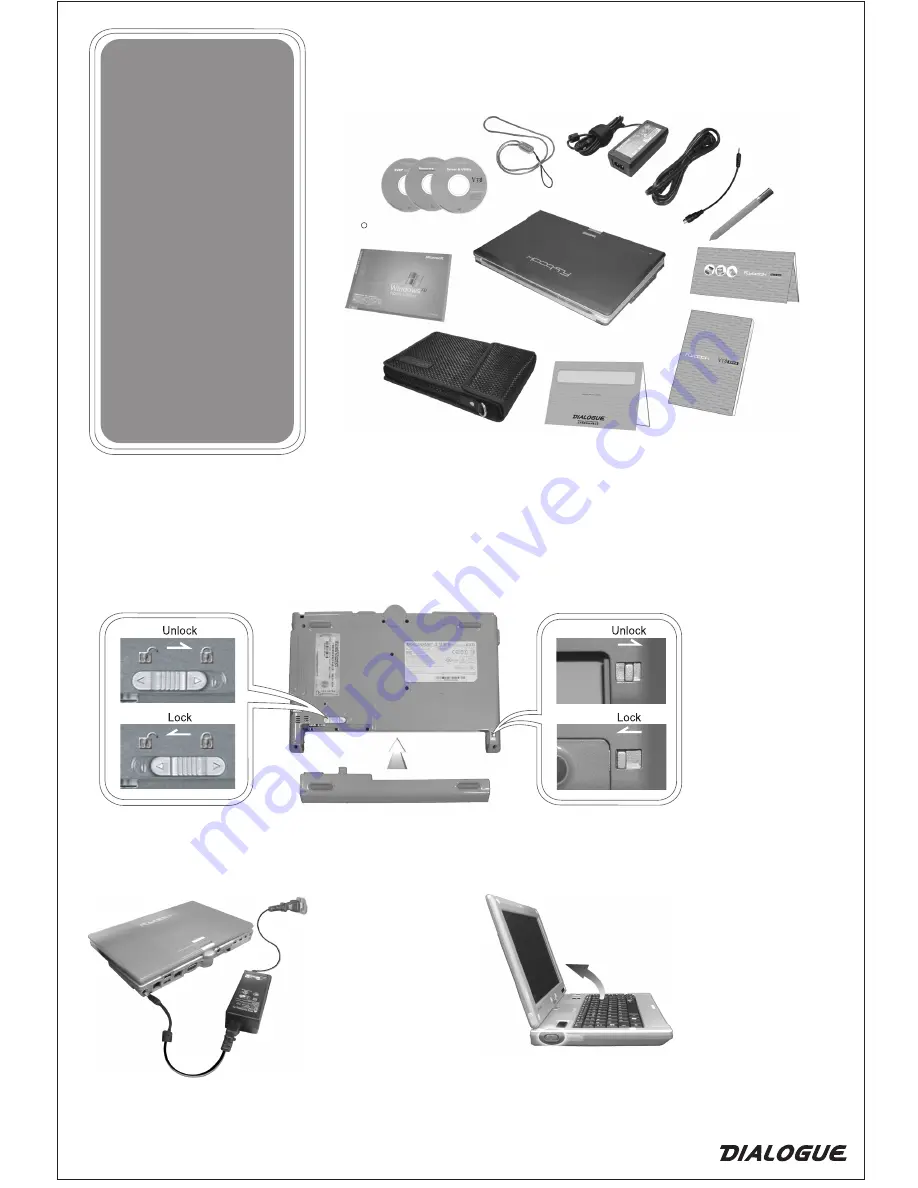
Included with your FlyBook
Powering on and getting started
1 Install the battery
2 Connect the AC adapter
Getting the most from your FlyBook
3 Turn on the FlyBook
Recovery CDs
Upgrading a hard drive
You can upgrade the hard drive
in your FlyBook yourself. To do
so, the keyboard must be
removed, a new hard drive
installed, and then the keyboard
must be replaced. Refer to the
User's Guide for instructions on
replacing the hard drive. Any
attempt to upgrade a hard drive
without following the
manufacturer's instructions can
void the warranty.
Safety instructions
Before using your computer
read "Important cautions" in the
User's Guide and read all
cautions and warnings on the
computer case.
Strap
AC adapter
Power cord
Stylus pen
Video cable
FlyBook V2/V3
Series Quick
Start Guide
FlyBook V2/V3
Series User's
Guide
Warranty card
Carry bag
Cautions
Windows
XP
start here booklet
Ensure both battery latches
are in the
Unlock
position.
Install the battery as
shown.
Slide both battery latches
to the
Lock
position.
1.
2.
3.
Open the cover to a
comfortable viewing angle.
Press and hold the power
button for two seconds to
turn on the computer.
Refer to the Windows XP
start here booklet to set up
and activate your operating
system.
1.
2.
3.
Connect the power cord to
the AC adapter.
Connect the other end to
an electrical outlet.
Connect the AC adapter to
your FlyBook.
1.
2.
3.
Refer to the FlyBook User's Guide to get the full benefit of your computer's advanced features.
R