


38
EnGLIsh
Do not expose to water.
Have defective cords replaced immediately.
Charge only between 4 ˚C and 40 ˚C.
Only for indoor use.
Discard the battery pack with due care for
the environment.
Charge
D
e
WALT
battery packs only with designated
D
e
WALT
chargers. Charging battery packs other
than the designated
D
e
WALT
batteries with a
D
e
WALT
charger may make them burst or lead to
other dangerous situations.
Do not incinerate the battery pack.
USE (without transport cap). Example: Wh rating
indicates 108 Wh (1 battery with 108 Wh).
TRANSPORT (with built-in transport cap). Example:
Wh rating indicates 3 x 36 Wh (3 batteries of 36 Wh).
Battery Type
The DCN682 operates on an 18 volt battery pack.
These battery packs may be used: DCB181, DCB182, DCB183,
DCB183B, DCB184, DCB184B, DCB185, DCB187, DCB546,
DCB547. Refer to
Technical Data
for more information.
Package Contents
The package contains:
1 Stapler
3 Non-mar tips
1 Charger
1 Li-Ion battery pack (C1, D1, L1, M1, P1, S1, T1, X1 models)
2 Li-Ion battery packs (C2, D2, L2, M2, P2, S2, T2, X2 models)
3 Li-Ion battery packs (C3, D3, L3, M3, P3, S3, T3, X3 models)
1 Instruction manual
nOTE:
Battery packs, chargers and kitboxes are not included
with N models. Battery packs and chargers are not included with
NT models. B models include Bluetooth® battery packs.
nOTE:
The Bluetooth® word mark and logos are registered
trademarks owned by the Bluetooth®, SIG, Inc. and any use of
such marks by
D
e
WALT
is under license. Other trademarks and
trade names are those of their respective owners.
• Check for damage to the tool, parts or accessories which may
have occurred during transport.
• Take the time to thoroughly read and understand this manual
prior to operation.
Markings on Tool
The following pictograms are shown on the tool:
Read instruction manual before use.
Wear ear protection.
Wear eye protection.
Do not operate tool on scaffoldings, ladders.
Length of staples.
Staple gauge.
Magazine capacity.
Tool voltage.
Visible radiation. Do not stare into light.
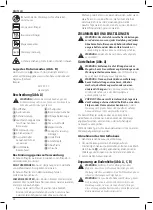
Date Code Position (Fig. B)
The date code
20
, which also includes
the year of manufacture,
is printed on the tool foot between the face of the battery and
the stapler.
Example:
2018 XX XX
Year of Manufacture
Description (Fig. A)
WARNING:
Never modify the power tool or any part of it.
Damage or personal injury could result.
1
Trigger
2
Trigger lock-off
3
Depth adjustment wheel
4
Headlights/Low battery/
Stall indicator
5
Contact trip
6
Sliding magazine
7
Sequential/Rapid
sequential selector switch
8
Reversible belt hook
9
No-mar pad
10
Stall release lever
11
Staple depth indicator
12
Battery
13
Battery release button
14
Magazine latch
15
Low staple indicator
16
Bottom plate
17
Adjustment knobs
18
Top plate
19
Screw
Intended Use
Your cordless flooring stapler has been designed for driving
staples into wooden workpieces.
DO nOT
use under wet conditions or in the presence of
flammable liquids or gases.