background image

User Instruction

devireg

 540/550

GB/DAS

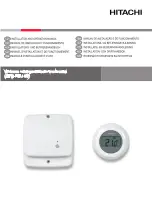
Summary of Contents for devireg 540

Page 1: ...User Instruction devireg 540 550 GB DAS...

Page 2: ...ireg 540 550 4 How to use your deviheat heating system 6 Daily operation 7 Setting the clock day 10 Timer programming 11 Warranty 16 Table of contents 2 Do not cover the thermostat e g by hanging towe...

Page 3: ...ith both the room and floor temperature in order to give you the highest pos sible comfort in the most economical way devireg 550 ONLY Furthermore devireg 550 will take a few days to optimise the use...

Page 4: ...mfort from the air temperature in the room to offset the outside weather condition We as human beings perceive comfort as the combined effect of the radiant heat from the floor and air temperature in...

Page 5: ...ensate the devireg 550 uses the information stored then checks to see if this is caused by e g the effects of a window opened for 10 minutes Even the programming of economy temperatures i e during the...

Page 6: ...frost protection Symbol for Timer On Numerical display for time tempera ture text etc Flashing point for actual time Weekdays Indication of AM PM time at 12 hour clock Symbol for Timer programming Sym...

Page 7: ...ccording to the set back level Constant temperature with the timer off Can be used e g as Party Mode or for con stantly lowering the temperature when going on holiday This is indicated by a continuous...

Page 8: ...ou want to lower the temperature Turn counter clockwise to lower the temperature You want to switch on or off the timer function Press the button to switch on the timer Press again to switch off the t...

Page 9: ...ol will appear in the display indicating that the thermostat will maintain minimum 5 C in the room for frost protection If the temperature is turned below 5 C the thermostat will switch off Only possi...

Page 10: ...ard or back by turning the button to the right or left respectively Changing the week day is done by continuing to change the time until it passes 0 00 either way The numbers 1 7 do not correspond to...

Page 11: ...my set back programme The timer is not set from the factory Hold the button for 6 sec The pro gramme for economy set back can now be edited First turn the button to choose the weekday which you want t...

Page 12: ...n omy set back and periods with com fort temperature respectively The programming switches between low economy set back and high comfort temperature every time you press the button And between every t...

Page 13: ...enter the programming menu choose a day and press the button Turn until you reach the first time when you want comfort temperature e g 06 00 Press Turn until the temperature must be lowered again e g...

Page 14: ...And turn to the next comfort period e g 15 30 and press Then turn until you reach the time when the next lowering of the temperature must start e g 22 30 and press 14...

Page 15: ...be saved This is done by holding the button for 3 sec The display will automatically return to normal display 3 sec Remember devireg 550 ONLY With devireg 550 you only have to programme the time when...

Page 16: ...wording of the WARRANTY CERTIFICATE must be provided in English or local language with the ISO code for your country in the upper The DEVI Warranty left corner of the front page of the installation i...

Page 17: ...lectrical Installation by Type of thermostat Installation date Production code Suppliers Stamp Please Observe In order to obtain the DEVI Warranty the following must be carefully filled in See other c...

Page 18: ......

Page 19: ......

Page 20: ...29 Connection diagram Network connection devireg 550 ONLY...

Page 21: ...ge Resistive load Inductive load Power consumption Battery back up Economy set back Offset IP class Type of sensor Sensor value 5 to 35 C or OFF 20 to 50 C 180 250 V 50 60 Hz 250 V 16 A 1 A power fact...

Page 22: ...nfigured as Master but can detect another Master unit Sensor fault floor sensor open circuit Sensor fault floor sensor shortcircuit Only one unit may be con figured as a Master Change the floor sensor...

Page 23: ...sh together with a reading of the detected fault which will be shown indicated by the weekday numbers 1 to 7 No 7 4 3 Fault Clock is not adjusted The thermostat is switched off because of overheating...

Page 24: ...the unit will need to be reconfigured If a devireg 550 is configured as a slave unit the following set up parameters are controlled from the master unit Time Day of week C or F 12 hour AM PM or 24 hou...

Page 25: ...slave units It is only possible to have one master unit A devireg 550 can be set as a stand alone unit even though it is connected to the network It will not respond to or send information to a maste...

Page 26: ...e Master or devireg 550 ONLY Slave Temp display C C or F Sensor Room floor Room floor or room floor Max floor temperature 45 C 20 C to 50 C Offset 0 0 C 5 5 C to 5 5 C Economy set back 5 C 1 to 30 C W...

Page 27: ...lock must be set Choose whether the clock must be 24 hours or 12 hours AM PM Turn to choose 12 or 24 hours and press 22 To finish the basic setting press the button and the display will return to the...

Page 28: ...the temperature LO e g during the night The range is 0 C to 15 C Turn to choose economy set back level and press Choose 5 C if the temperature must be lowered 5 degrees If normal room heating is insta...

Page 29: ...variation between the thermostat and a thermometer in the room if any If the thermometer shows e g 1 C more than the thermostat it is pos sible to adjust the offset with 1 C The range is 5 5 C to 5 5...

Page 30: ...m floor temperature is preset Max tempera ture setting for different floor constructions from the factory to 45 C for cable temperature safety Local building regulations must be observed when chang in...

Page 31: ...ch will be used for this heating system Turn to choose Room Sensor r S Floor Sensor FS or both Room and Floor Sensor rFS and press If the thermostat only uses a floor sensor the display will not show...

Page 32: ...Choose whether the thermostat must show Celcius or Fahrenheit degrees Turn to choose C or F and press 17...

Page 33: ...tats are linked in one network only one of the thermo stats can be choosen as Master For further information about network and Master Slave see section on page 24 Turn to choose Alone ALO Master MAS o...

Page 34: ...necessary to change the basic setting the button must be held for 12 sec It is then possible to access the basic setting menu by choosing the code Turn to choose code Choose the code 0044 When the cod...

Page 35: ...ll be used for this heating system Turn to choose Room Sensor r S Floor Sensor FS or both Room and Floor Sensor rFS and press If the thermostat only uses a floor sensor the display will not show the a...

Page 36: ...mains voltage for the first time a code must be chosen and the sensor s selected Turn to choose code Choose the code 0044 When the code is chosen press the button Now the sensors to be used should be...

Page 37: ...DO NOT over tighten 12...

Page 38: ...ress the front cover into place Note The display must be gently remounted on the base module ensuring that the 8 pin plug is placed accurately by using the four tabs sur rounding it When remounting th...

Page 39: ...T be subjected to direct sunlight Away from windows doors that will open occasionally It must not be covered by curtains towels etc The devireg 540 550 should not be installed in small rooms with insu...

Page 40: ...ny of the eight screw holes in the base module Screw holes 9 Warning devireg 550 ONLY Please note when working on thermostats connected to a network ensure that the mains supply for all thermostats in...

Page 41: ...ensor in Basic Settings Total Room Heating Control of room temperature in living rooms etc Install the Floor sensor and choose both Floor sensor and Room sensor in Basic Settings No Floor Sensor A flo...

Page 42: ...Max load 16 Amp Network connection devireg 550 ONLY NTC sensor 7 As the devireg 540 550 is not equipped with an earth terminal the earthing screen of the heating cable must be connected to the earth f...

Page 43: ...Remove the frame from the thermostat Frame 6...

Page 44: ...Remove the two screws one in each side and gently pull off the display module Screws 5...

Page 45: ...n of devireg 540 550 When installing devireg 540 550 you must first dismantle the thermostat Remove the front cover by gently pressing the release tab in the top center hole and lift out the cover Rel...

Page 46: ...ork 24 Error messages 26 Technical specifications 28 Connection diagram 29 Table of contents Please Note The devireg 540 550 must be connected and the basic setting must be done by an authorised elect...

Page 47: ......

Page 48: ...Installation Instruction GB Installation Instruction GB Installation Instruction GB DAS devireg 540 550 08095121 03 03...

Reviews: