23
G
E
A
13
13
13
B
C
E
F
D
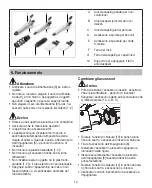
A
Large curling iron for voluminous
curls
B
Small curling iron for gentle curls
C
Flat curling iron for crimped curls
D
Spiral attachment for corkscrew curls
E
Brush attachment for sleek waves
F
Crimping iron for crimped waves
G
Straightening iron for straight hair
13
Stand
6. Operation
Important
•
Straighten the mains cable [9] if it becomes
twisted.
•
Do not pull, twist or kink the mains cable [9]; do
not pull or lay it across/on sharp, pointy objects
or hot surfaces.
•
Do not clamp the mains cable [9], for example in
drawers, doors or between the heating plates [1, 2].
Warning
•
Stand on a dry, electrically non-conductive
surface.
•
Ensure that your hands are dry!
•
Your hair must be dry!
•
Depending on the temperature setting and dura-
tion of use, the unit can become very hot. If the
unit is hot, touch it only by its handle [6] – burn
and fire hazard!
•
Do not touch the heating plates [1, 2]!
•
Do not touch the attachments as long as they are
still hot!
•
Do not clamp any objects between the heating
plates [1, 2] and the barrel and the curling tong.
•
Switch the unit off immediately if it is defective or
malfunctioning.
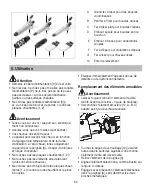
Changing attachments
Warning
•
When the attachment is in place on the unit,
always let it cool down before removing it – burn
hazard!
•
Select the right attachment [12, A, B, C] for the
desired hairstyle.
•
Turn the lock ring [10] clockwise until it stops.
The attachment is unlocked.
•
Remove the attachment from the handle [6].
•
Align the selected attachment as shown in the
figure.
•
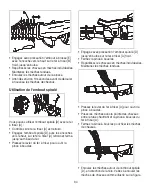
Push the selected attachment carefully into the
handle [6], without jamming the two metal pins.
•
Turn the lock ring [10] anti-clockwise until it
stops. The attachment is locked.
•
Check whether the attachment is firmly connec-
ted with the handle.
•
Lay the multi-function styler or place it with the
Summary of Contents for HC 40
Page 47: ...47...


