background image

This package includes (Style of push button and chime may vary from illus-
tration):
• Wireless chime

• Wireless push button with demostration batteries

• Hardware pack

• Audio cable (Model 1204 Only)

This chime requires 3 “C” alkaline batteries for the chime and 4 “AA”
alkaline batteries for the transmitter (Not Included).

 In typical use, alka-

line batteries will last up to six months.

Say What?!

 Wireless Chime

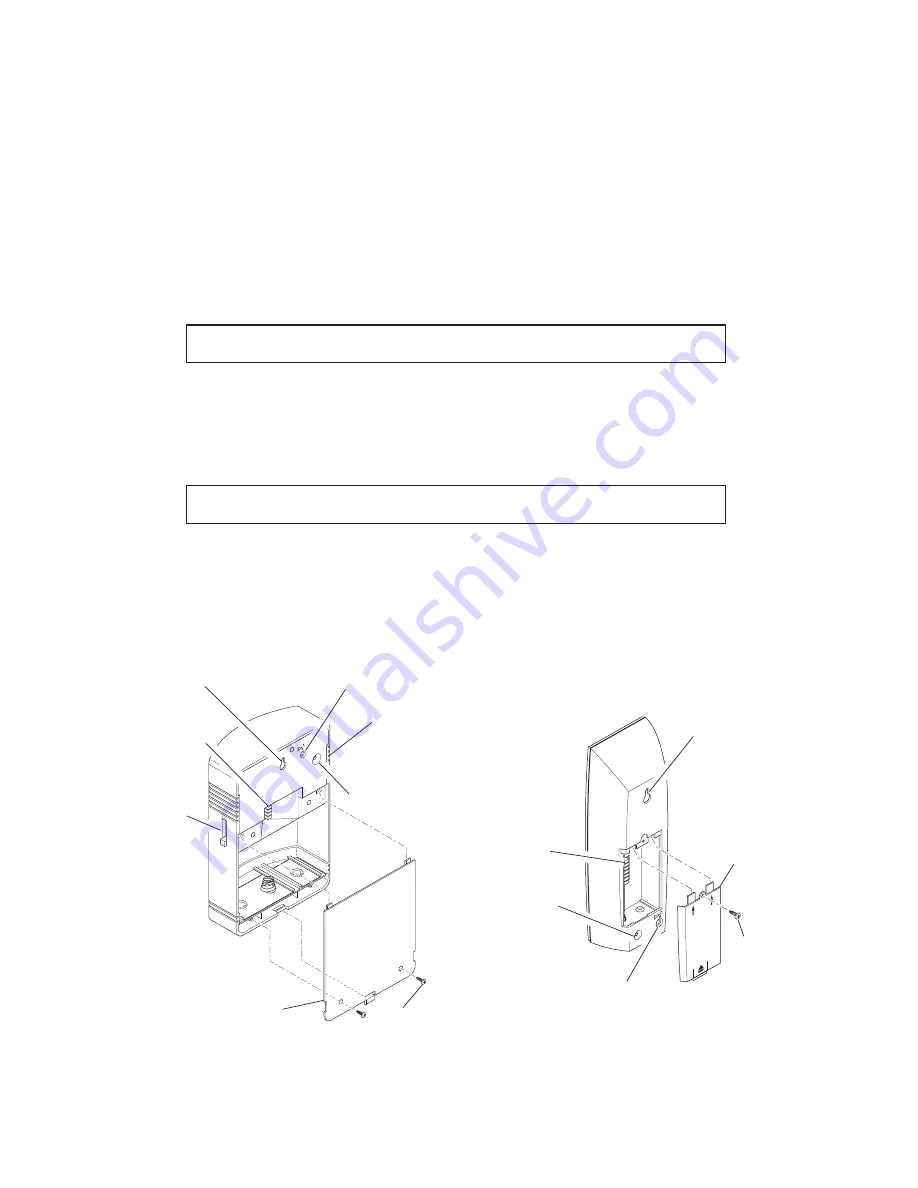
Open back of case by removing 2 screws at bottom of battery cover with
small philips-head screwdriver. Press in catch on bottom of chime and re-
move cover. Insert batteries according to markings inside the chime. Re-
verse above procedures to reattach battery cover.

© 2003 DESA Specialty Products™

598-1126-00

Open back of push button by removing screw at top of battery cover with
small philips-head screwdriver. Slide cover up and pull bottom of cover out to
remove. Remove demonstration batteries. Insert batteries according to mark-
ings inside push button. Reverse above procedures to reattach battery cover.

1.

 Install 4 type “AA” alkaline batteries in push button.

2.

 Install 3 type “C” alkaline batteries in chime.

RE

C.

5
4
3
2
1

ALL

Model 1204 Shown

Tune

Selector

Battery Cover

Jumpers

Record Button

Audio Cable Jack

(Model 1204 Only)

Screw

Volume Control

(Not Shown)

Keyhole

RE

C.

OPEN

Battery

Cover

Screw

Jumpers

Audio Cable Jack

(Model 1204 Only)

Keyhole

Record

Button

Summary of Contents for SAY WHAT?! 1204

Page 1: ...g to markings inside the chime Re verse above procedures to reattach battery cover 2003 DESA Specialty Products 598 1126 00 Open back of push button by removing screw at top of battery cover with small philips head screwdriver Slide cover up and pull bottom of cover out to remove Remove demonstration batteries Insert batteries according to mark ings inside push button Reverse above procedures to r...

Page 2: ...le sided tape make sure the surface is clean Chime can be mounted by using 1 screw with keyhole see illustration on page 1 or placed on top of a desk or table Follow steps under mounting push button with screw to mount chime Temporarily position chime and push button where you want them mounted Press push button to verify chime and push button work properly If chime does not sound see Troubleshoot...

Page 3: ...tem may not function properly Fol low the instructions below for setting a new code 1 To access the jumpers remove the battery covers and locate the jumpers on both the push button and chime See illustration on page 3 Note To access the jumpers on the push button the batteries must be removed 2 The push button and chime both have multiple jumpers either 3 or 7 de pending on model The jumpers are u...

Page 4: ... button located on the back of the chime near the top while speaking or playing the audio from your sound source Release the Rec but ton when completed Note The microphone is located on front of chime For best results do not hold the microphone closer than 2 to the sound source Recording Push Button Audio Your push button has the capability to record up to 10 seconds of audio for personalized mess...

Page 5: ...lies with Part 15 of the FCC Rules Operation is subject to the following two conditions 1 this device may not cause harmful interference and 2 this device must accept any interference received including interference that may cause undesired operation The user is cautioned that changes or modifications not expressly approved by the party responsible for regulatory compliance could void the user s a...

Page 6: ...this warranty in its entirety This warranty does not include reimbursement for inconve nience installation setup time loss of use or unauthorized service This warranty covers only DESA Specialty Products assembled prod ucts and is not extended to other equipment and components that a customer uses in conjunction with our products THIS WARRANTY IS EXPRESSLY IN LIEU OF ALL OTHER WAR RANTIES EXPRESS ...

Reviews: