DFU ProTaper® Universal Retreatment Kit F19 02 89.X/ 04 / 2006 updated 04/2009
2 / 62
DENTSPLY MAILLEFER
1338 Ballaigues
Switzerland
For Dental Use Only
DIREctIONS FOR uSE
(ProTaper
®
Universal Retreatment Kit)
PROtaPER
®
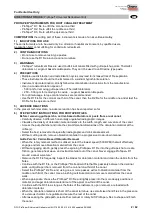
INStRuMENtS FOR ROOt caNaL REtREatMENt
ProTaper
•
®
D1: file to unfill the coronal one third
ProTaper
•
®
D2: file to unfill the middle one third
ProTaper
•
®
D3: file to unfill the apical one third
cOMPOSItION:
the cutting part of these instruments is made of a nickel-titanium alloy.
1) INDIcatIONS FOR uSE
These instruments are to be used only in a clinical or hospital environment, by qualified users.
Application field: canal unfilling for endodontic retreatment.
2) cONtRaINDIcatIONS
Do not use to remove resin type pastes.
•
Do not use the D1 file around a canal curvature.
•
3) WaRNINGS
ProTaper
•
®
retreatment files are used to unfill root canals filled with gutta percha points, Thermafil
obturators or, eugenol based soluble paste. They can’t be used to unfill resine type paste.
4) PREcautIONS
Multiple use disinfection and resterilization cycles may lead to increased risk of file separation.
•
These instruments should not be immersed in a sodium hypochlorite solution.
•
Instrument decontamination. strictly follow decontamination instructions from the manufacturer.
•
Use in a constant rotation speed of:
•
500 rpm for removing gutta percha or Thermafil obturators
•
250 – 300 rpm for removing zinc oxide – eugenol based soluble paste.
•
For optimal usage, torque control devices are recommended.
•
Use the D1 file for the coronal one third of the canal, then the D2 file for the middle one and at last the
•
D3 file for the apical one third.
5) aDVERSE REactIONS
In the present technical state, no adverse reaction has been reported so far.
6) StEP BY StEP INStRuctIONS FOR PROtaPER FILES
Before removing gutta percha, carrier-based obturators or paste from a root canal:
Carefully observe 3 different, horizontally angulated radiographic images.
•
Visualize the density of obturation material relative to the width, length, and curvature of the canal.
•
Access the pulp chamber and note the circumferential dimensions of the obturation material at the
•
orifice(s).
Select the best removal technique after radiographic and clinical assessment.
•
Without cutting dentin, remove obturation material in a progressive crown-down manner.
•
Gutta Percha / carrier-Based Obturator Removal
When the rotary removal method is utilized, select the lowest speed (500 RPM) that will effectively
•
engage and remove obturation material from the canal.
Without engaging dentin, gently press the spinning ProTaper
•
®
D1 file into the gutta percha to create
friction, generate a heat wave, and extract material out of the canal. Never engage ProTaper
®
D1
around a canal curvature.*
Remove the D1 file frequently, inspect the blades for obturation material and clean the debris from the
•
flutes.
Continue with the D1 file, or the ProTaper
•
®
Retreatment file that fits passively between the dentinal
walls, until gutta percha is removed from the coronal one-third of the canal.
Select the ProTaper
•
®
D2 file and, using one or more passes, extract obturation material from the
middle one-third of the canal. Use a brushing outstroke motion to remove material from the canal
walls.
When appropriate, choose the ProTaper
•
®
D3 file and lightly press into the more deeply positioned
material and auger obturation material out of the apical one-third of the canal.
Continue with the D3 file as long as the flutes of the instrument, upon removal, are loaded with
•
obturation material.
When the obturation material is short of the canal terminus, use small sized hand files in the presence
•
of a viscous chelator to negotiate and secure the rest of the canal.
After assessing the glide path, select either manual or rotary NiTi ProTaper
•
®
files to shape and finish
the canal.
GB


