4
Using Adobe Reader (Windows version)
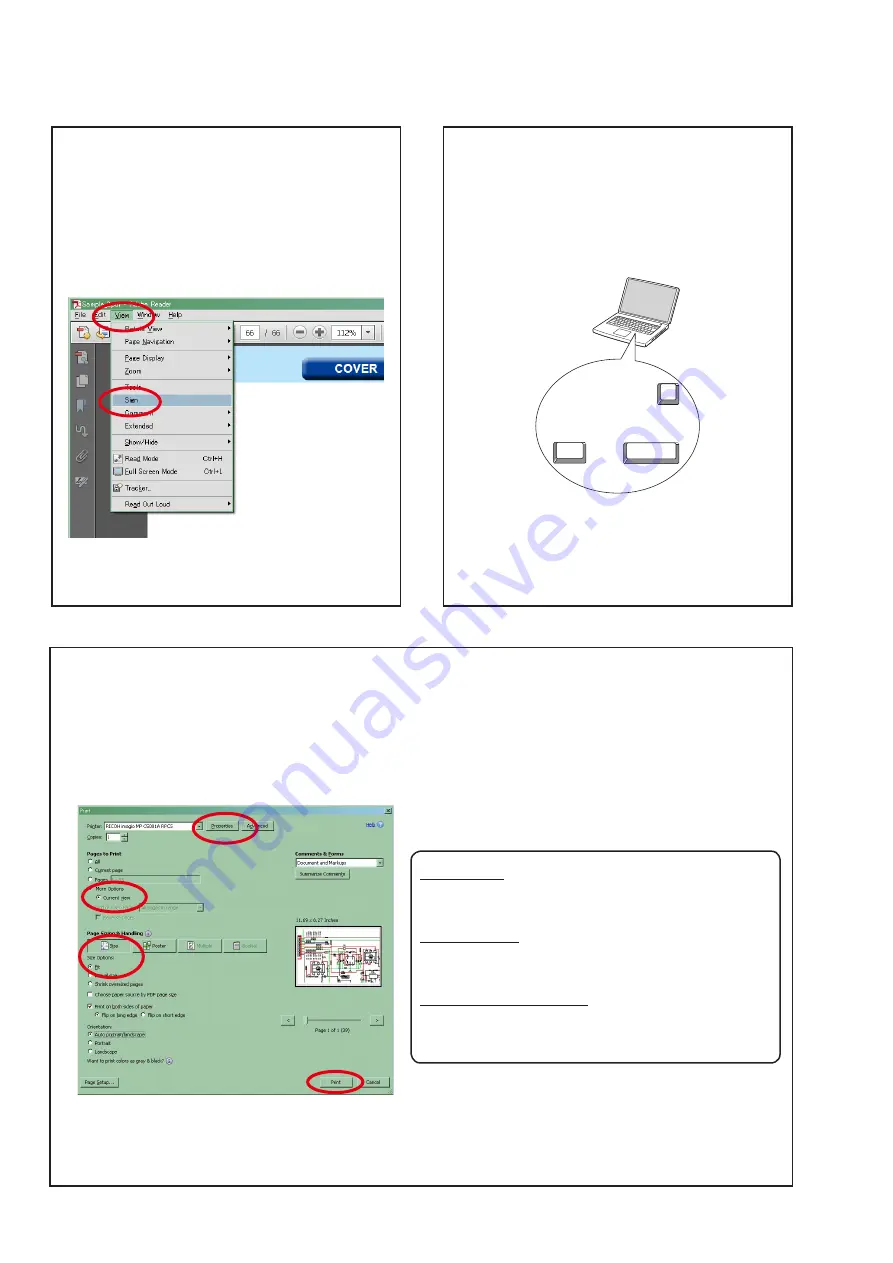
• Properties
Click this button and check that the printer is set to a
suitable paper size.
• Page to print
Select the following checkbox.
"
More Options
" : "
Current View
"
• Page Sizing & Handling
Select the following checkbox.
"
Size
" / "
Size Options
" : "
Fit
"
Add notes to this data (Sign)
The Sign function lets you add notes to the data in this
manual.
Save the file once you have finished adding notes.
[Example using Adobe Reader X]
On the "
View
" menu, click "
Sign
".
• The Sign pane appears.
[Example using Adobe Reader 9]
On the "
Document
" menu, click "
Sign
".
Magnify schematic / printed wiring board
diagrams - 1
(Ctrl+Space, mouse operation)
Press
Ctrl
+
Space
on the keyboard and drag the
mouse to select the area you want to view.
• The selected area is magnified.
Ctrl
Space
0
• When you want to move the area shown, hold down
Space
and drag the mouse.
• When you want to show a full page view, press
Ctrl
+
0
on the keyboard.
Print a magnified part of the manual
The Properties dialog box and functions will vary depending on your printer.
1. Drag the mouse to magnify the part you want to print.
2. On the "
File
" menu, click "
".
3. Configure the following settings in the Print dialog box.
4. Click the
button to start printing.


