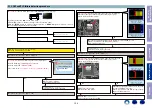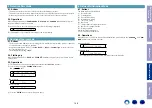
4. Protection Pass Mode
6. Network Initialization Mode
4.1. Actions
• This mode allows the power to be turned on without activating protections.
• This mode functions in the same way as normal power-on, except that protections are not activated.
• When using the protection pass mode, do not connect speakers to the speaker terminals.
4.2. Operations
While holding down buttons "
ZONE3 SOURCE
", "
STATUS
" and "
CURSOR
0
" simultaneously, press
the power button to turn on the power.
The device returns to the normal display message after the following is displayed.
L1
Protection Pass
This is displayed for 5 seconds before returning to the normal display.
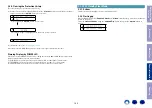
5. Additional Source mode
5.1. Actions
• These functions add Additional Source settings for use with the Custom installer. AUX 3-7 is added as
a source when these settings are enabled.
• Assign input terminals to AUX 3-7 in "
Setup Menu
" → "
Input
" → "
Input Assign
" to increase the num-
ber of usable input sources.
• The default factory setting is "
OFF
".
5.2. Starting up
While holding down buttons "
BACK
" and "
CURSOR
f
" simultaneously, press the power button to turn
on the power.
5.3. Operations
(1) The Additional Source mode is displayed in FLD after the POWER ON sequence.
(2) Select settings using the "
CURSOR
0
/
1
" buttons.
ON
OFF
L1
*Add Source Mode
L2
< OFF >
• ON is selected.
L2
< ON >
• OFF is selected.
L2
< OFF >
(3) Press the "
ENTER
" button on the main unit to apply.
6.1. Actions
The following items are initialized.
(1) Network setup
(2) Friendly Name
(3) Auto Update setting
(4) Allow Update setting
(5) Time Zone setting
(6) Queue list
(7) Internet Radio recently played station
(8) Quick Select playback station
(9) AirPlay Password
(10) Bluetooth Pairing History
(11) Crestron Connected Setup
6.2. Operations
When the power is on and the input source is HEOS Music, press and hold the "
CURSOR
1
" and "
DIM-
MER
" buttons for more than 3 seconds.
Initializing Display
L1
Network Reset...
Complete Display
L1
Completed
This is displayed for 5 seconds before returning to the normal display.
Before Servicing
This Unit
Electrical
Mechanical
Repair Information
Updating
148

