Delta Children Simmons Juvenile Crib 'N' More Assembly Instructions Manual Download Page 14

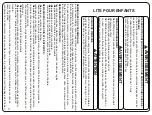
 W

ARNING:

*

Infants can suffocate on soft bedding. Never add a pillo

w or comforter. Never place additional padding under an 

infant.

*

Failure to follow these warnings and the assembly instructions could result in serious injury or death. 

DO NOT use 

this crib if you cannot exactly follow the accompanying instructions.

*

To reduce the risk of SIDS, pediatricians recommend healthy infants be placed on their backs to sleep, unless 

otherwise advised by your physician.

*Strangulation Hazard:

 STRINGS CAN CAUSE STRANGULATION! 

Do not

 place items with a string around a 

child's neck, such as hood strings or pacifier cords. 

Do not

 suspend strings over a crib or attach strings to toys.

*Strangulation Hazard:

 To help prevent strangulation tighten all fasteners. A child can trap parts of the body or 

clothing on loose fasteners.

*Strangulation Hazard:


Do not

 place crib near window 

or patio door  

where cords from blinds or drapes may 

strangle a child.

*Fall Hazard:

 When child is able to pull to a standing position, set mattress to lowest position and remove bumper 

pads, large toys and other objects that could serve as steps for climbing out. This crib has an adjustable mattress 

support. For the convenience of the parent when the baby is very small, the mattress support may be used in the 

highest position.  Important:  with the mattress support and mattress in the highest position, be absolutely sure that 

the top of the front crib side is at least 3 inches higher than the top surface of the mattress.  If it is not, lower the 

mattress support and the mattress to the next highest position.

*Fall Hazard:

 Stop using crib when child begins to climb out or reaches a height of 35in. (89cm),  whichever occurs 

first. The child should be placed in a youth or regular bed. 

*

Check this product for damaged hardware, loose joints, loose bolts or other fasteners, missing parts, or sharp edges 

before and after assembly and frequently during use.  Securely tighten loose bolts and other fasteners. 

Do not use 

crib

 if any parts are missing, damaged or broken.  Contact Simmons Kids Furniture for replacement parts and 

instructional literature if needed.  Do not substitute parts.

*Follow warnings on 

all 

products in a crib.

*If refinishing, use a non-toxic finish specified for children's products.

*

Never

 use plastic shipping bags or other plastic film as mattress covers because they can cause suffocation.

*Infants can suffocate in gaps between crib sides and a mattress that is too small.

*Ensure a safe environment for the child by checking regularly, before placing the child in the crib, that every 

component is properly and securely in place.

*To avoid head injury, do not allow any child to play underneath the crib.

*

Never

 add an accessory such as a bassinet or changing table that extends over the sleeping area.

*

In Canada Only

 - Use a crib mattress that is no thicker than 15 cm and is of such a size that, when it is pushed 

firmly against any side of the crib, it does not leave a gap of more than 3 cm between the mattress and any part of 

the sides of the crib. Do not use this crib for a child who can climb out of it or who is taller than 90 cm.

 CAUTION:

ANY MATTRESS USED IN THIS CRIB SHALL 

BE AT LEAST 27 1/4 BY 51 5/8 IN. WITH A 

THICKNESS NOT EXCEEDING 6 IN.

23

Summary of Contents for Simmons Juvenile Crib 'N' More

Page 1: ...aux informations indiqu es sur l tiquette qui se trouve sur Panneau Arri re veuillez faire r f rence aux informations indiqu es sur le produit lorsque vous contactez le Service client Al contactar al...

Page 2: ...broken parts any questions CALL Simmons Kids Consumer Care NEVER place the crib near a window or any wall hangings Your baby should sleep on a firm mattress DO NOT place any items in the crib AAP Reco...

Page 3: ...ximit d une fen tre ou de tentures Votre b b doit dormir sur un matelas ferme Conseils de l AAP Placez toujours votre b b sur le dos pour dormir Consultez votre m decin Lisez tous les avertissements e...

Page 4: ...los beb s JAM S duerma con ellos JAM S coloque la cuna cerca de una ventana o elementos colgados en las paredes Su beb debe dormir sobre un colch n firme APP recomienda Haga que su beb duerma siempre...

Page 5: ...ed tipover restraints NEVER allow children to climb or hang on drawers doors or shelves Place heaviest items in the lowest drawers NEVER open more than one drawer at a time DO NOT leave drawers open w...

Page 6: ...nis NE laissez JAMAIS les enfants monter sur ou se suspendre aux tiroirs portes et ou tablettes Placez les objets les plus lourds dans les tiroirs du bas N OUVREZ JAMAIS plus d un tiroir en m me temps...

Page 7: ...UNCA permita que los ni os trepen sobre cajones puertas o baldas de estanter a ni que se cuelguen de ellos Coloque los art culos de mayor peso en los cajones inferiores NUNCA abra m s de un caj n al m...

Page 8: ...TES DE ENCENDER A LA ASAMBLEA SI ALGUNAS PIEZAS SON QUE FALTA O DA ADAS CRIB PARTS PI CES DE LIT DE B B PIEZAS DE LA CUNA 4 1 Left Crib Side 1 Panneau de Gauche du Lit de B b 1 Montaje del Lado Izquie...

Page 9: ...mm 11 8 M6 x 18mm Bolt 8 Boulons M6 x 18mm 8 Pernos M6 x 18mm 5475 5466 5763 1177 12 2 M6 x 17mm Barrel Nut 5479 2 crous Port e Cylindrique M6x17mm 2 Tuerca Cil ndrica M6x17mm 8 2 M6 x 105mm Bolt 2 Bo...

Page 10: ...M6x17mm 2 Tuerca Cil ndrica M6x17mm Part 12 Pi ce No12 Pieza 12 Attach Left Rear Post Part 1 and Right Rear Post Part 2 to Back Rail Part 3 using 2 M6x90mm Bolts Part 9 2 M6x105mm Bolts Part 8 and 2 M...

Page 11: ...the Assembly from Step 1 using 3 M6x45mm Bolts Part 10 Tighten with the M4 Allen Wrench Be sure label is towards the inside 2 Attach Left Crib Side Part 4 to the Assembly from Step 1 using 3 M6x45mm...

Page 12: ...hexadecimal M4 incluida Aseg rese de apretar completamente todos los pernos Nota Hay 3 posiciones para el soporte del colch n desde reci n nacido hasta un ni o de 35 pulgadas de altura lea la nota de...

Page 13: ...y from Step 3 Lit De B b Assembl L tape No3 Montaje de la Cuna del Paso 3 Part 6 Pi ce No6 Pieza 6 M4 Allen Wrench Provided Cl hexagonale M4 Fournie Llave Allen M4 se Incluye 6 1 Front Rail 1 Panneau...

Page 14: ...tress support and the mattress to the next highest position Fall Hazard Stop using crib when child begins to climb out or reaches a height of 35in 89cm whichever occurs first The child should be place...

Page 15: ...st pas le cas abaisser le support du matelas et le matelas d un cran Danger de chute Cesser d utiliser le lit lorsque l enfant est capable d en sortir ou qu il atteint la taille de 89 cm 35 pouces L e...

Page 16: ...de utilizar la cuna cuando el ni o comience a trepar o alcance una altura de 35 pulgadas 89 cm lo que ocurra primero Deber a colocarse al ni o en una cama normal o juvenil Compruebe que este producto...

Page 17: ...emicals Do not spray cleaners directly onto furniture Lift slightly when moving on carpeting to prevent leg breakage Use of a vaporizer near furniture will cause wood to swell and finish to peel NOTES...

Page 18: ...iez avoir besoin de le placer sur le cote lateral et sur le cote frontal Il est fortement recommand de faire l assemblage sur une surface lisse non abrasive comme le film mousse de l emballage pour ev...

Page 19: ...solicite que coloque la unidad de lado y de cara Se reco mienda encarecidamente que realice el montaje sobre una superficie no abrasiva Como la envoltura de embalaje de espuma para evitar da ar el aca...

Page 20: ...CRIB N MORE PEUT TRE CONVERTI EN LIT D ENFANT L ACHAT DU GARDE CORPS POUR LIT D ENFANT SIMMONS No 328725 PLUS DE D TAILS EN MAGASIN NOTA ESTA CUNA SE PUEDE CONVERTIR EN UNA CAMA DEL NI O CON LA COMPR...

Page 21: ...immons Kids Furniture for more information Attach Bed Rails to the Back Rail Part 3 and Front Rail Part 6 using 8 M6 x18mm Bolts Part 11 Follow all instructions supplied with the Bed Rails Ce lit de b...

Page 22: ......

Reviews: