background image

To Make Assembly Even

Easier Watch Video Here!

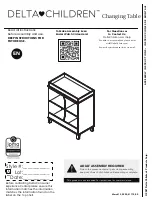
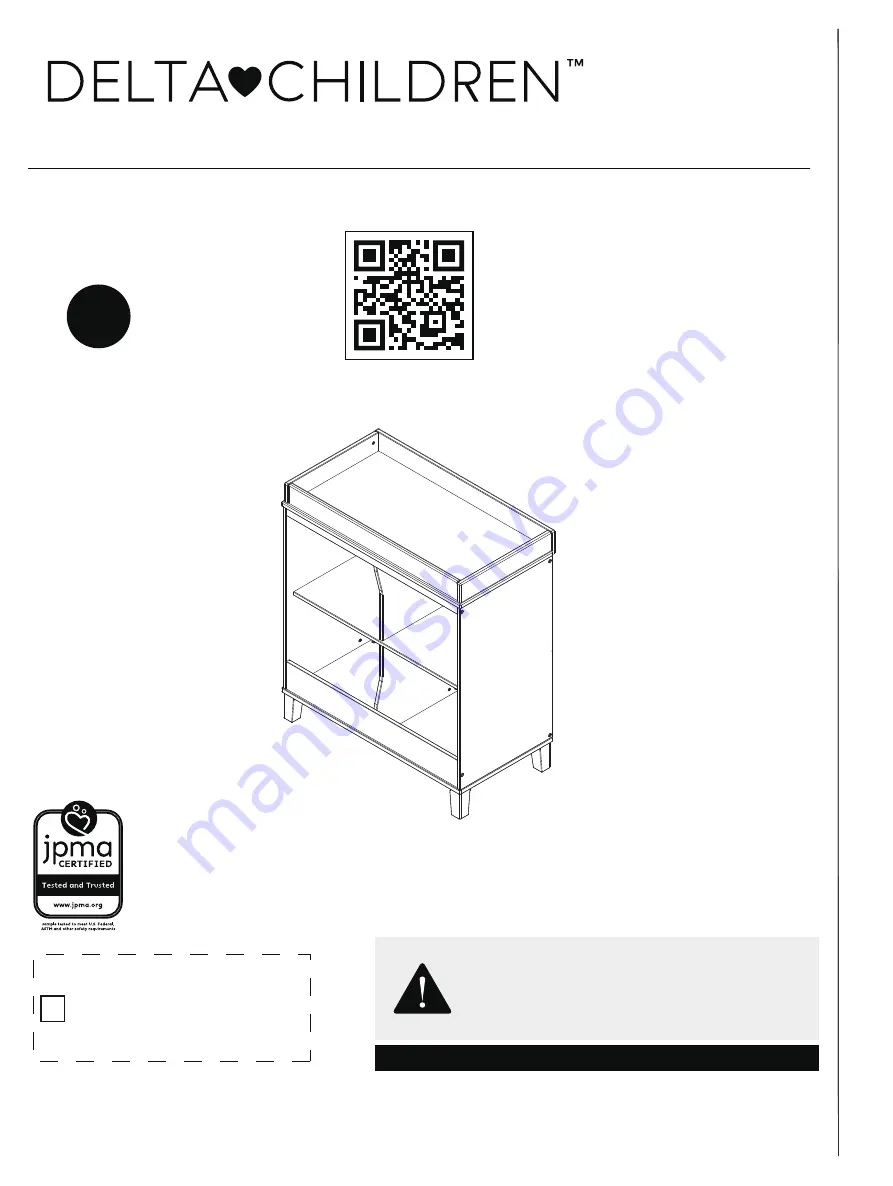
ADULT ASSEMBLY REQUIRED

Due to the presence of small parts during assembly, 

keep out of reach of children until assembly is complete.

EN

March 12, 2020, 41715, R0

Changing Table

This product is not intended for institutional or commercial use.

Read all instructions 

before assembly and use. 

KEEP INSTRUCTIONS FOR 

FUTURE USE.

Style #:

Lot:

Date:

___________

___________

___________

A

REV

Before contacting Delta Consumer 

Experience Center please ensure this 

information matches the information 

matches the information found on the 

label on the

 Top Shelf.

For Questions or 

to Contact Us: 

DeltaChildren.com/Help

If unable to access website, please email 

[email protected]

Expect longer response times via email.

©2021 Delta Childr

en’

s Pr

oducts Corp.

ASSEMBLY INSTRUCTIONS • INSTRUCCIONES DE MONTAJE

Summary of Contents for Huck W146010-130

Page 1: ...EEP INSTRUCTIONS FOR FUTURE USE Style Lot Date ___________ ___________ ___________ A REV Before contacting Delta Consumer Experience Center please ensure this information matches the information match...

Page 2: ...actar el Centro de Experiencia del Consumidor de Delta por favor aseg rese de que la informaci n de la primera p gina coincida con la informaci n que se encuentra en la etiqueta ubicada en el Estante...

Page 3: ...3 A S S E M B L Y I N S T R U C T I O N S I N S T R U C C I O N E S D E M O N T A J E...

Page 4: ...n hour without any help It s very sturdy and we like that it has adjustable levels for the mattress height To top it all off it s so incredibly darling We LOVE LOVE LOVE this crib WRITE A REVIEW for t...

Page 5: ...nda donde haya sido comprado 1 HAGA UNA CAPTURA DE PANTALLA de su cali caci n y c rguela a la pagina www DeltaChildren com Review 2 ES AS DE F CIL En cuanto lo env e ya estar instant neamente PARTICIP...

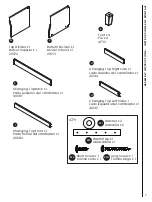
Page 6: ...C Back Middle Rail x 1 Barra trasero medio x 1 41240 D Back Bottom Rail x 1 Barra trasero inferior x 1 41241 E Front Top Rail x 1 Barra frontal superior x 1 41238 F Front Bottom Rail x 1 Barra fronta...

Page 7: ...1 Parte posterior del cambiador x 1 40681 S Changing Top Front x 1 Parte frontal del cambiador x 1 40682 T Changing Top Left Side x 1 Lado izquierdo del cambiador x 1 41243 U 7 A S S E M B L Y I N S T...

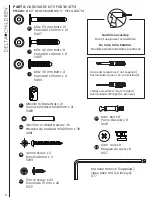
Page 8: ...erno M6 x 40mm x 8 5465 X M6x13mm Barrel Nut x 21 Tuerca Cil ndrica M6x13mm x 21 5483 Z 6x30 mm Wood Dowel x 36 Pasador de madera 6x30mm x 36 4491 AA Cam Bolt x 8 Perno de Leva x 8 6128 DD Cam Lock x...

Page 9: ...utilizar el sistema de bloqueo de leva 1 Insert the cams 2 Cam bolts must be screwed down ush 3 Refer to page 9 for instructions on how to use the cam lock system 1 Inserte las levas 2 Se debe atornil...

Page 10: ...paso 1 Cam bolts must be screwed down ush 2 Refer to page 9 for instructions on how to use the cam lock system 1 Se debe atornillar los pernos de leva 2 Re rase a la p gina 9 para obtener instruccione...

Page 11: ...11 A S S E M B L Y I N S T R U C T I O N S I N S T R U C C I O N E S D E M O N T A J E B A DD DD DD DD DD DD...

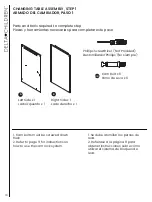
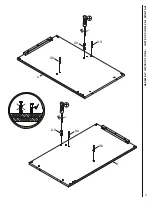
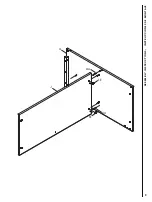
Page 12: ...AA 2 Cam Bolts Part DD and 2 Cam Locks Part EE Tighten with the Phillips Screwdriver Fije la Estante Medio Pieza J al Lado izquierdo Pieza A utilizando 2 Pasadores de madera 6x30mm Pieza AA 2 Pernos...

Page 13: ...13 A S S E M B L Y I N S T R U C T I O N S I N S T R U C C I O N E S D E M O N T A J E J A AA EE AA EE...

Page 14: ...ider Part N and the Bottom Divider Part P to the Middle Shelf Part J using 4 6x30 mm Wood Dowels Part AA as shown Conecte el divisor superior Parte N y el divisor inferior Parte P al estante medio Par...

Page 15: ...15 A S S E M B L Y I N S T R U C T I O N S I N S T R U C C I O N E S D E M O N T A J E N J AA AA AA BACK POSTERIOR AA P...

Page 16: ...1 Barra trasero inferior Pieza E a la pieza del paso 3 utilizando 3 Pasadores de madera 6x30mm Pieza AA 1 Bloqueo de Leva Pieza EE 5 Pernos M6x50mm Pieza W y 5 Tuercas cil ndricas M6x13mm Pieza Z Util...

Page 17: ...17 A S S E M B L Y I N S T R U C T I O N S I N S T R U C C I O N E S D E M O N T A J E A AA Z E D C W W Z W Z W Z AA AA Z W BACK POSTERIOR EE A EE D...

Page 18: ...per alignment Fije 1 Barra frontal superior Pieza F y 1 Barra frontal inferior Pieza G a la pieza del paso 4 utilizando 3 Pasadores de madera 6x30mm Pieza AA 2 Pernos M6x50mm Pieza W y 2 Tuercas cil n...

Page 19: ...19 A S S E M B L Y I N S T R U C T I O N S I N S T R U C C I O N E S D E M O N T A J E FRONT el FRENTE AA Z F W AA AA Z G W...

Page 20: ...Lado derecho Pieza B a la pieza del paso 5 utilizando 8 Pasadores de madera 6x30mm Pieza AA 1 Bloqueos de Levas Pieza EE 4 Pernos M6x50mm Pieza W y 4 Tuercas cil ndricas M6x13mm Pieza Z Utilice la Ll...

Page 21: ...21 A S S E M B L Y I N S T R U C T I O N S I N S T R U C C I O N E S D E M O N T A J E B W W Z AA AA AA AA AA AA Z EE W W Z EE AA Z EE...

Page 22: ...n M4 incluido M6 x 40 mm Bolt x 4 Perno M6 x 40mm x 4 X Attach 4 feet Part R to the bottom of the Bottom Shelf Part K with 4 6x30 mm Wood Dowels Part AA and 4 M6x40mm Bolts Part X using the M4 Allen W...

Page 23: ...23 A S S E M B L Y I N S T R U C T I O N S I N S T R U C C I O N E S D E M O N T A J E K R X AA R X AA R X AA R X AA...

Page 24: ...arrel Nut in the proper alignment Fije la Estante inferior Pieza K a la pieza del paso 6 utilizando 8 Pasadores de madera 6x30mm Pieza AA 8 Pernos M6x50mm Pieza W y 8 Tuercas cil ndricas M6x13mm Pieza...

Page 25: ...25 A S S E M B L Y I N S T R U C T I O N S I N S T R U C C I O N E S D E M O N T A J E AA K W W W W W W Z AA AA AA Z Z...

Page 26: ...30 mm Wood Dowels Part AA and 4 M6x30mm Bolts Part Y using the M4 Allen Wrench as shown Fije la Estante superior Pieza H a la pieza del paso 8 utilizando 4 Pasadores de madera 6x30mm Pieza AA y 4 Pern...

Page 27: ...27 A S S E M B L Y I N S T R U C T I O N S I N S T R U C C I O N E S D E M O N T A J E H AA AA Y Y AA Y Y...

Page 28: ...ompletar este paso Attach the Top Shelf Part H to the assembly from step 9 with 4 M6x40mm Bolts Part X using the M4 Allen Wrench as shown Fije la Estante superior Pieza H a la pieza del paso 9 utiliza...

Page 29: ...29 A S S E M B L Y I N S T R U C T I O N S I N S T R U C C I O N E S D E M O N T A J E H X X X X...

Page 30: ...Ensure the Address Label is facing to the back of the unit Fije el panel posterior superior Pieza L y el panal posterior inferior Pieza M al conjunto de piezas del Paso 10 utilizando 20 tornillos 15m...

Page 31: ...31 A S S E M B L Y I N S T R U C T I O N S I N S T R U C C I O N E S D E M O N T A J E L M PRODUCT LABEL R TULO DEL PRODUCTO CC CC CC CC CC x 20...

Page 32: ...ado izquierdo del cambiador Pieza U y 1 lado derecho del cambiador Pieza V a 1 parte frontal del cambiador Pieza T utilizando 2 Pernos de Levas Pieza DD y 2 Bloqueos de Levas Pieza EE Apriete todos lo...

Page 33: ...33 A S S E M B L Y I N S T R U C T I O N S I N S T R U C C I O N E S D E M O N T A J E V U DD DD T V U EE EE...

Page 34: ...crewdriver to hold the Barrel Nut in the proper alignment Fije 1 parte posterior del cambiador Pieza S al conjunto de piezas del paso 12 utilizando 2 pernos M6 x 50 mm Pieza W y 2 tuercas de barril M6...

Page 35: ...35 A S S E M B L Y I N S T R U C T I O N S I N S T R U C C I O N E S D E M O N T A J E S V U W W Z Z...

Page 36: ...on the top of the Dresser as shown 2 Insert 3 40mm screws Part BB through the back of the Changing Top into the pre drilled holes the dresser 3 Tighten with a Phillips Screwdriver 1 Poner el equip de...

Page 37: ...37 A S S E M B L Y I N S T R U C T I O N S I N S T R U C C I O N E S D E M O N T A J E BB BB BB...

Page 38: ...del ramo m s cercana para conseguir un sistema de anclaje que soporte una fuerza de tiraje de hasta 50 LBS 22 7 Kgs para su tipo de muro Si no est seguro sobre c mo encontrar la viga de madera o tien...

Page 39: ...p 6 Feed the Tipover Restarint through the hole as you place the dresser in it s final position NOTA Aseg rese de fijar todos los accesorios a la carcasa antes de completar este paso 6 Pase el element...

Page 40: ...ter and beauty of this ne nish Do not use abrasive chemicals Do not spray cleaners directly onto furniture Lift slightly when moving on carpeting to prevent leg breakage Use of a vaporizer near furnit...

Page 41: ...o caluroso o un s tano h medo y fr o Estos extremos pueden provocar una p rdida de integridad estructural Para preservar el brillo del acabado de alta calidad que recubre su producto se recomienda que...

Page 42: ...l tanto sobre novedades de su producto por favor visite www DeltaChildren com Fecha de Compra _____________ debe adem s mantener su recibo Para reportarcualquier problema por favor entre a www DeltaCh...

Page 43: ...OR QU ELEGIR A Visita Deltachildren Com Pages Our Story para m s informaci n DELTA DONA 10 de nuestros ingresos est destinado a mejorar la vida de los ni os A DELTA LE IMPORTA Hacemos pruebas por enci...

Page 44: ...S UNE PLACE CAMA SENCILLA BINS ORGANIZERS PANIERS CONTENEDORES MATTRESES MATELAS COLCH N PLAYROOM FURNITURE SALLE DE JEUX CUARTO DE JUGAR TODDLER BEDS LITS POUR ENFANT CAMA PARA NI O WHY CHOOSE DELTA...

Reviews: