Steps
1
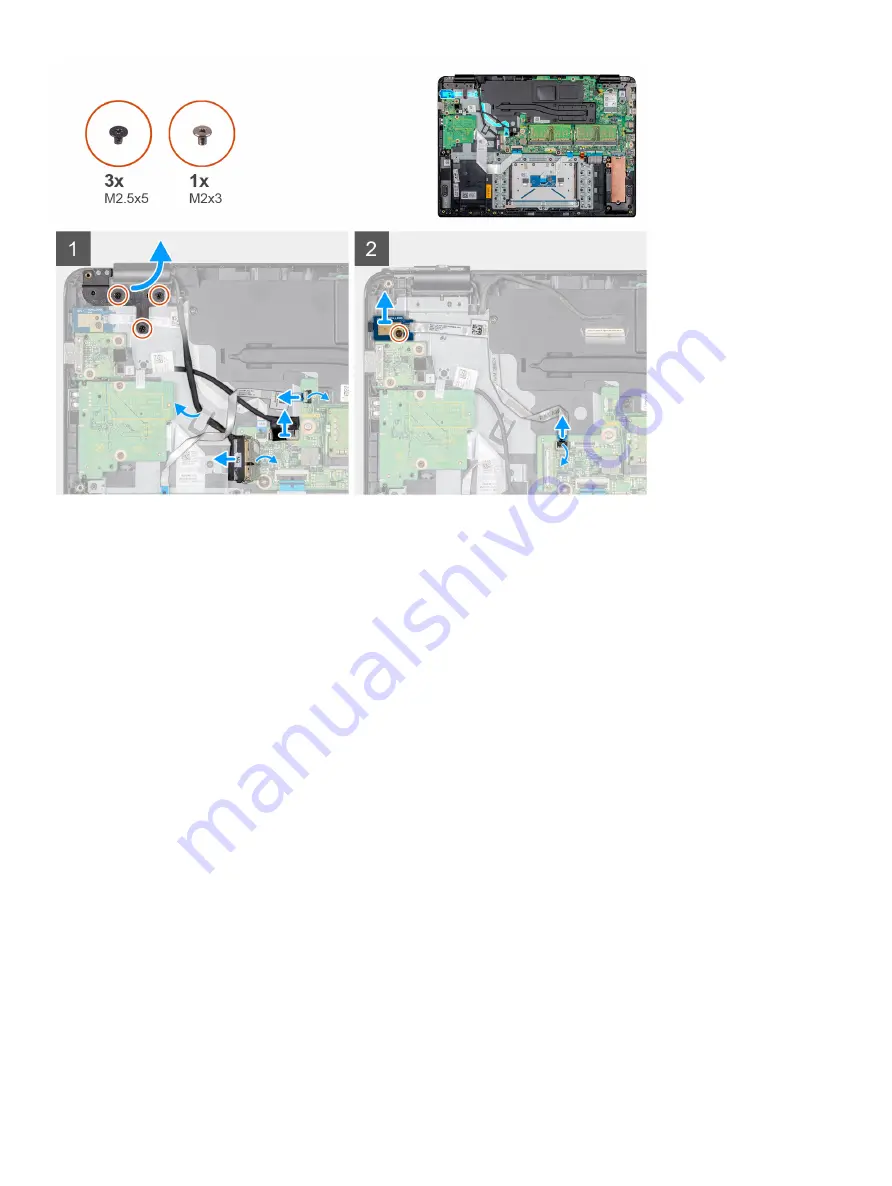
Remove the three screws (M2.5x5) that connects the left hinge to the keyboard and palm-rest assembly.
2
Lift the left hinge from the palm-rest and keyboard assembly.
3
Open the latch and disconnect the CAC reader cable from the system board.
4
Open the latch and disconnect the VGA daughterboard cable from the system board.
5
Peel the tape that secures the display cable to the system board.
6
Open the latch and disconnect the display cable from the system board.
7
Remove the display cable from the routing guide.
8
Open the latch and disconnect the power button board cable from the system board.
9
Remove the screw (M2x3) that secures the power button board to the palm-rest and keyboard assembly.
10 Peel the power button cable off the palm-rest and keyboard assembly.
11 Lift the power button board with the cable from the palm-rest and keyboard assembly.
Installing the power button board
Prerequisite
If you are replacing a component, remove the existing component before performing the installation procedure.
About this task
The following image indicates the location of the power button board and provides a visual representation of the installation procedure:
Removing and installing components
43
Summary of Contents for Wyse 5470
Page 1: ...Dell Wyse 5470 Thin Client Service Manual ...
Page 13: ...Removing and installing components 13 ...
Page 15: ...Removing and installing components 15 ...
Page 38: ...38 Removing and installing components ...
Page 41: ...Removing and installing components 41 ...
Page 47: ...Removing and installing components 47 ...
Page 49: ...Removing and installing components 49 ...
Page 56: ...56 Removing and installing components ...


