background image

Chipsets

All laptops communicate with the CPU through the chipset. This laptop is shipped with the Intel 100 Series chipset.

Downloading the chipset driver

Turn on the laptop.

2  Go to 

Dell.com/support

.

3  Click 

Product Support

, enter the Service Tag of your laptop, and then click 

Submit

.

NOTE: 

If you do not have the Service Tag, use the autodetect feature or manually browse for your laptop model.

4  Click 

Drivers and Downloads

.

5  Select the operating system installed in your laptop.
6  Scroll down the page, expand 

Chipset

, and select your chipset driver.

Click 

Download File

 to download the latest version of the chipset driver for your laptop.

8  After the download is complete, navigate to the folder where you saved the driver file.
9  Double-click the chipset driver file icon and follow the instructions on the screen.

Identifying the chipset in Device Manager on Windows 10

Click 

All Settings


 on the Windows 10 Charms Bar.

2  From the 

Control Panel

, select 

Device Manager

.

3  Expand 

System Devices

 and search for the chipset.

Identifying chipset in Device Manager on Windows 8

Click 

Settings


 on the Windows 8.1 Charms Bar.

2  From the 

Control Panel

, select 

Device Manager

.

3  Expand 

System Devices

 and search for the chipset.

Technology and components

52

Summary of Contents for Vostro 15-3568

Page 1: ...Dell Vostro 15 3568 Owner s Manual Regulatory Model P63F Regulatory Type P63F002 ...

Page 2: ... the problem WARNING A WARNING indicates a potential for property damage personal injury or death 2016 Dell Inc All rights reserved This product is protected by U S and international copyright and intellectual property laws Dell and the Dell logo are trademarks of Dell Inc in the United States and or other jurisdictions All other marks and names mentioned herein may be trademarks of their respecti...

Page 3: ...oving the optical drive 15 Removing the optical drive bracket 16 Installing the optical drive bracket 17 Installing the optical drive 17 Keyboard 17 Removing the keyboard 17 Installing the keyboard 19 Base cover 19 Removing the base cover 19 Installing the base cover 22 Hard drive 22 Removing the hard drive assembly 22 Removing the hard drive from the hard drive bracket 23 Installing the hard driv...

Page 4: ...power connector 38 Installing the power connector 39 Display assembly 39 Removing the display assembly 39 Installing the display assembly 41 Display bezel 41 Removing the display bezel 41 Installing the display bezel 42 Camera 43 Removing the display bezel 43 Installing the camera 43 Display panel 44 Removing the display panel 44 Installing the display panel 45 Display hinges 46 Removing the displ...

Page 5: ...lay 57 Connecting to external display devices 57 Hard drive options 57 Identifying the hard drive in Windows 10 57 Identifying the hard drive in Windows 8 58 Identifying the hard drive in Windows 7 58 Entering BIOS setup 58 USB overview 59 USB 3 0 aka SuperSpeed USB 59 Speed 60 Applications 60 Compatibility 61 HDMI 1 4 61 HDMI 1 4 Features 61 Advantages of HDMI 62 USB Powershare 62 Camera features...

Page 6: ...assword 76 Assigning a system password and setup password 76 Deleting or changing an existing system and or setup password 76 5 Enhanced Pre Boot System Assessment ePSA diagnostics 78 Running the ePSA diagnostics 78 6 Technical specifications 79 7 Contacting Dell 84 Owner s Manual 6 ...

Page 7: ...computer CAUTION Handle components and cards with care Do not touch the components or contacts on a card Hold a card by its edges or by its metal mounting bracket Hold a component such as a processor by its edges not by its pins CAUTION When you disconnect a cable pull on its connector or on its pull tab not on the cable itself Some cables have connectors with locking tabs if you are disconnecting...

Page 8: ... your operating system press and hold the power button for about 6 seconds to turn them off Turning off your computer Windows 7 CAUTION To avoid losing data save and close all open files and exit all open programs before you turn off your computer 1 Click Start 2 Click Shut Down NOTE Ensure that the computer and all attached devices are turned off If your computer and attached devices did not auto...

Page 9: ...4 Connect your computer and all attached devices to their electrical outlets 5 Turn on your computer Working on your computer 9 ...

Page 10: ...llips 1 screwdriver Small plastic scribe Screw size list Table 1 Vostro 15 3568 screw size list Component M2L3 M2 5L8 M2L2 Big head07 M2L2 Big head05 M2L5 M2 5L2 5 Big head M3L3 M2L3 Optical drive 1 Optical drive bracket 1 Base Cover 8 3 Hard drive 4 Hard drive bracket 4 WLAN card 1 System fan 2 System board 2 I O board 1 Power connector 1 Display assembly 3 Display panel 4 Hinge 6 Power button bo...

Page 11: ...Chassis view Front open view 1 Camera 2 Camera status light 3 Microphone 4 LCD panel 5 Power and battery status light Hard drive activity light Removing and installing components 11 ...

Page 12: ...Left view 1 Power connector 2 Network connector 3 VGA connector 4 HDMI connector 5 USB 3 0 connector 6 USB 3 0 connector Removing and installing components 12 ...

Page 13: ...Palmrest view 1 Power button 2 Keyboard 3 Palmrest 4 Touchpad Removing and installing components 13 ...

Page 14: ...tical drive 5 Security cable slot Battery Removing the battery 1 Follow the procedure in Before working inside your computer 2 To remove the battery a Slide the release latch to unlock the battery 1 b Remove the battery from the computer 2 Removing and installing components 14 ...

Page 15: ...rive Removing the optical drive 1 Follow the procedure in Before working inside your computer 2 Remove the battery 3 To remove the optical drive a Remove the screw that secures the optical drive to the computer 1 b Using a plastic scribe push the tab to release the optical drive 2 c Slide the optical drive out of the computer 3 Removing and installing components 15 ...

Page 16: ... working inside your computer 2 Remove the a battery b optical drive 3 To remove the optical drive from the bracket a Remove the screw that secures the optical drive bracket b Remove the optical drive bracket from the optical drive Removing and installing components 16 ...

Page 17: ...ks into place 2 Tighten the screw to secure the optical drive to the computer 3 Install the battery 4 Follow the procedure in After working inside your computer Keyboard Removing the keyboard 1 Follow the procedure in Before working inside your computer 2 Remove the battery 3 To remove the keyboard a Release the keyboard by prying on the keyboard release tabs using a plastic scribe 1 b Slide and l...

Page 18: ...4 To remove the keyboard cable a Disconnect the keyboard cable from the system board b Lift the keyboard cable to remove it from the computer Removing and installing components 18 ...

Page 19: ...place 4 Install the battery 5 Follow the procedure in After working inside your computer Base cover Removing the base cover 1 Follow the procedure in Before working inside your computer 2 Remove the a battery b optical drive c keyboard 3 To remove the base cover a Disconnect the optical drive connector and lift it to remove it from the system board 1 Removing and installing components 19 ...

Page 20: ...b Remove the screws inside the palmrest 2 4 Remove the screws that secure the base cover to the computer Removing and installing components 20 ...

Page 21: ...5 To remove the base cover a Pry the edges of the base cover 1 b Lift the base cover and remove it from the computer 2 Removing and installing components 21 ...

Page 22: ...r over 5 Open the computer and connect the optical drive connector to the system board 6 Tighten the screws to secure the base cover to the palmrest 7 Install the a keyboard b optical drive c battery 8 Follow the procedure in After working inside your computer Hard drive Removing the hard drive assembly 1 Follow the procedure in Before working inside your computer 2 Remove the a battery Removing a...

Page 23: ...ing the hard drive from the hard drive bracket 1 Follow the procedure in Before working inside your computer 2 Remove the a battery b optical drive c keyboard d base cover e hard drive assembly 3 To remove the hard drive from the hard drive assembly a Pull the hard drive cable connector to remove it from the hard drive 1 b Remove the screws that secure the hard drive bracket to the hard drive 2 c ...

Page 24: ...e in After working inside your computer Installing the hard drive assembly 1 Insert the hard drive assembly into the slot on the computer 2 Tighten the screws to secure the hard drive assembly to the computer 3 Connect the hard drive cable to the connector on the system board 4 Install the a base cover b keyboard c optical drive d battery 5 Follow the procedures in After working inside your comput...

Page 25: ... Remove the WLAN card from the computer 3 Installing the WLAN card 1 Insert the WLAN card into the slot on the computer 2 Connect the WLAN cables to the connectors on the WLAN card 3 Place the securing tab on the WLAN card and tighten the screw on the computer 4 Install the a base cover b keyboard c optical drive d battery 5 Follow the procedure in After working inside your computer Removing and i...

Page 26: ...e cover 3 To remove memory module a Pull the clips securing the memory module until the memory module pops up 1 b Remove the memory module from the system board 2 Installing the memory module 1 Insert the memory module into the memory socket 2 Press the memory module until the clips secure the memory module 3 Install the Removing and installing components 26 ...

Page 27: ...de your computer Coin cell battery Removing the coin cell battery 1 Follow the procedure in Before working inside your computer 2 Remove the a battery b optical drive c keyboard d base cover 3 By using a plastic scribe lift the battery out of the battery slot Removing and installing components 27 ...

Page 28: ...side your computer Power button board Removing the power button board 1 Follow the procedure in Before working inside your computer 2 Remove the a battery b optical drive c keyboard d base cover 3 To remove the power button board a Disconnect the motherboard cable from the computer 1 b Remove and lift the display hinge screws from the computer 2 3 c Remove the power button board from the computer ...

Page 29: ...ews to secure it to the power button board 4 Install the a base cover b keyboard c optical drive d battery 5 Follow the procedures in After working inside your computer Heat sink Removing the heat sink 1 Follow the procedure in Before working inside your computer 2 Remove the a battery b optical drive c keyboard d base cover Removing and installing components 29 ...

Page 30: ...k 1 Align the screws on the heat sink with the screw holders on the system board 2 Install the heat sink and tighten the captive screws to secure it to the system board NOTE Secure the screws in the order of the callout numbers 1 2 3 4 3 Install the a base cover b keyboard c optical drive d battery 4 Follow the procedures in After working inside your computer System fan Removing the system fan 1 F...

Page 31: ...Lift and remove the system fan from the computer 3 Installing the system fan 1 Align the system fan on the chassis 2 Secure the system fan to the computer by tightening the screws 3 Connect the system fan connector cable to the system board connector 4 Install the a base cover b keyboard c optical drive d battery 5 Follow the procedures in After working inside your computer Removing and installing...

Page 32: ...he speakers a Disconnect the speaker cable 1 b Unroute the cables speaker cable 2 c Remove the speakers from the computer 23 Installing the speakers 1 Insert the tabs on the speakers into the slots on the computer 2 Route the speaker cable through the routing channel on the computer 3 Connect the speaker cable to the system board Removing and installing components 32 ...

Page 33: ...ard Removing the system board 1 Follow the procedure in Before working inside your computer 2 Remove the a battery b optical drive c keyboard d base cover e hard drive assembly f WLAN card g memory module h heat sink i system fan 3 Remove the screw and lift the display hinge from the computer 1 2 Removing and installing components 33 ...

Page 34: ...es a power switch connector b eDP connector c i o connector d speaker connector e touchpad connector f hard drive connector 5 Remove the screw that secures the system board to the computer 1 and lift the system board 2 Removing and installing components 34 ...

Page 35: ...ver 7 To remove the system board a Remove the white adhesive tape 1 b Unlock the tab and disconnect the eDP cable 2 c Disconnect the power cable d Remove the system board from the computer Removing and installing components 35 ...

Page 36: ...e system board to the computer 6 Tighten the display hinge screw to the computer 7 Connect the following cables to the system board a hard drive connector b touchpad connector c speaker connector d i o connector e eDP connector f power switch connector 8 Install the a system fan b heat sink c memory module d WLAN Card e hard drive assembly f base cover g keyboard h optical drive i battery Removing...

Page 37: ...he a battery b optical drive c keyboard d base cover e hard drive assembly 3 To remove the Input Output board I O board a Disconnect the I O board cable 1 b Remove the screw and lift I O board from the computer 2 3 Installing the Input Output board 1 Place the I O board on the computer 2 Connect the input output I O board cable and tighten the screw Removing and installing components 37 ...

Page 38: ...cedure in Before working inside your computer 2 Remove the a battery b optical drive c keyboard d base cover e hard drive assembly f WLAN card g memory module h heat sink i system fan j coin cell battery k system board 3 To remove the power connector a Unroute the cable 1 b Remove the screw that secures the power connector to the computer 2 c Lift the power connector 3 Removing and installing comp...

Page 39: ...mbly h base cover i keyboard j optical drive k battery 5 Follow the procedure in After working inside your computer Display assembly Removing the display assembly 1 Follow the procedure in Before working inside your computer 2 Remove the a battery b optical drive c keyboard d base cover e hard drive assembly f WLAN card 3 To remove the display assembly a Unroute the WLAN cable 1 b Remove the white...

Page 40: ... the computer over 5 To remove the display assembly a Remove and lift the screws that secure the display hinge to the computer 1 b Lift and remove the display assembly 2 Removing and installing components 40 ...

Page 41: ...he display hinges screws to secure the display assembly 4 Install the a WLAN Card b hard drive assembly c base cover d keyboard e optical drive f battery 5 Follow the procedure in After working inside your computer Display bezel Removing the display bezel 1 Follow the procedure in Before working inside your computer 2 Remove the Removing and installing components 41 ...

Page 42: ...m the display assembly b Remove the display bezel display assembly Installing the display bezel 1 Place the display bezel on the display assembly 2 Press the display bezel until it clicks onto the display assembly 3 Install the a display assembly b WLAN Card c hard drive assembly d base cover e keyboard f optical drive g battery 4 Follow the procedure in After working inside your computer Removing...

Page 43: ...e assembly f WLAN card g display assembly h display bezel 3 To remove the camera a Disconnect the camera cable from the camera 1 b Remove the camera from the display assembly 2 Installing the camera 1 Install the camera into the slot on the display assembly 2 Connect the camera cable 3 Install the a display bezel b display assembly Removing and installing components 43 ...

Page 44: ...the procedure in Before working inside your computer 2 Remove the a battery b optical drive c keyboard d base cover e hard drive assembly f WLAN card g display assembly h display bezel i camera 3 To remove the display panel a Remove the screws that secure the display panel to the display assembly 1 b Lift the display panel to access the cables underneath 2 Removing and installing components 44 ...

Page 45: ...P cable to the display panel 2 Affix the tape to secure the display cable 3 Place the display panel on the display assembly 4 Tighten the screws to secure the display panel to the display assembly 5 Install the a camera b display bezel c display assembly d WLAN Card e hard drive assembly f base cover g keyboard h optical drive i battery 6 Follow the procedure in After working inside your computer ...

Page 46: ...assembly f WLAN card g display assembly h display bezel i camera j display panel 3 To remove the hinges a Remove the screws that secure the display hinges to the display assembly 1 b Remove the display hinges 2 Installing the display hinges 1 Tighten the screws to secure the display hinges to the display assembly 2 Install the a display panel Removing and installing components 46 ...

Page 47: ...de your computer Palmrest Removing the palmrest 1 Follow the procedure in Before working inside your computer 2 Remove the a battery b optical drive c keyboard d base cover e hard drive assembly f WLAN card g memory module h heat sink i system fan j system board k display assembly 3 Remove the palmrest assembly away from the computer Removing and installing components 47 ...

Page 48: ...stall the a display assembly b system board c system fan d heat sink e memory module f WLAN Card g hard drive assembly h base cover i keyboard j optical drive k battery 3 Follow the procedure in After working inside your computer Removing and installing components 48 ...

Page 49: ...rformance varies depending on the workload and other variables Identifying processors in Windows 10 1 Tap Search the Web and Windows 2 Type Device Manager 3 Tap Processor The basic information of the processor is displayed Identifying processors in Windows 8 1 Tap Search the Web and Windows 2 Type Device Manager 3 Tap Processor 3 Technology and components 49 ...

Page 50: ...rmation of the processor is displayed Identifying processors in Windows 7 1 Click Start Control Panel Device Manager 2 Select Processor The basic information of the processor is displayed Technology and components 50 ...

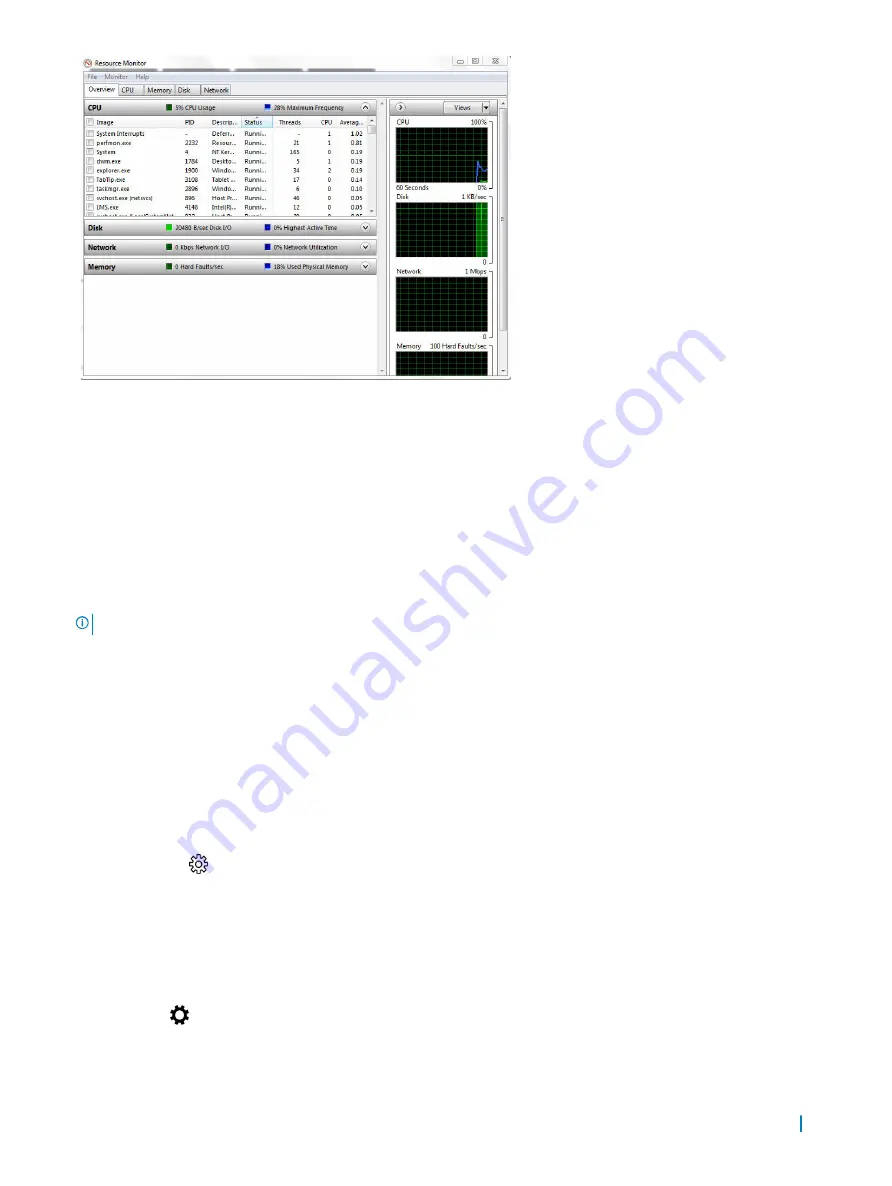
Page 51: ...s Task Manager window The processor performance details are displayed Verifying the processor usage in Resource Monitor 1 Press and hold the taskbar 2 Select Start Task Manager The Windows Task Manager window is displayed 3 Click the Performance tab in the Windows Task Manager window The processor performance details are displayed 4 Click Open Resource Monitor Technology and components 51 ...

Page 52: ...select your chipset driver 7 Click Download File to download the latest version of the chipset driver for your laptop 8 After the download is complete navigate to the folder where you saved the driver file 9 Double click the chipset driver file icon and follow the instructions on the screen Identifying the chipset in Device Manager on Windows 10 1 Click All Settings on the Windows 10 Charms Bar 2 ...

Page 53: ...Identifying chipset in Device Manager on Windows 7 1 Click Start Control Panel Device Manager 2 Expand System Devices and search for the chipset Technology and components 53 ...

Page 54: ...Graphics 620 This laptop is shipped with the Intel HD Graphics 620 graphics chipset Intel HD Graphics drivers Verify if the Intel HD Graphics drivers are already installed in the laptop Table 3 Intel HD Graphics drivers Before installation After installation Display options This laptop has a 15 inch HD with 1366 x 768 pixels resolution maximum Technology and components 54 ...

Page 55: ... to Normal Rotate to 90 Degrees Rotate to 180 Degrees Rotate to 270 Degrees NOTE The Display can also be rotated using the following key combinations Ctrl Alt Up arrow key Rotate to normal Right arrow key Rotate 90 degrees Down arrow key Rotate 180 degrees Left arrow key Rotate 270 degrees Downloading drivers 1 Turn on the laptop 2 Go to Dell com support 3 Click Product Support enter the Service T...

Page 56: ...tap Apply Adjusting brightness in Windows 10 To enable or disable automatic screen brightness adjustment 1 Swipe in from the right edge of the display to access the Action Center 2 Tap or click All Settings System Display 3 Use the Adjust my screen brightness automatically slider to enable or disable automatic brightness adjustment NOTE You can also use the Brightness level slider to adjust the br...

Page 57: ...the screen with your fingers or you may leave oily prints and smears NOTE Do not leave any liquid on the screen 5 Remove all excess moisture as it may damage your screen 6 Let the display dry thoroughly before you turn it on 7 For stains that are hard to remove repeat this procedure till the display is clean Connecting to external display devices Follow these steps to connect your laptop to an ext...

Page 58: ...anager The hard drive is listed under Disk drives 2 Expand Disk drives Entering BIOS setup 1 Turn on or restart your laptop 2 When the Dell logo appears perform one of the following actions to enter the BIOS setup program With keyboard Tap F2 until the Entering BIOS setup message appears To enter the Boot selection menu tap F12 Without keyboard When the F12 boot selection menu is displayed press t...

Page 59: ...s Low Speed 1996 USB 3 0 aka SuperSpeed USB For years the USB 2 0 has been firmly entrenched as the de facto interface standard in the PC world with about 6 billion devices sold and yet the need for more speed grows by ever faster computing hardware and ever greater bandwidth demands The USB 3 0 finally has the answer to the consumers demands with a theoretically 10 times faster than its predecess...

Page 60: ... storage devices high megapixel count digital cameras etc USB 2 0 may not be fast enough Furthermore no USB 2 0 connection could ever come close to the 480Mbps theoretical maximum throughput making data transfer at around 320Mbps 40MB s the actual real world maximum Similarly USB 3 0 connections will never achieve 4 8Gbps We will likely see a real world maximum rate of 400MB s with overheads At th...

Page 61: ... with the advantages HDMI High Definition Multimedia Interface is an industry supported uncompressed all digital audio video interface HDMI provides an interface between any compatible digital audio video source such as a set top box DVD player or A V receiver and a compatible digital audio and or video monitor such as a digital TV DTV The intended applications for HDMI are set top boxes TVs and D...

Page 62: ... the cost complexity and confusion of multiple cables currently used in A V systems HDMI supports communication between the video source such as a DVD player and the DTV enabling new functionality USB Powershare USB PowerShare is a feature which allows for external USB devices i e cellular phones portable music players etc to charge using the portable system s battery Only the USB connector with a...

Page 63: ... interface 2 Select Control Panel 3 Select Device Manager and expand Imaging devices Identifying the camera in Device Manager on Windows 7 1 Click Start Control Panel Device Manager 2 Expand Imaging devices Starting the camera To start the camera open an application that uses the camera For instance if you tap the Dell webcam central software or the Skype software that is shipped with the laptop t...

Page 64: ...ting the camera app 1 Tap or click the Windows button and select All apps 2 Select Camera from the apps list 3 If the Camera App is not available in the apps list search for it Technology and components 64 ...

Page 65: ...oard When the F12 boot selection menu is displayed press the Volume Down button to enter BIOS setup To enter the Boot selection menu press the Volume Up button 3 On the left pane select Settings General System Information The memory information is displayed on the right pane Testing memory using ePSA 1 Turn on or restart your laptop 2 Perform one of the following actions after the Dell logo is dis...

Page 66: ...Realtek HD audio drivers Verify if the Realtek audio drivers are already installed in the laptop Table 5 Realtek HD audio drivers Before installation After installation Technology and components 66 ...

Page 67: ...e optical drive or hard drive During the Power on Self Test POST when the Dell logo appears you can Access System Setup by pressing F2 key Bring up the one time boot menu by pressing F12 key The one time boot menu displays the devices that you can boot from including the diagnostic option The boot menu options are Removable Drive if available STXXXX Drive NOTE XXX denotes the SATA drive number Opt...

Page 68: ...Memory Technology DIMM A Size DIMM B Size Processor Information Displays Processor Type Core Count Processor ID Current Clock Speed Minimum Clock Speed Maximum Clock Speed Processor L2 Cache Processor L3 Cache HT Capable and 64 Bit Technology Device Information Displays Primary Hard Drive ODD Device LOM MAC Address Video Controller Video BIOS Version Video Memory Panel Type Native Resolution Audio...

Page 69: ...type of USB Mass Storage Devices HDD memory key floppy If USB port is enabled device attached to this port is enabled and available for OS If USB port is disabled the OS cannot see any device attached to this port Enable Boot Support Enable External USB Port Enable USB3 0 Controller NOTE USB keyboard and mouse always work in the BIOS setup irrespective of these settings Audio This field enables or...

Page 70: ...r and be at least 8 characters long Password Configuration Allows you to determine the minimum and maximum length of Administrator and System passwords Password Bypass Allows you to enable or disable the permission to bypass the System and the Internal HDD password when they are set The options are Disabled Reboot bypass Default Setting Disabled Password Change Allows you to enable the disable per...

Page 71: ...ion Description Secure Boot Enable This option enables or disables the Secure Boot Feature Disabled Enabled Default Setting The option is disabled Expert Key Management Allows you to manipulate the security key databases only if the system is in Custom Mode The Enable Custom Mode option is disabled by default The options are PK KEK db dbx If you enable the Custom Mode the relevant options for PK K...

Page 72: ...or disable multi core support for the processor The installed processor supports two cores If you enable Multi Core Support two cores will be enabled If you disable Multi Core Support one core will be enabled Enable Multi Core Support Default Setting The option is enabled Intel SpeedStep Allows you to enable or disable the Intel SpeedStep feature Enable Intel SpeedStep Default Setting The option i...

Page 73: ...nced Battery Charge Configuration This option enables you to maximize the battery health By enabling this option your system uses the standard charging algorithm and other techniques during the non work hours to improve the battery health Disabled default Primary Battery Charge Configuration Allows you to select the charging mode for the battery The options are Adaptive Standard Fully charges your...

Page 74: ...n Technology default VT for Direct I O Enables or disables the Virtual Machine Monitor VMM from utilizing the additional hardware capabilities provided by Intel Virtualization technology for direct I O Enable VT for Direct I O enabled by default Table 16 Wireless Option Description Wireless Switch Allows to set the wireless devices that can be controlled by the wireless switch The options are WLAN...

Page 75: ...ce Tag click Detect My Product Proceed with the instructions on screen 4 If you are unable to locate or find the Service Tag click the Product Category of your computer 5 Choose the Product Type from the list 6 Select your computer model and the Product Support page of your computer appears 7 Click Get drivers and click View All Drivers The Drivers and Downloads page opens 8 On the Drivers and Dow...

Page 76: ... Security and press Enter The System Security screen appears 2 In the System Security screen verify that Password Status is Unlocked 3 Select System Password enter your system password and press Enter or Tab Use the following guidelines to assign the system password A password can have up to 32 characters The password can contain the numbers 0 through 9 Only lower case letters are valid upper case...

Page 77: ...ect Setup Password alter or delete the existing setup password and press Enter or Tab NOTE If you change the System and or Setup password re enter the new password when promoted If you delete the System and or Setup password confirm the deletion when promoted 5 Press Esc and a message prompts you to save the changes 6 Press Y to save the changes and exit from System Setup The computer reboots Syst...

Page 78: ...o test only your computer Using this program with other computers may cause invalid results or error messages NOTE Some tests for specific devices require user interaction Always ensure that you are present at the computer terminal when the diagnostic tests are performed Running the ePSA diagnostics 1 Power on the computer 2 As the computer boots press the F12 key as the Dell logo appears 3 On the...

Page 79: ...tel Core i7 7th Generation Intel Core i5 7th Generation Intel Core i3 L1 cache 128 KB L2 cache 512 KB L3 cache Up to 4 MB Table 22 Memory specifications Feature Specification Memory connector Two internally accessible DDR3L connectors Memory capacity 4 GB and 8 GB Memory speed 1600 Mhz Minimum memory 4 GB Maximum memory 8 GB Table 23 Audio specifications Feature Specification Type Two channel high...

Page 80: ... HD at 30 fps maximum Diagonal viewing angle 74 Table 26 Communication specifications Feature Specification Network adapter 10 100 1000 Mbps Ethernet LAN on Motherboard LOM Wireless Wi Fi 802 11 b g n Bluetooth 4 0 Table 27 Ports and connectors specifications Feature Specification Audio One headphone microphone combo port headset Video VGA and HDMI out Network adapter One RJ 45 port USB Two USB 3 ...

Page 81: ...imum viewing angles Horizontal 40 40 Vertical 10 30 Pixel pitch 0 2265 mm Table 29 Keyboard specifications Feature Specification Number of keys US 101 Brazil 104 UK 102 and Japan 105 Table 30 Touchpad Feature Specification Active Area X axis 105 00 mm 4 13 inches Y axis 80 00 mm 3 14 inches Table 31 Battery specifications Feature Specification Type 4 cell smart lithium ion 47 WHr Dimensions Height...

Page 82: ... 1 70 A Output current 45 W 2 31 A 65 W 3 34 A Rated output voltage 19 50 V DC Temperature range Operating 0 C to 40 C 32 F to 104 F Non Operating 40 C to 70 C 40 F to 158 F Table 33 Physical Feature Specification Height 23 75 mm 0 93 inches Width 380 00 mm 14 96 inches Depth 260 40 mm 10 25 inches Weight 2 29 kg 5 04 lb Table 34 Environmental specifications Feature Specification Temperature Opera...

Page 83: ...0 to 95 non condensing Altitude maximum Operating 15 2 m to 3048 m 50 to 10 000 ft 0 to 35 C Non Operating 15 2 m to 10 668 m 50 ft to 35 000 ft Airborne contaminant level G1 as defined by ISA S71 04 1985 Technical specifications 83 ...

Page 84: ... service options Availability varies by country and product and some services may not be available in your area To contact Dell for sales technical support or customer service issues 1 Go to Dell com support 2 Select your support category 3 Verify your country or region in the Choose a Country Region drop down list at the bottom of the page 4 Select the appropriate service or support link based on...

Reviews: