


Configuring VLANs
609
Figure 22-32. Trunk Port Configuration
e
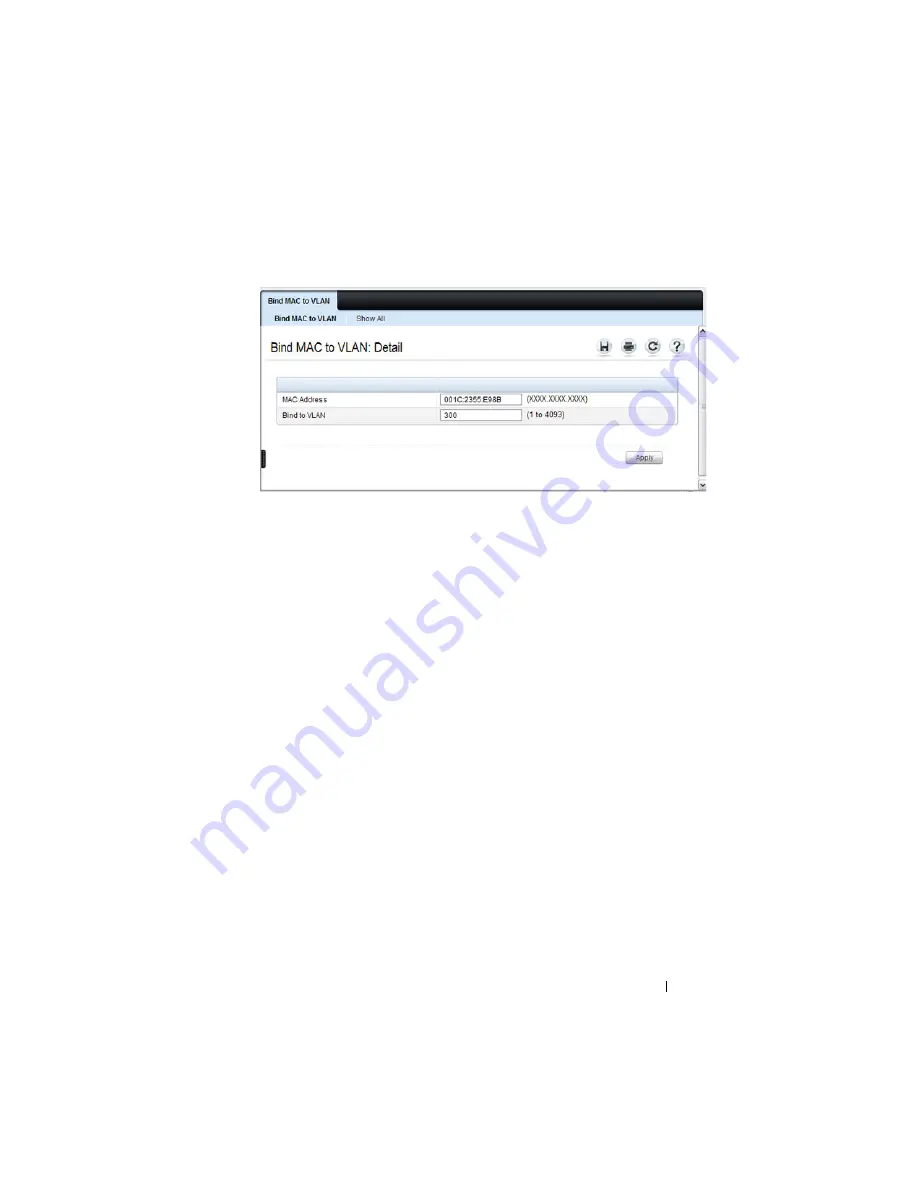
Repeat steps b–d to add additional MAC address-to-VLAN
information for the Sales department.
9
To save the configuration so that it persists across a system reset, use the
following steps:
a
Go to the
System
→
File Management
→
Copy Files
page
b
Select Copy Configuration and ensure that Running Config is the
source and Startup Config is the destination.
c
Click
Apply
.
Configure the VLANs and Ports on Switch 2
Use the following steps to configure the VLANs and ports on Switch 2. Many
of the procedures in this section are the same as procedures used to configure
Switch 1. For more information about specific procedures, see the details and
figures in the previous section.
To configure Switch 2:
1.
Create the Engineering, Marketing, Sales, and Payroll VLANs.
Although the Payroll hosts do not connect to this switch, traffic from the
Payroll department must use Switch 2 to reach the rest of the network and
Internet through the uplink port. For that reason, Switch 2 must be aware
of VLAN 400 so that traffic is not rejected by the trunk port.
Summary of Contents for PowerConnect 8024
Page 48: ...48 Contents ...
Page 52: ...52 Introduction ...
Page 86: ...86 Switch Features ...
Page 140: ...140 Setting Basic Network Information ...
Page 178: ...178 Managing a Switch Stack ...
Page 204: ...204 Configuring Authentication Authorization and Accounting ...
Page 272: ...272 Managing General System Settings ...
Page 308: ...308 Configuring SNMP ...
Page 336: ...336 Managing Images and Files ...
Page 354: ...354 Auto Image and Configuration Update ...
Page 468: ...468 Configuring Port Characteristics ...
Page 512: ...512 Configuring Port and System Security ...
Page 550: ...550 Configuring Access Control Lists ...
Page 580: ...580 Configuring VLANs Figure 22 17 GVRP Port Parameters Table ...
Page 586: ...586 Configuring VLANs Figure 22 24 Double VLAN Port Parameter Table ...
Page 618: ...618 Configuring VLANs ...
Page 631: ...Configuring the Spanning Tree Protocol 631 Figure 23 5 Spanning Tree Global Settings ...
Page 637: ...Configuring the Spanning Tree Protocol 637 Figure 23 11 RSTP LAG Settings ...
Page 685: ...Configuring Port Based Traffic Control 685 Figure 25 3 Storm Control 5 Click Apply ...
Page 776: ...776 Snooping and Inspecting Traffic Figure 27 17 DAI Interface Configuration Summary ...
Page 790: ...790 Snooping and Inspecting Traffic ...
Page 797: ...Configuring Link Aggregation 797 To view or edit settings for multiple LAGs click Show All ...
Page 894: ...894 Configuring DHCP Server Settings ...
Page 928: ...928 Configuring L2 and L3 Relay Features Figure 34 3 DHCP Relay Interface Summary ...
Page 955: ...Configuring OSPF and OSPFv3 955 Figure 35 1 OSPF Configuration ...
Page 1030: ...1030 Configuring OSPF and OSPFv3 ...
Page 1068: ...1068 Configuring VRRP ...
Page 1092: ...1092 Configuring IPv6 Routing ...
Page 1119: ...Configuring Differentiated Services 1119 Figure 40 5 DiffServ Class Criteria ...
Page 1126: ...1126 Configuring Differentiated Services Figure 40 14 DiffServ Service Summary ...
Page 1142: ...1142 Configuring Differentiated Services ...
Page 1148: ...1148 Configuring Class of Service Figure 41 1 Mapping Table Configuration CoS 802 1P ...
Page 1160: ...1160 Configuring Class of Service ...
Page 1164: ...1164 Configuring Auto VoIP Figure 42 2 Auto VoIP Interface Configuration ...
Page 1230: ...1230 Managing IPv4 and IPv6 Multicast Figure 43 51 DVMRP Next Hop Summary ...
Page 1256: ...1256 Managing IPv4 and IPv6 Multicast ...
Page 1266: ...1266 Feature Limitations and Platform Constants ...
Page 1274: ...1274 System Process Definitions ...
Page 1294: ...Index 1294 ...


