

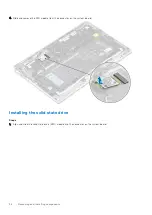


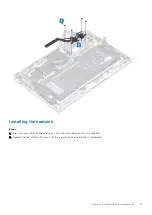

Next steps
1. Connect the
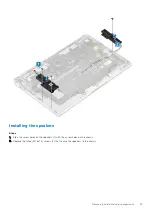
2. Install the
.
3. Install the
after working inside your computer
.
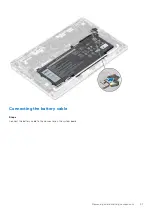
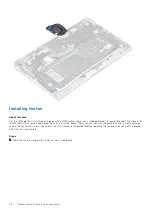
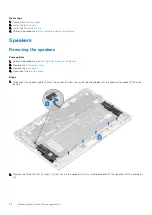
Fan
Removing the fan
Prerequisites
before working inside your computer
.
2. Remove the
.
3. Remove the
.
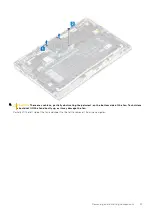
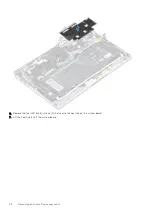
4. Disconnect the
.
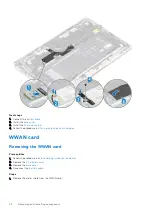
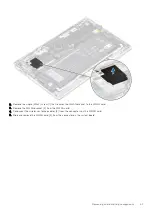
NOTE:
For the Latitude 7400 2-in-1 model shipped with a WWAN card, there is an L-shaped bracket (P-sensor bracket)
that covers the four WWAN LTE antenna cable connections to the system board. The screw that secures the bracket to
the system also helps secure the fan to the system. Technicians must first remove the bracket before removing the fan and
then reinstall the bracket after the fan is reinstalled.
Steps
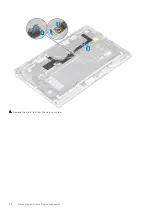
1. Peel off the Mylar sheet from the system board.
44
Removing and installing components
Summary of Contents for Latitude 7400 2-in-1
Page 24: ...4 Pry along the left right and bottom edges of the base 24 Removing and installing components ...
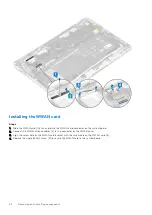
Page 43: ...5 Place the metal shield on the WWAN card Removing and installing components 43 ...
Page 51: ...8 Adhere the Mylar sheet on the system board Removing and installing components 51 ...
Page 56: ...4 Remove the metal foil from the heatsink shield 56 Removing and installing components ...
Page 57: ...5 Remove the heatsink shield from the system board Removing and installing components 57 ...
Page 60: ...3 Place the heatsink shield on the heatsink 60 Removing and installing components ...
Page 61: ...4 Adhere the metal foils on the heatsink shield Removing and installing components 61 ...
Page 87: ...8 Lift the keyboard off the palmrest assembly Removing and installing components 87 ...


