Steps
1. Loosen the nine captive screws that secure the palmrest assembly to the computer chassis.
2. Place the system on a flat surface with the keyboard facing up. Open the system to 180 degrees.
NOTE:
The system will automatically power on when it is opened past 5-degree angle. Press the power button to turn
off the system and then proceed with the disassembly process.
3. Use a plastic scribe to pry open the palmrest assembly, starting from the U-shaped recesses near the hinges at the top edge
of the palmrest.
4. Use the scribe to pry open the top, left, and right sides of the palmrest.
5. Hold the left and right sides of the palmrest and open it to 45 degrees to release the palmrest assembly from the computer
chassis.
CAUTION:
Do not open the palmrest assembly more than 60 degrees, as it may damage the keyboard Flexible
Printed Circuits (FPC) and touchpad Flexible Flat Cable (FFC).
6. Gently flip over the palmrest assembly with the keyboard facing downward.
CAUTION:
Do not apply excess force to the palmrest assembly while flipping it over, as it may damage to the
keyboard FPC and touchpad FFC.
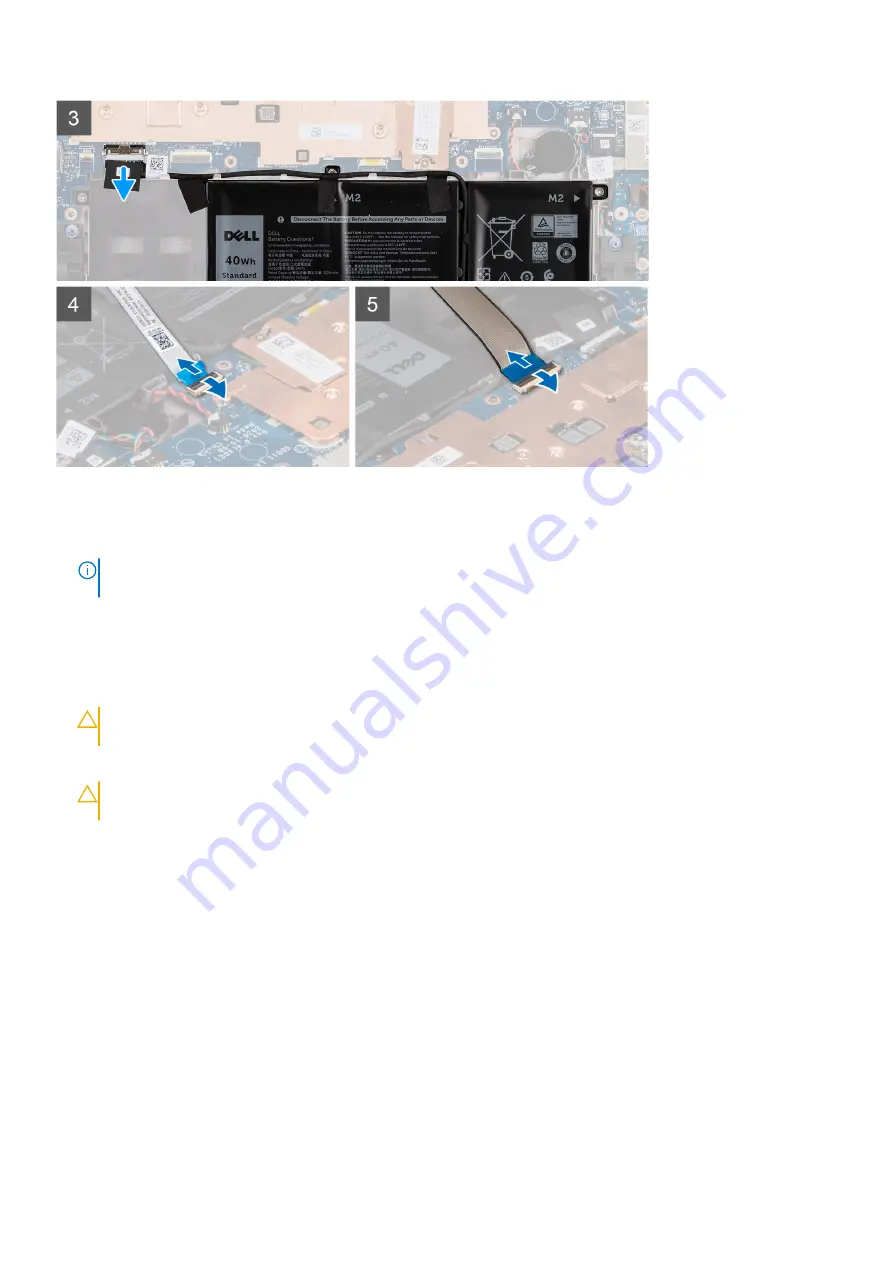
7. Disconnect the battery cable, keyboard FPC, and touchpad FFC from the system board.
8. Lift and remove the palmrest assembly and keyboard from the computer chassis.
Installing the palmrest and keyboard
Prerequisites
If you are replacing a component, remove the existing component before performing the installation procedure.
About this task
The following images indicate the location of the palmrest and keyboard, and provide a visual representation of the installation
procedure.
Removing and installing components
15
Summary of Contents for Latitude 3120
Page 12: ...Major components of your system 1 Display assembly 12 Removing and installing components ...
Page 14: ...14 Removing and installing components ...
Page 16: ...16 Removing and installing components ...
Page 30: ...30 Removing and installing components ...
Page 32: ...32 Removing and installing components ...
Page 42: ...42 Removing and installing components ...
Page 44: ...44 Removing and installing components ...
Page 50: ...50 Removing and installing components ...


