background image

Dell™ Inspiron™ 620 Service Manual 


Notes, Cautions, and Warnings 

Information in this document is subject to change without notice. 

© 2011 Dell Inc. All rights reserved.


Trademarks used in this text: Dell™, the DELL logo, and Inspiron™ are trademarks of Dell Inc.; Microsoft®

, Windows

®

and the Windows start button logo 

 are either 

trademarks or registered trademarks of Microsoft Corporation in the United States and/or other countries. 

Reproduction of these materials in any manner whatsoever without the written permission of Dell Inc. is strictly forbidden. 

Regulatory model: D11M series     Regulatory type: D11M001


2011 -

 05     Rev. A00


Technical Overview


Before You Begin


Computer Cover


Memory Module(s)


Front Bezel


Card Retention Bracket


PCI Express Cards


Drives


Front I/O Panel


Power Button Module
Fans


Processor


Coin-Cell Battery


Power Supply


System Board


System Setup


Flashing the BIOS


NOTE: 

A NOTE indicates important information that helps you make better use of your computer. 


CAUTION: 

A CAUTION indicates either potential damage to hardware or loss of data and tells you how to avoid the problem. 


WARNING: 

A WARNING indicates a potential for property damage, personal injury, or death. 

Summary of Contents for Inspiron 620

Page 1: ...out the written permission of Dell Inc is strictly forbidden Regulatory model D11M series Regulatory type D11M001 2011 05 Rev A00 Technical Overview Before You Begin Computer Cover Memory Module s Front Bezel Card Retention Bracket PCI Express Cards Drives Front I O Panel Power Button Module Fans Processor Coin Cell Battery Power Supply System Board System Setup Flashing the BIOS NOTE A NOTE indic...

Page 2: ...when you shut down the operating system press and hold the power button until the computer turns off Safety Instructions Use the following safety guidelines to help protect your computer from potential damage and to help ensure your own personal safety 1 Ensure that the work surface is flat and clean to prevent the computer cover from being scratched CAUTION To avoid losing data save and close all...

Page 3: ...m the Media Card Reader 7 Press and hold the power button to ground the system board Back to Contents Page CAUTION To disconnect a network cable first unplug the cable from your computer and then unplug the cable from the network device CAUTION Before touching anything inside your computer ground yourself by touching an unpainted metal surface such as the metal at the back of the computer While yo...

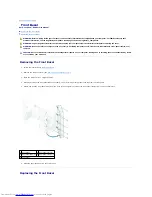
Page 4: ...on Replacing the Front Bezel WARNING Before working inside your computer read the safety information that shipped with your computer For additional safety best practices information see the Regulatory Compliance Homepage at dell com regulatory_compliance WARNING To guard against electrical shock always unplug your computer from the electrical outlet before removing the cover WARNING Do not operate...

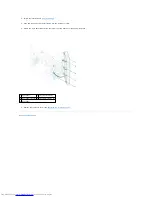
Page 5: ...to the front panel slots 3 Rotate the front bezel towards the computer until the front bezel tabs snap into place 4 Replace the computer cover see Replacing the Computer Cover Back to Contents Page 1 front bezel 2 front bezel tabs 4 3 front panel slots 4 4 front bezel clamps 4 5 front panel ...

Page 6: ...in the Select Your Product Line list d Select the product model number in the Select Your Product Model list e Click Confirm 4 A list of results appears on the screen Click BIOS 5 Click Download Now to download the latest BIOS file The File Download window appears 6 Click Save to save the file on your desktop The file downloads to your desktop 7 Click Close if the Download Complete window appears ...

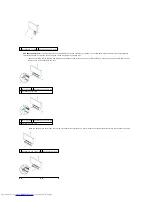
Page 7: ...ructions based on the type of securing tab on the PCI Express x16 card slot l Push the securing tab to the side grasp the card by its top corners and then ease it out of the connector WARNING Before working inside your computer read the safety information that shipped with your computer For additional safety best practices information see the Regulatory Compliance Homepage at dell com regulatory_c...

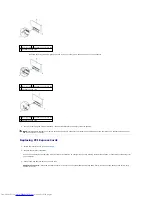
Page 8: ...r otherwise customizing it for your computer 3 Connect the PCI Express card to the card slot PCI Express x1 card Place the PCI Express card in the slot on the system board and press down firmly Ensure that the PCI Express card is fully seated in the slot 1 securing tab 2 PCI Express x16 card slot 3 PCI Express x16 card 1 securing tab 2 PCI Express x16 card slot 3 PCI Express x16 card 1 securing ta...

Page 9: ... the slot on the system board and press down firmly Ensure that the PCI Express card is fully seated in the slot l Place the PCI Express card in the slot on the system board and press down firmly Ensure that the PCI Express card is fully seated in the slot 1 PCI Express x1 card 2 PCI Express x1 card slot 1 securing tab 2 PCI Express x16 card slot 3 PCI Express x16 card 1 securing tab 2 PCI Express...

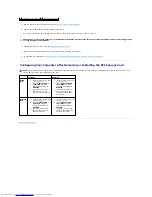
Page 10: ... or cause damage to the equipment NOTE For information about the location of external connectors see the Setup Guide For information on installing drivers and software for your card see the documentation that shipped with the card Installed Removed Sound card 1 Enter system setup see System Setup 2 Go to Onboard Audio Controller and then change the setting to Disabled 3 Connect the external audio ...

Page 11: ...omputer cover see Replacing the Computer Cover Back to Contents Page WARNING Before working inside your computer read the safety information that shipped with your computer For additional safety best practices information see the Regulatory Compliance Homepage at dell com regulatory_compliance WARNING To guard against electrical shock always unplug your computer from the electrical outlet before r...

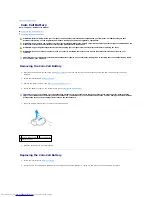
Page 12: ...actices information see the Regulatory Compliance Homepage at dell com regulatory_compliance WARNING A new battery can explode if it is incorrectly installed Replace the battery only with the same or equivalent type recommended by the manufacturer Discard used batteries according to the manufacturer s instructions WARNING To guard against electrical shock always unplug your computer from the elect...

Page 13: ... the Computer Cover 4 Connect your computer and devices to electrical outlets and then turn them on 5 Enter system setup see System Setup and restore the settings you recorded in step 1 Back to Contents Page 1 coin cell battery 2 battery socket ...

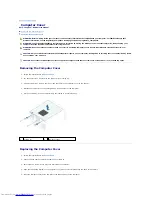
Page 14: ...along the edge of the chassis 5 Press the computer cover down and slide it towards the front of the computer WARNING Before working inside your computer read the safety information that shipped with your computer For additional safety best practices information see the Regulatory Compliance Homepage at dell com regulatory_compliance WARNING To guard against likelihood of electric shock laceration ...

Page 15: ...6 Using a screwdriver replace the two screws that secure the computer cover to the chassis 7 Place the computer in an upright position Back to Contents Page 1 screws 2 2 computer cover ...

Page 16: ...d against electrical shock always unplug your computer from the electrical outlet before removing the cover WARNING Do not operate your equipment with any cover s including computer covers bezels filler brackets front panel inserts etc removed CAUTION Only a certified service technician should perform repairs on your computer Damage due to servicing that is not authorized by Dell is not covered by...

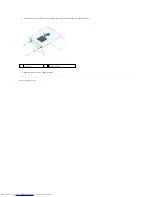
Page 17: ...n and place it under the tab on the processor cover 1 processor 2 socket CAUTION Ground yourself by touching an unpainted metal surface on the back of the computer CAUTION When replacing the processor do not touch any of the pins inside the socket or allow any objects to fall on the pins in the socket CAUTION You must position the processor correctly in the socket to avoid permanent damage to the ...

Page 18: ...he Computer Cover 12 Connect your computer and devices to electrical outlets and turn them on Back to Contents Page 1 alignment post 2 tab 3 processor cover 4 release lever 5 processor 6 processor cover notch CAUTION Ensure that you apply new thermal grease New thermal grease is critical for ensuring adequate thermal bonding which is a requirement for optimal processor operation CAUTION Ensure tha...

Page 19: ...fety best practices information see the Regulatory Compliance Homepage at dell com regulatory_compliance WARNING To guard against electrical shock always unplug your computer from the electrical outlet before removing the cover WARNING Do not operate your computer with any cover s including computer covers bezels filler brackets front panel inserts etc removed CAUTION Only a certified service tech...

Page 20: ...hard drive to verify that it is configured for your computer 3 Place the hard drive brackets in position 4 Replace the two screws one on each side that secure the hard drive brackets to the hard drive 5 Slide the hard drive assembly into the hard drive bay 6 Replace the two screws that secure the hard drive assembly to the drive panel 7 If you are replacing the primary hard drive connect the power...

Page 21: ...he Computer Cover 3 Remove the front bezel see Removing the Front Bezel 4 If you are removing the primary optical drive disconnect the power and data cables from the primary optical drive 5 If you are removing the secondary optical drive a Disconnect the power cable from the primary and secondary optical drives b Disconnect the data cable from the secondary optical drive 6 Remove the two screws th...

Page 22: ...w the instructions in Before You Begin 2 Remove the screw from the old optical drive and insert it in the new optical drive 3 To install a secondary optical drive pull the break away metal plate away from the chassis 1 power cable 2 data cable 3 secondary optical drive 4 screws 2 1 screw ...

Page 23: ...ondary optical drive a Connect the power cable to the primary and secondary optical drives b Connect the data cable to the secondary optical drive 9 Replace the front bezel see Replacing the Front Bezel 10 Replace the computer cover see Replacing the Computer Cover 11 Connect your computer and devices to electrical outlets and turn them on 12 See the documentation that shipped with the drive for i...

Page 24: ...ssis 3 Replace the four screws that secure the chassis fan to the chassis WARNING Before working inside your computer read the safety information that shipped with your computer For additional safety best practices information see the Regulatory Compliance Homepage at dell com regulatory_compliance WARNING To guard against electrical shock always unplug your computer from the electrical outlet bef...

Page 25: ... 4 Place the processor fan and heat sink assembly over the processor 5 Align the four captive screws on the processor fan and heat sink assembly with the screw holes on the system board 6 Tighten the four captive screws that secure the processor fan and heat sink assembly to the system board WARNING Despite having a plastic shield the processor fan and heat sink assembly may be very hot during nor...

Page 26: ...cable to the system board connector FAN_CPU see System Board Components 8 Replace the computer cover see Replacing the Computer Cover 9 Connect your computer and devices to electrical outlets and turn them on Back to Contents Page ...

Page 27: ...t practices information see the Regulatory Compliance Homepage at dell com regulatory_compliance WARNING To guard against electrical shock always unplug your computer from the electrical outlet before removing the cover WARNING Do not operate your computer with any cover s including computer covers bezels filler brackets front panel inserts etc removed CAUTION Only a certified service technician s...

Page 28: ...the I O panel to the front panel 4 Connect the front I O panel cables to the system board connectors AUDIOF1 USBF1 and USBF2 see System Board Components 5 Replace the front bezel see Replacing the Front Bezel 6 Replace the computer cover see Replacing the Computer Cover 7 Connect your computer and devices to electrical outlets and turn them on Back to Contents Page ...

Page 29: ...onal safety best practices information see the Regulatory Compliance Homepage at dell com regulatory_compliance WARNING To guard against electrical shock always unplug your computer from the electrical outlet before removing the cover WARNING Do not operate your computer with any cover s including computer covers bezels filler brackets front panel inserts etc removed CAUTION Only a certified servi...

Page 30: ...and then turn them on If a message appears stating that the memory size has changed press F1 to continue 7 Log on to your computer To verify that the memory is installed correctly click Start Control Panel System Check the amount of memory RAM listed Back to Contents Page 1 cutouts 2 2 tab 3 notch 4 memory module CAUTION To avoid damage to the memory module press the memory module straight down in...

Page 31: ...ew holes on the power supply with the screw holes on the chassis WARNING Before working inside your computer read the safety information that shipped with your computer For additional safety best practices information see the Regulatory Compliance Homepage at dell com regulatory_compliance WARNING To guard against electrical shock always unplug your computer from the electrical outlet before remov...

Page 32: ...the chassis 5 Connect the DC power cables to the system board and drives see System Board Components 6 Replace the computer cover see Replacing the Computer Cover 7 Connect your computer and devices to electrical outlets and turn them on Back to Contents Page ...

Page 33: ...dule 1 Follow the instructions in Before You Begin 2 Align and push the power button module tabs into the slots on the front panel WARNING Before working inside your computer read the safety information that shipped with your computer For additional safety best practices information see the Regulatory Compliance Homepage at dell com regulatory_compliance WARNING To guard against electrical shock a...

Page 34: ...d connector LEDH1 see System Board Components 4 Replace the front bezel see Replacing the Front Bezel 5 Replace the computer cover see Replacing the Computer Cover 6 Connect your computer and devices to electrical outlets and turn them on Back to Contents Page ...

Page 35: ...ect all cables connected to the system board see System Board Components Note the routing of all cables as you remove them so that you can re route them correctly after installing the new system board 8 Remove the six screws that secure the system board to the chassis WARNING Before working inside your computer read the safety information that shipped with your computer For additional safety best ...

Page 36: ...cing the Computer Cover 10 Connect your computer and devices to electrical outlets and turn them on 11 Flash the system BIOS as needed see Flashing the BIOS 12 Enter the service tag see Entering the Service Tag in the BIOS Entering the Service Tag in the BIOS 1 Turn on the computer 2 Press F2 during POST to enter the system setup program 3 From the main tab enter the service tag in the Set Service...

Page 37: ... Then shut down your computer see Turning Off Your Computer and try again Setup Item This field appears on the left side of the system setup window The field is a scrollable list containing features that define the configuration of your computer including installed hardware power conservation and security features Scroll up and down the list with the up and down arrow keys As an option is highligh...

Page 38: ... Onboard LAN Boot ROM Enabled or Disabled Disabled by default l SATA Mode AHCI RAID AHCI by default l USB Controller Enabled or Disabled Enabled by default l USB Storage Boot Function Enabled or Disabled Enabled by default l Onboard Card Reader Enabled or Disabled Enabled by default l Onboard Serial Port Enabled or Disabled Enabled by default l Serial Port IO Address IRQ 3F8h IRQ4 2F8h IRQ3 3E8h I...

Page 39: ...On the Boot Device Menu choose the device you want to boot from For example if you are booting to a USB memory key highlight USB Storage Device and press Enter Changing Boot Sequence for Future Boots Hard Disk CD DVD Network USB Floppy USB Hard Disk USB CD DVD Disabled Hard Disk by default 2nd Boot Priority Specifies the boot sequence from the available devices Hard Disk CD DVD Network USB Floppy ...

Page 40: ...lectrical outlets 7 Remove the 2 pin jumper plug from pins 1 and 2 and replace it on pins 2 and 3 to enable the password feature 8 Replace the computer cover see Replacing the Computer Cover 9 Connect your computer and devices to electrical outlets and turn them on NOTE Write down your current boot sequence in case you want to restore it WARNING Before you begin any of the procedures in this secti...

Page 41: ...e Computer Cover 8 Connect your computer and devices to electrical outlets and turn them on Back to Contents Page WARNING Before you begin any of the procedures in this section follow the safety instructions that shipped with your computer WARNING The computer must be disconnected from the electrical outlet to clear the password setting CAUTION Only a certified service technician should perform re...

Page 42: ...l com regulatory_compliance WARNING To avoid electrostatic discharge ground yourself by using a wrist grounding strap or by periodically touching an unpainted metal surface such as a connector on your computer CAUTION Only a certified service technician should perform repairs on your computer Damage due to servicing that is not authorized by Dell is not covered by your warranty 1 front bezel 2 fro...

Page 43: ...nnector SATA 2 10 chassis fan connector FAN_SYS1 11 SATA drive connector SATA 1 12 SATA drive connector SATA 0 13 SATA drive connector SATA 3 14 CMOS reset jumper CMOSCLR1 15 front panel USB connector USBF2 16 front panel USB connector USBF1 17 password reset jumper PSWDCLR1 18 front panel audio connector AUDIOF1 19 PCI Express x1 card slot SLOT4 20 PCI Express x1 card slot SLOT3 21 PCI Express x1...

Page 44: ...ademarks of Microsoft Corporation in the United States and or other countries Reproduction of these materials in any manner whatsoever without the written permission of Dell Inc is strictly forbidden 2011 05 Rev A00 Back to Contents Page NOTE A NOTE indicates important information that helps you make better use of your computer CAUTION A CAUTION indicates either potential damage to hardware or los...

Reviews: