About this task
CAUTION:
After the TPM plug-in module is installed, it is cryptographically bound to that specific system
board. When the system is powered on, any attempt to remove an installed TPM plug-in module breaks the
cryptographic binding, and the removed TPM cannot be installed on another system board. Ensure any keys you
have stored on the TPM have been securely transferred.
Removing the TPM
Steps
1. Locate the TPM connector on the system board.
2. Press to hold the module down and remove the screw using the security Torx 8-bit shipped with the TPM module.
3. Slide the TPM module out from its connector.
4. Push the plastic rivet away from the TPM connector and rotate it 90° counterclockwise to release it from the system board.
5. Pull the plastic rivet out of its slot on the system board.
Installing the TPM
Steps
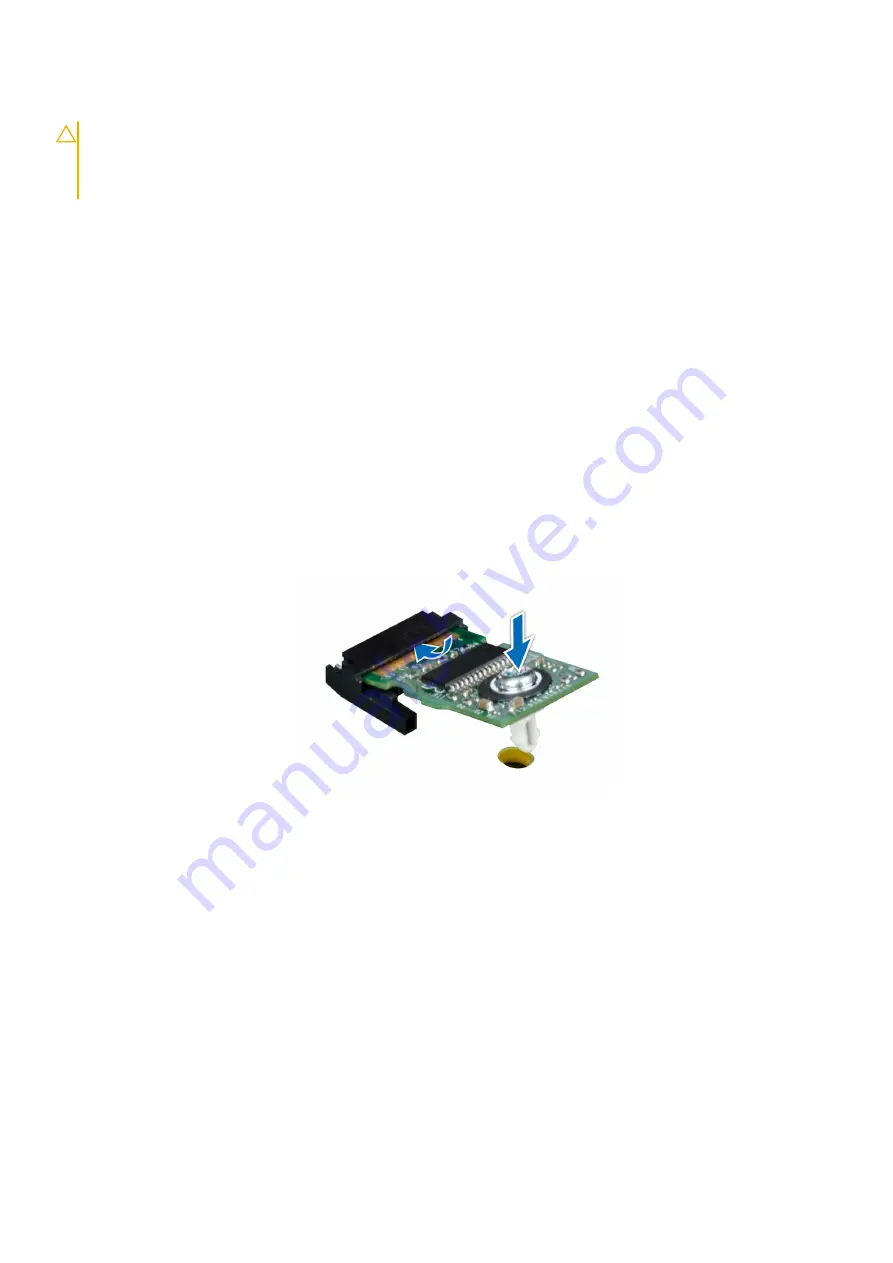
1. To install the TPM, align the edge connectors on the TPM with the slot on the TPM connector.
2. Insert the TPM into the TPM connector such that the plastic rivet aligns with the slot on the system board.
3. Press the plastic rivet until the rivet snaps into place.
4. Replace the screw that secures the TPM to the system board.
Figure 106. Installing the TPM
Initializing TPM for users
Steps
1. Initialize the TPM.
For more information, see
Initializing the TPM for users
.
2. The
TPM Status
changes to
Enabled, Activated
.
Initializing the TPM 1.2 for users
Steps
1. While booting your system, press F2 to enter System Setup.
2. On the
System Setup Main Menu
screen, click
System BIOS
>
System Security Settings
.
108
Installing and removing system components
Summary of Contents for EMC PowerEdge R550
Page 16: ...Figure 10 Service information 16 System overview ...
Page 17: ...Figure 11 Service information System overview 17 ...
Page 18: ...Figure 12 Memory information Figure 13 Configuration and layout 18 System overview ...
Page 19: ...Figure 14 Configuration and layout Figure 15 LED behavior System overview 19 ...


