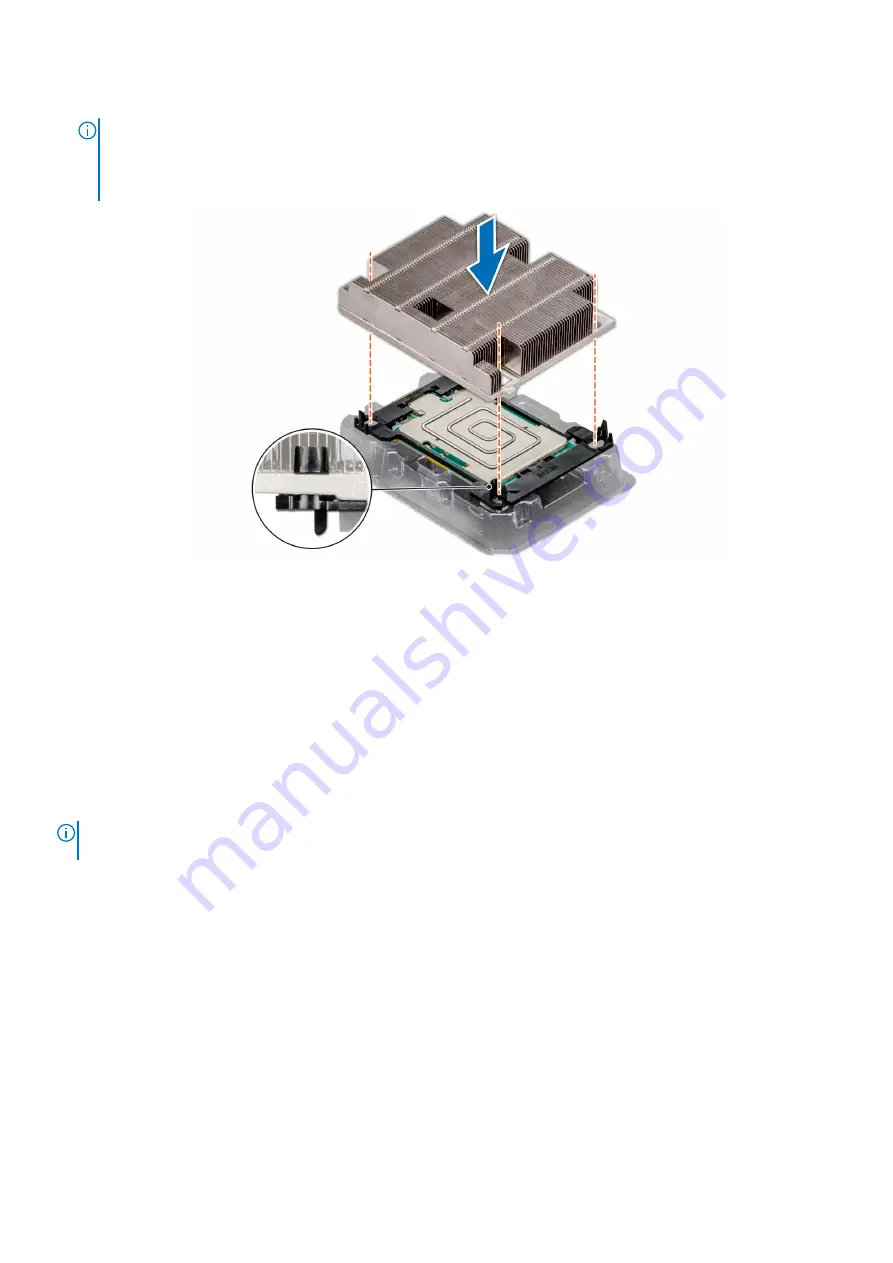
6. Place the heat sink on the processor and push down until the bracket locks onto the heat sink.
NOTE:
●
Ensure that the two guide pin holes on the bracket match the guide holes on the heat sink.
●
Ensure that the pin 1 indicator on the heat sink is aligned with the pin 1 indicator on the bracket before placing the
heat sink on the processor and bracket.
Figure 35. Installing the heat sink onto the processor
Next steps
1.
Install the processor and heat sink module
.
2. Follow the procedure listed in
After working inside your system
.
Removing the non-fabric processor from the processor and heat
sink module
Prerequisites
NOTE:
Only remove the processor from the processor and heat sink module if you are replacing the processor or heat sink.
This procedure is not required when replacing a system board.
1. Follow the safety guidelines listed in
.
2. Follow the procedure listed in
Before working inside your system
3.
4.
Remove the processor and heat sink module
Steps
1. Place the heat sink with the processor side facing up.
2. Insert a flat blade screwdriver into the release slot marked with a yellow label. Twist (do not pry) the screwdriver to break
the thermal paste seal.
3. Push the retaining clips on the processor bracket to unlock the bracket from the heat sink.
46
Installing and removing enclosure components


