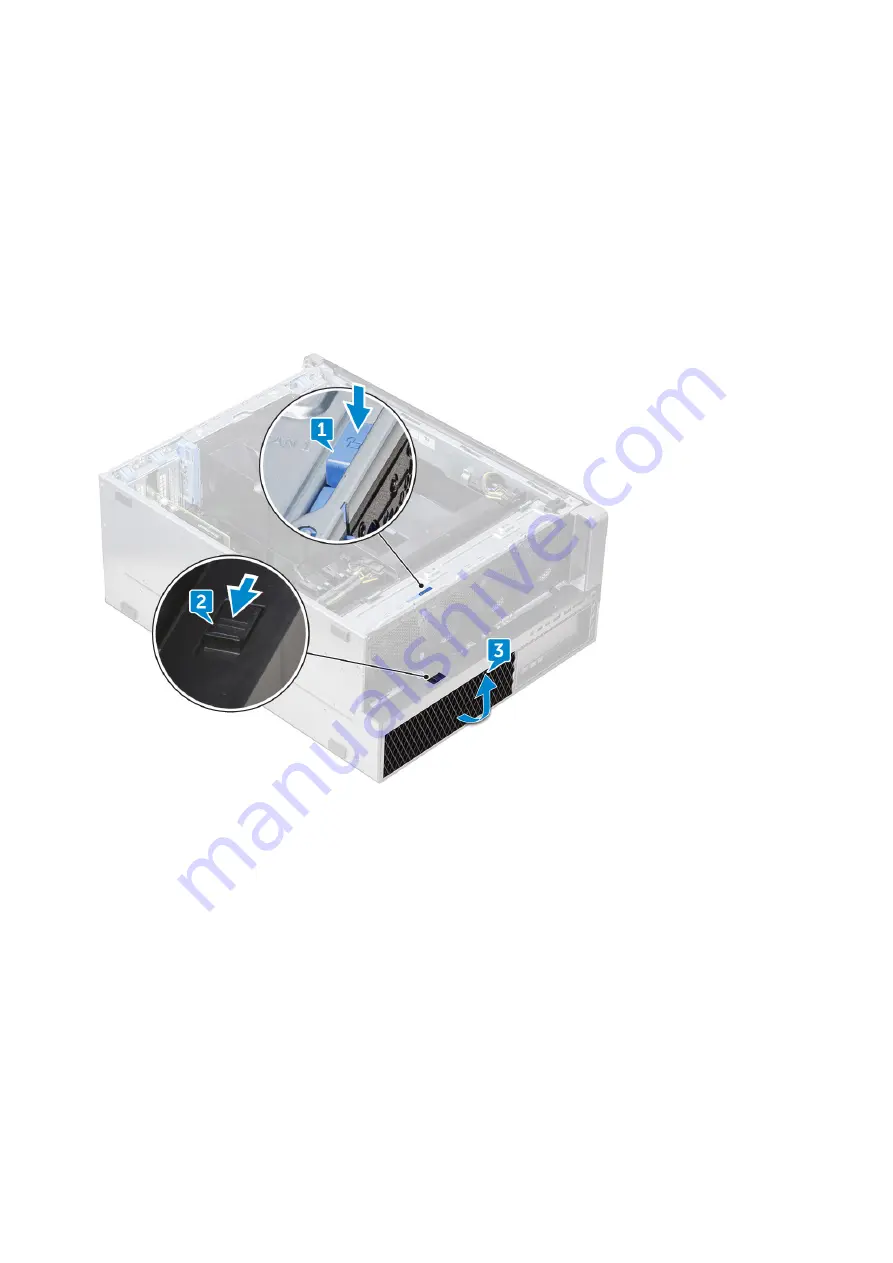
Hard disk drive and the Optical disk drive bezel
Removing the HDD bezel
1. Follow the procedure in
Before working inside your computer
.
2. Remove the following components:
a)
b)
3. To remove the HDD bezel:
a) Press the blue unlock button [1], which is located near the front system fan assembly.
b) Slide the latch [2] on the front I/O bezel, to release the HDD bezel from the chassis [3].
c) Rotate and lift the HDD bezel out from the chassis [3].
4. Optional: Remove the ODD bezel from the chassis by prying the edges of the bezel and lift it away.
Installing the HDD bezel
1. If the ODD bezel is removed, install it by aligning the notch of the bezel into the slot on the chassis (Optional).
2. Align the HDD bezel onto its slots on the chassis and press the HDD bezel towards the chassis.
3. Press the blue lock button located near the front system fan assembly, to secure the HDD bezel to the chassis.
4. Install the following components:
a)
b)
5. Follow the procedure in
After working inside your computer
Removing and installing components
33
Summary of Contents for D04X
Page 1: ...Dell Precision 7920 Tower Owner s Manual Regulatory Model D04X Regulatory Type D04X001 ...
Page 30: ...6 Rotate and lift the fan assembly away from the system 30 Removing and installing components ...
Page 65: ...Figure 1 Mandatory System Fan Removing and installing components 65 ...
Page 67: ...Mandatory System Fan Removing and installing components 67 ...
Page 68: ...68 Removing and installing components ...
Page 86: ...c Lift and remove the RAID controller battery 86 Removing and installing components ...


