3
screws (4)
Installing a hard drive or solid state drives into a hard drive
carrier
1
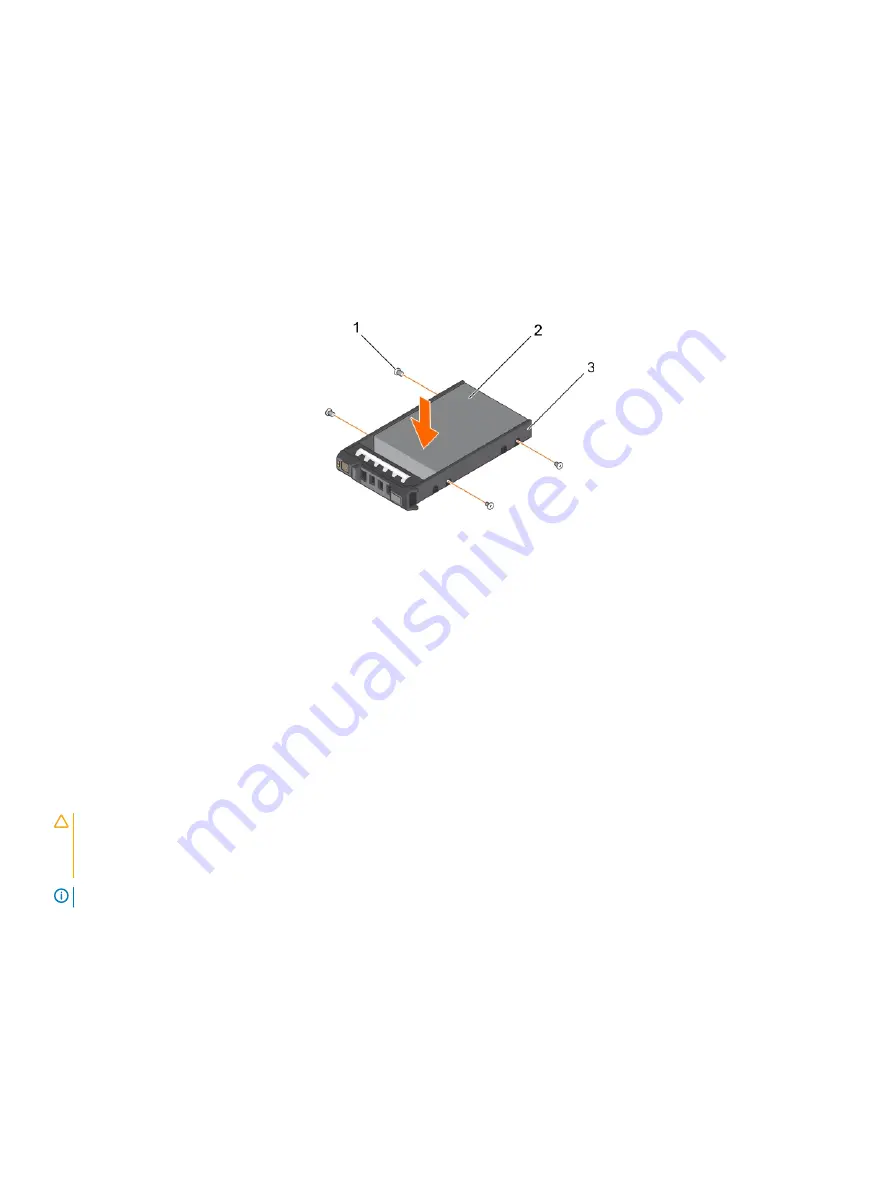
Insert the hard drive into the hard drive carrier with the connector end of the hard drive toward the back of the carrier.
2
Align the screw holes on the hard drive with the screws holes on the hard drive carrier.
When aligned correctly, the back of the hard drive is flush with the back of the hard drive carrier.
3
Attach the screws to secure the hard drive to the hard drive carrier.
Figure 23. Installing a hard drive into a hard drive carrier
1
screw (4)
2
hard drive
3
hard drive carrier
Install the hot swappable hard drive carrier.
Optical drive (optional)
Optical drives retrieve and store data on optical discs such as CD and DVD. Optical drives can be categorized into two basic types: optical
disc readers and optical disc writers.
Removing the optical drive
CAUTION:
Many repairs may only be done by a certified service technician. You should only perform troubleshooting and simple
repairs as authorized in your product documentation, or as directed by the online or telephone service and support team.
Damage due to servicing that is not authorized by Dell is not covered by your warranty. Read and follow the safety instructions
that are shipped with your product.
NOTE:
This procedure applies only to the eight hard drive system.
1
If installed, remove the front bezel.
2
Turn off the system, including any attached peripherals, and disconnect the system from the electrical outlet and peripherals.
3
Open the system.
4
Disconnect the power/data cable from the back of the drive.
Note the routing of the power/data cable on the side of the system as you remove them from the system board and drive. You must
route these cables properly when you replace them to prevent them from being pinched or crimped.
5
To release the drive, press down and push the blue release tab toward the front of the system.
52
Installing and removing system components


