


F.
DSPB-ICP1 Sigma Studio Connection - Quick Start
Note: Sigma Studio connection requires a Windows PC. This guide requires a basic knowledge of
computer operation, but it is not overly complex if the directions are closely followed.
1.
Download and install the most recent version of SigmaStudio to your system
2.
Make sure your ICP1 is disconnected from USB and from your DSPB before starting, to ensure
the proper steps are taken.
3.
Open an example project from parts-express.com on any of the DSPB series product pages, or
use the following steps to
setup the ‘hardware configuration’ menu in SigmaStudio.
If using an
example project, skip to step 6 after opening it in Sigma Studio with File > Open.
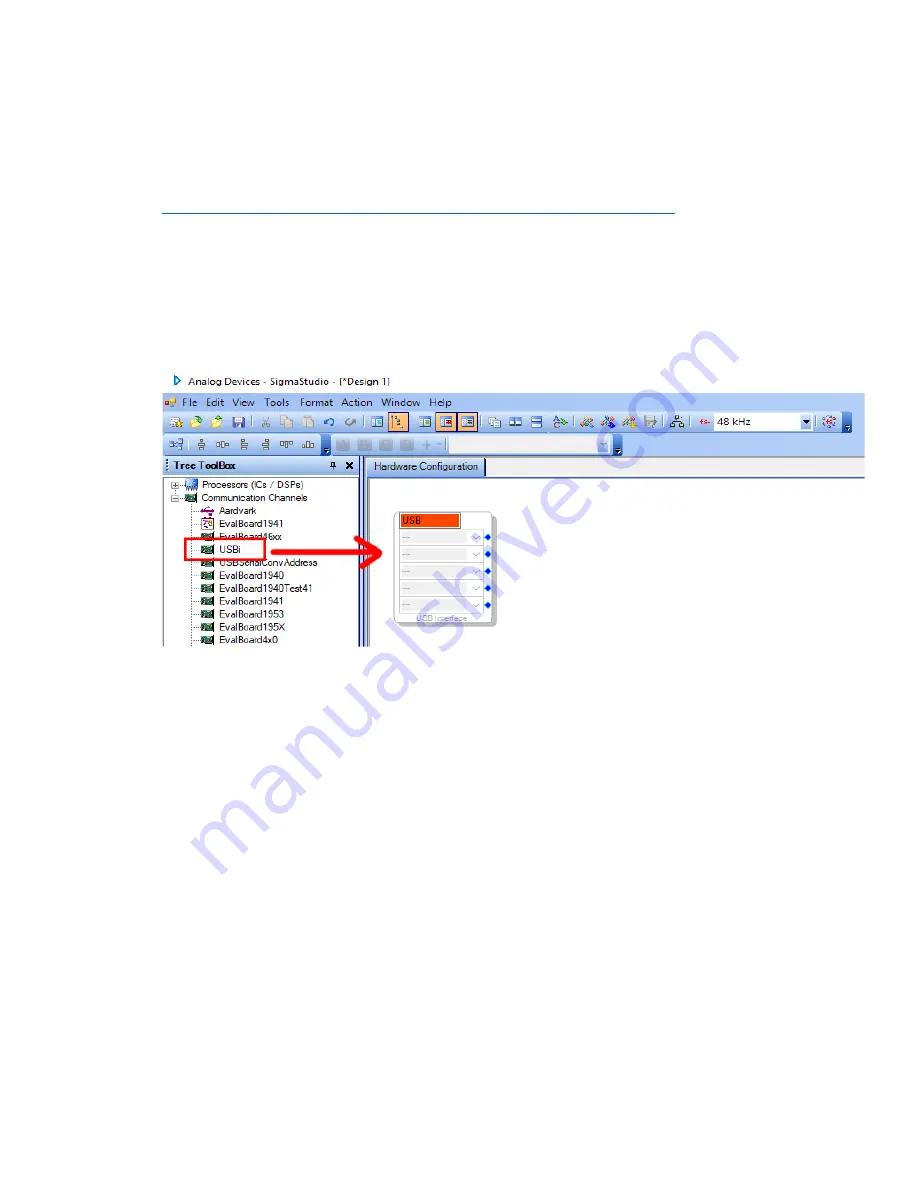
4.
Find the “USBi” block in the Communication Channels section of the tree toolbox and drag it in
to the white space like shown below.
5.
Find the ADAU1701 and E2Prom blocks in the “Processors (ICs / DSPs)” section of the tree
toolbox and drag them into the white space like shown below. Then make the connections to
the USB block. The I2C addresses in the USB block will automatically populate correctly, there is
no need to change them.
a.
Note: In this image below, the “USB Interface” represents your
ICP1, the ADAU1701 is
the processor on your DSPB, and E2Prom is non-volatile memory on the DSPB that
programs ultimately will be written to.
Summary of Contents for DSPB Series
Page 37: ...4 Wiring Diagrams DSPB 100 ...
Page 38: ......
Page 39: ...DSPB 250 ...
Page 40: ......
Page 41: ...DSPB K ...
Page 42: ...DSPB KE ...
Page 43: ...DSPB ICP1 ...
Page 46: ......


