3465 Diablo Ave., Hayward, CA 94545 USA
510.732.9229 • www.davisnet.com
Integrated Sensor Suite Installation Manual
Model #6357
®
Page 1: ...3465 Diablo Ave Hayward CA 94545 USA 510 732 9229 www davisnet com Integrated Sensor Suite Installation Manual Model 6357 ...
Page 2: ...f the user is encouraged to try to correct the interference by one or more of the following measures Reorient or relocate the receiving antenna Increase the separation between the equipment and receiver Connect the equipment into an outlet on a circuit different from that to which the receiver is connected Consult the dealer or an experienced radio TV technician for help Changes or modification no...
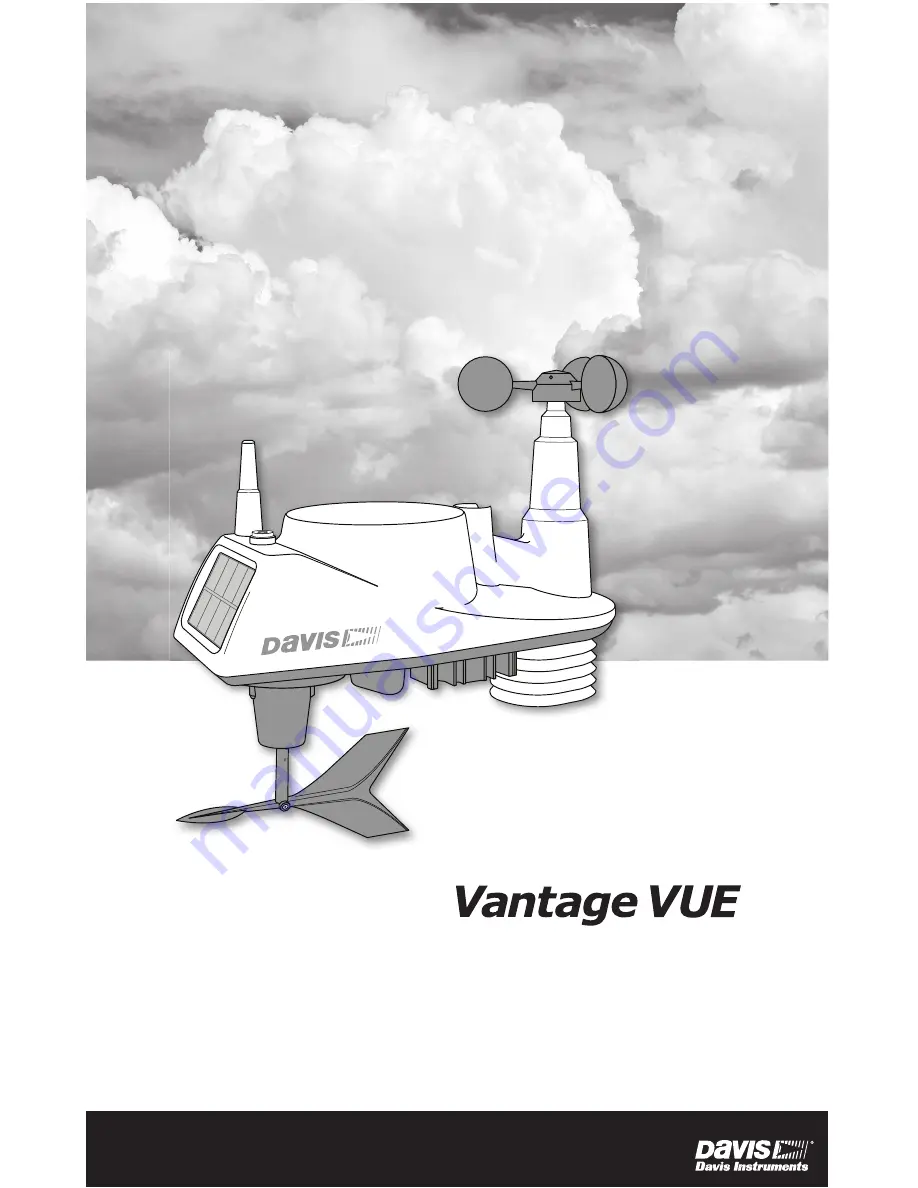
Page 3: ...nd the wind vane measures wind direction The Sensor Interface Module SIM is housed within the ISS and comprises the brains of the Vantage Vue system and the radio transmitter The SIM collects outside weather data from the ISS sensors and transmits that data to your Vantage Vue console Note Your Vantage Vue ISS can transmit to an unlimited number of consoles so you can purchase addi tional consoles...
Page 4: ...epare the ISS for installation 1 Attach the wind cups to the anemometer 2 Attach the wind vane 3 Install the rain collector tipping spoon assembly 4 Install the debris screen in the rain collector 5 Install the ISS battery to apply power Note At this point we recommend that you set up your console and then come back to finish the installation of the ISS See your Vantage Vue Console Manual Addition...
Page 5: ...measures wind direction The wind vane is mounted on a stainless steel shaft on the opposite side of the ISS assembly from the wind cups 1 Hold the ISS assembly on its side with the anemometer and radiation shields on your left the wind vane shaft on your right and the wind cups away from you 2 When the ISS is held in this manner the wind vane shaft is horizontal and will orient itself so that its ...
Page 6: ... board stores energy from the solar panel for power at night A 3 volt lithium battery provides a backup power source The battery compartment is located on the underside of the ISS base The compartment cover is included in the hardware packet To install the ISS backup battery 1 Insert the 3 volt lithium battery into the ISS battery compartment being sure to match the sign on the battery with the si...
Page 7: ... of times the transmitter ID LED blinks indi cating its transmitter ID Unless you have intentionally changed your transmitter ID the LED should blink one time because the default transmitter ID for the ISS is 1 If you have changed the ID the LED should blink the number of times equal to the ID you have set i e twice for an ID of 2 three times for an ID of 3 etc After blinking the transmitter ID th...
Page 8: ...on on the console to alternate between speed and direction in the windcompass rose 4 Gently turn the wind vane and allow 5 seconds for the wind direction display to stabilize before moving it again Note A good way to ensure that your console is listening to your ISS and not another Davis station nearby is to make sure the wind values displayed match your wind vane s direction in reference to the s...
Page 9: ...reate the perfect installation The better the siting the more accurate your data will be Place the ISS away from sources of heat such as chimneys heaters air conditioners and exhaust vents Place the ISS at least 100 30 m away from any asphalt or concrete roadway that readily absorbs and radiates heat from the sun Avoid installations near fences or sides of build ings that receive a lot of sun duri...
Page 10: ...en installed over well irrigated regularly mowed grass If the last three guidelines cannot be met install the ISS at the edge of the primary crop of interest Siting guidelines that may affect the anemometer For optimal wind data mount the ISS so that the wind cups are at least 7 2 1 m above obstructions such as trees or buildings that may obstruct wind flow For optimal wind data you may mount the ...
Page 11: ... for proper installation If you are not using one of these Davis products mount on a galvanized steel pole having an outside diameter ranging from 1 to 1 75 25 44 mm Note It is important that the mounting pole be plumb You may wish to use a level such as a magnetic torpedo level to assure that the ISS when mounted on top of the pole will be level 2 Using the illustration above as a guide hold the ...
Page 12: ...rate when the solar panel is pointing south If your solar panel does not point south you must calibrate your console so that it displays accurate wind direction readings In any case you can also calibrate your console to fine tune your station for greatest accuracy Refer to your Vantage Vue Console Manual to calibrate your console Note Calibration must be done if you are in the Southern Hemisphere...
Page 13: ...o maintain the order in which the five plates are assembled separate the plates as shown and remove all debris from inside the shield 3 Reassemble the plates in the same order in which they were disassembled and fasten them together using a Phillips head screwdriver to tighten the 6 x 2 1 2 screws as shown Cleaning the Rain Collector Debris Screen and Tipping Spoon Module To maintain accuracy thor...
Page 14: ...eturn to the Current Weather Screen The icon should appear 4 Small transmission waves display above the antenna icon and toggle on and off when the console receives a transmission If you do not see the antenna s transmission wave graphic slowly blinking regardless of where you stand with the console you should call Technical Support 5 If the Transmitter ID LED does not light after pressing the Tra...
Page 15: ...emove the wind cups by loosening the set screw and clear out any insects or debris which may be interfering with the cup rotation Turn the shaft the cups rotate on If it feels gritty or stiff contact Davis Technical Support Note Do not lubricate the shaft or bearings in any way Readings aren t what I expected them to be Comparing data from your ISS to measurements from TV radio newspapers or a nei...
Page 16: ...cups with magnetic detection Wind Direction Sensor Wind vane with magnetic encoder Rain Collector Type Tipping spoon 0 01 per tip 0 2 mm with metric rain cartridge Part No 7345 319 18 0 in2 116 cm2 collection area Temperature Sensor Type PN Junction Silicon Diode Relative Humidity Sensor Type Film capacitor element Housing Material UV resistant ABS ASA plastic Update Interval by Sensor BAR Baromet...