


41
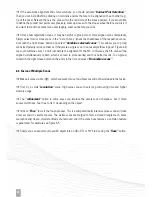
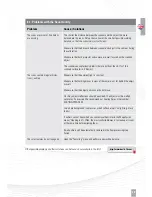
Figure 6.4: Scans after alignment
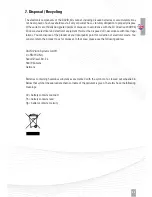
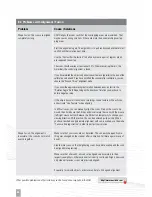
Figure 6.5: Fusion result (with ”close holes“ option)
Z
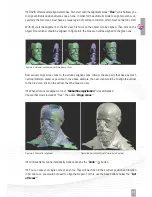
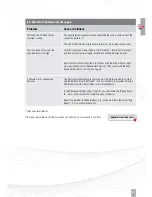
DAVID offers several alignment modes. First, start with the alignment mode
”Free“
, which allows you
to align arbitrarily positioned scans one-on-one. In order for the automatic mode to align two scans suc-
cessfully, the two scans must have a unique region of overlap in common, which must not be too small.
With
start the alignment. In the 3D view, first click on the object A to be aligned. Then click on the
object B, to which A should be aligned. In Figure 6.3, the blue scan will be aligned to the green one:
Successively align more scans to the already aligned scans. Always choose pairs that have as much
overlap (common areas) as possible. In the above example, the next step would be to align the yellow
to the blue scan: click on the yellow, then the blue scan, etc.
Z
When all scans are aligned, a run of
”Global fine registration“
is recommended.
Choose that mode instead of ”Free“, then click
”Align scans“
.
Z
All movements can be individually made undone by the
”undo“
button.
Z
You can save your single scans at any time. They will be stored in their current position and rotation
in 3D space, so you would not need to align them again. For this, use the Save buttons below the
”List
of Scans“
.
Figure 6.3: Automatic alignment with two mouse clicks
Summary of Contents for SLS-2
Page 1: ...QUICK GUIDE...