Basic Installation Procedures with the CBX510
Reference Manual
189
Check Operations Using Test Mode
To quickly check DX8210 operation:
1. Make sure the scanner is connected to a CBX510 or SC5000.
2. Apply power to the reader.
3. Press and hold the X-Press button until the first two red LEDs light, and
then release the button.
4. Position a test barcode symbol approximately 750 mm [30 inches] from the
reader. Skew the bar code symbol slightly.
5. The laser(s) should be scanning continuously during normal operations.
(Observe the laser safety warnings.)
6. Observe the LEDs. The LEDs illuminate when the reader is scanning and
decoding the bar code symbol, and indicate the rough read rate of the scan
(see
).
Basic Installation Procedures with the CBX510
1. Mechanically install the scanner(s) according to the application drawing for
your system.
2. Install the CBX510 according to the application drawing or in a location for
best wiring access to scanner(s), encoder (tachometer), and photoelectric
sensor.
3. If using more than one scanner, connect the host cable to ETH1 of the des-
ignated Master. Then wire ETH2 from the Master to ETH1 of the first Slave,
and then from the first slave ETH2 to ETH1 of the next slave and so on.
4. Connect the 25 pin I/O communication cable from the scanner (Master only
in multihead systems) to the CBX510.
5. Wire the encoder (tachometer) and photoelectric sensor into the CBX510
(see sections
and ).
6. After the scanner(s), CBX510, and accessories have been carefully wired,
apply power to the system.
7. When everything is powered up, connect a laptop to the ETH2 of the scan-
ner (last slave in a multihead system.)
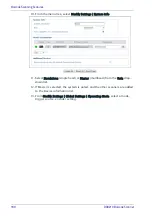
8. Open a browser and enter the default IP (192.168.3.100,
see section
.).
e-
Genius opens.
9. Log on to e-Genius
(see section
.).
Perform the following test using a bar code that matches the default parameters. A
barcode test chart is included in the box with each scanner, and a code from the chart
can be used to perform the test If the default parameters have been changed, you
must enable the control panel buttons and the other default parameters listed.
Detailed information on connecting a laptop to the system and using
e-Genius
is avail-
able in Chapter .
Summary of Contents for DX8210
Page 1: ...DX8210 Reference Manual Omnidirectional Barcode Scanner ...
Page 31: ...Installation Reference Manual 19 Small Side Mounted L Bracket Options ...
Page 45: ...Tachometer Wiring to CBX510 Reference Manual 33 ...
Page 47: ...Tachometer Wiring to CBX510 Reference Manual 35 ...
Page 49: ...Digital Output Configuration to CBX510 Reference Manual 37 Unpowered Outputs Powered Outputs ...
Page 268: ...Barcode Scanning Features 256 DX8210 Barcode Scanner DX8210 2100 0 25 mm 10mil ...
Page 269: ...Reading Diagrams Reference Manual 257 DX8210 2100 0 30 mm 12mil ...
Page 270: ...Barcode Scanning Features 258 DX8210 Barcode Scanner DX8210 2100 0 38 mm 15mil ...
Page 271: ...Reading Diagrams Reference Manual 259 DX8210 2100 0 50 mm 20 mil ...
Page 272: ...Barcode Scanning Features 260 DX8210 Barcode Scanner DX8210 4100 0 38 mm 15 mil ...
Page 273: ...Reading Diagrams Reference Manual 261 DX8210 4100 0 50 mm 20 mil ...
Page 274: ...Barcode Scanning Features 262 DX8210 Barcode Scanner DX8210 4200 0 25 mm 10 mil ...
Page 275: ...Reading Diagrams Reference Manual 263 DX8210 4200 0 30 mm 12 mil ...
Page 297: ...Reference Manual 285 ...
Page 298: ......
Page 299: ......

